
Hello there! 👋
ℹ️ This post is part of a series, where I pen down my journey as I plan and build a tic-tac-toe game from ideation to release
In the previous post, we set the foundations for our tic-tac-toe game by planning the entire app ahead of time. We broke down the app's functionality into a list of specific objectives and goals. These will now help us in creating the look of the game.
Step 1: Wireframing
Before delving too much into the colours, animations, and fine details, we need to draw up a low-fidelity wireframe which will provide a basic layout for the different screens in our app, and help visualize user flow.
My tool of choice for this job is Whimsical. It has a lot of customizable UI elements and controls built-in which allow for quick wireframing.
The app can be broken down into three major views:
- Displaying game settings
- The actual game
- Displaying the game's result (win/draw)
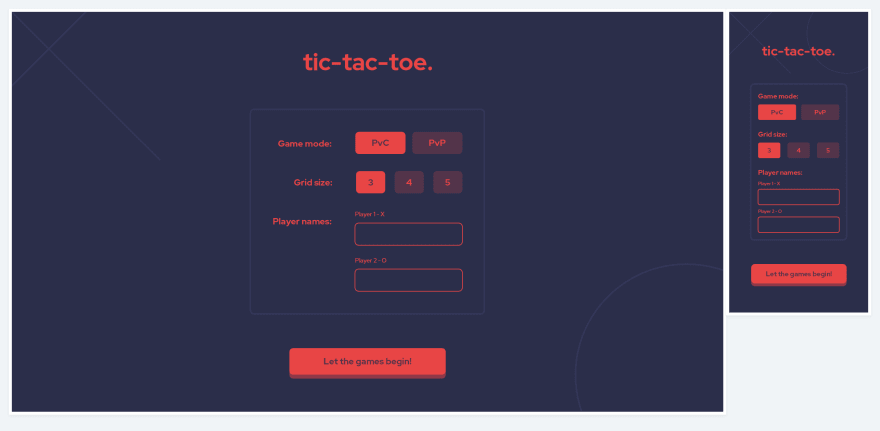
Let's start with the first view. In the previous post we decided to allow setting the following game settings:
- Game mode (PvP/PvC)
- Grid size (3 - 5)
- Player name(s)
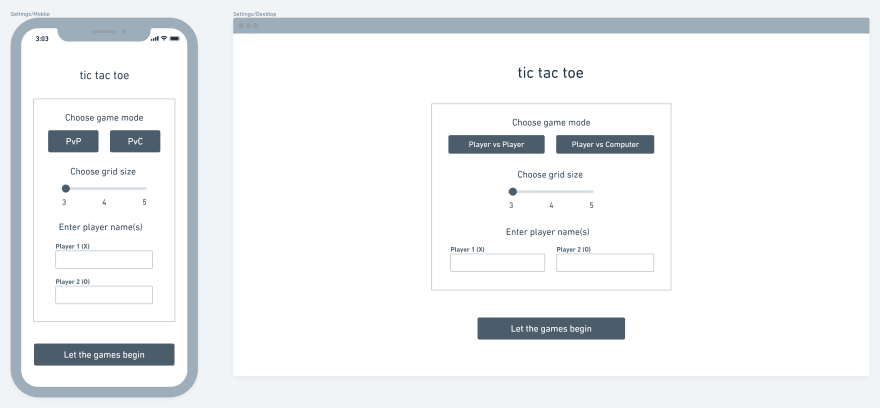
The layout is centered on the screen, so that the user doesn't have to move their eyes much to the sides. It also presents a top-to-bottom hierarchy, wherein focus will first fall on the heading/logo, then on each option, and then finally on the action button, which will start the game.
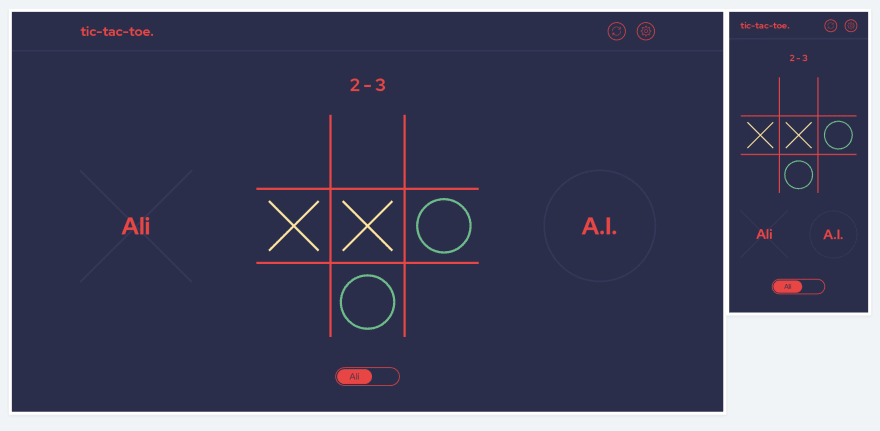
For the second view, we need to have the following elements be visible to the user at all times:
- Tic-tac-toe grid
- Current player indicator
- Players' names
- Players' scores
- An option to reset the grid
- An option to adjust the settings
Let's add them:
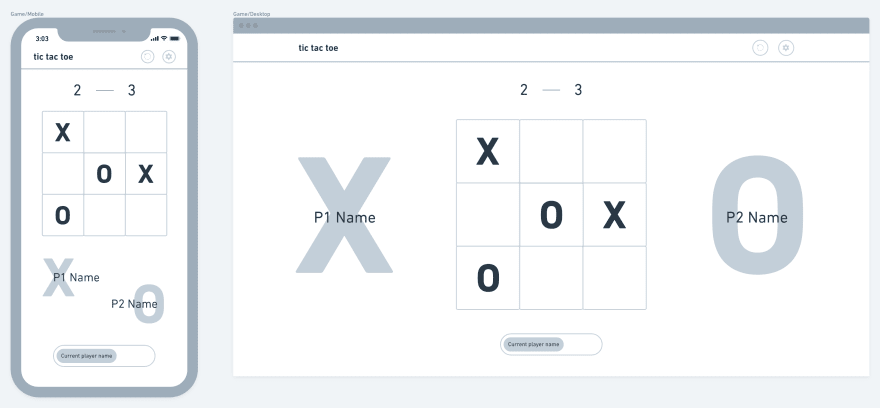
The toggle switch in the bottom will not be an actual input control, but rather an indication of the current player, whose name will be present on the switch's thumb. I made the reset and settings buttons smaller and moved them to the top right since they are a secondary part of the interface and the user's focus will lie on the grid for a larger part of their time on the app.
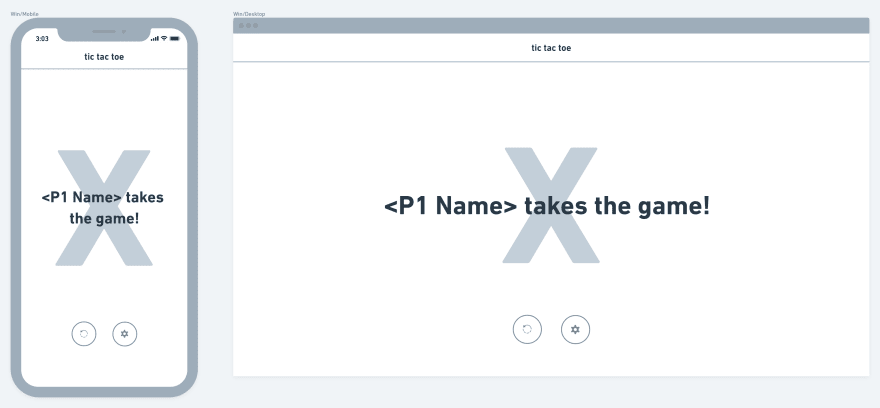
Now for the third screen, we need to display buttons to restart the game and edit settings, and information about the result of the game, i.e. whether someone won or there was a draw, and if someone did win, who was it?
Nice and simple! 👌
Creating wireframes before jumping into designing has helped us lay a foundation for the next step and make core design decisions beforehand. Notice how they don't depict too much, but show only what is absolutely necessary, and that is enough for us to make a mental model of the app.
Step 2: Designing
Now we will really get into the finer details and design an interface that looks beautiful, and is functional. My tool of choice for this task is Lunacy, a free design app for Windows, macOS and Linux.
Here is a list of the things we need to design:
- Game logo
- Splash screen
- Settings screen
- Hover/active states for:
- Game mode selector
- Grid size selector
- Player name fields
- Start button
- Hover/active states for:
- Game screen
- X/O symbols
- Hover/active states for:
- Grid (cells)
- Reset and settings buttons
- Result screen
Each screen has to be designed for both mobile and desktop viewers. Let's get to it! 🖌️
Splash screen
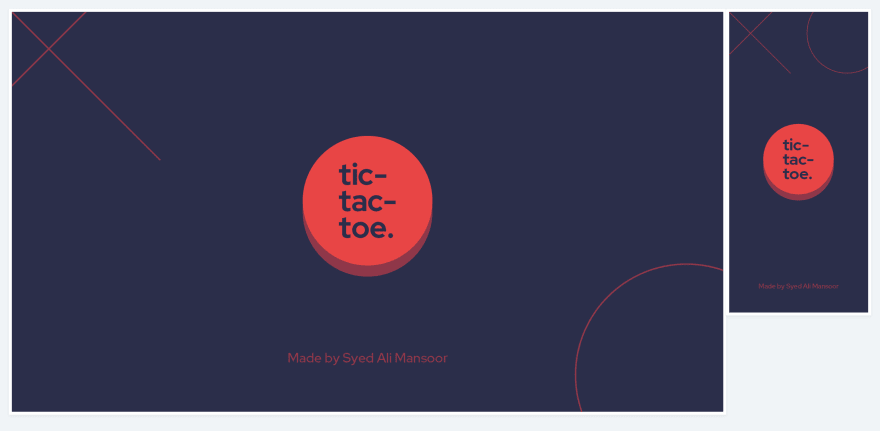
This screen consists of the logo inside a button which can be pressed to start the game. Also a little attribution to the app's eventual developer.
Settings screen
I switched up the layout for this one a bit and for the grid size selector, I dropped the slider in favour of buttons to improve consistency.
Game screen
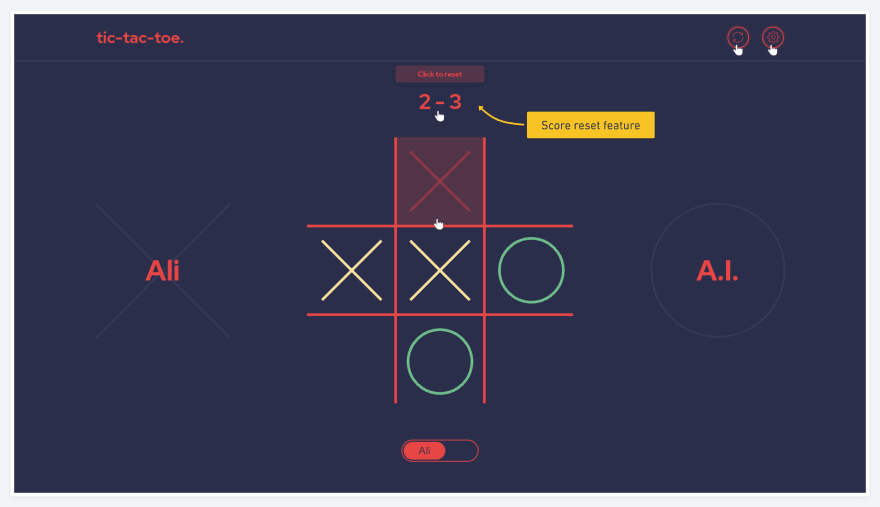
The game screen is nearly the same as in the wireframe, although while experimenting with hover states, I thought of a feature where the user could reset the score by simply clicking on it. Additionally, each cell should show the mark of the current player on hover.
Hover state:
Game result
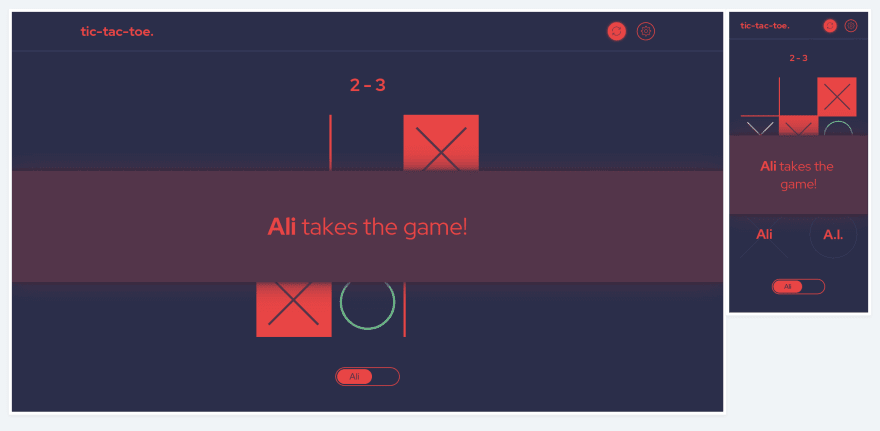
I dropped the idea of a separate game result screen in favour of an overlay stating the result. This would prevent too many layout shifts and re-renders, would allow the user to see the end game state, and may also allow us to add some neat animations.
The overlay should display either "xxx takes the game!", or "It's a draw!"
View all the designs, including hover and active states on an infinitely zoomable canvas here!
Now that we know how the app is supposed to look on a screen, we have to get just a few more things done before we can start the development process.
Firstly, a component breakdown, wherein we will identify small sections of the app that can be isolated and developed on their own.
After that, we will decide what data our app will store, where we will store it, and how each component will access and modify it.
⚡ Stay tuned for the next post in this series, where we will perform a component breakdown and define our app's data.
❤️ Remember to like this post and leave your thoughts in the comments!

Top comments (1)
Hello! Thanks for post! In the development process, creating Wireframe is very important. It allows you to show the customer how close to his idea the interface is, and whether it is worth making changes.
The general sequence for creating wireframes is as follows:
conducting a UI/UX marketing study
creating a site visit plan
developing a Wireframe
testing your Wireframe
More information on creating a Wireframe and its functions can be found in the article