INTRODUCTION
As a developer, building applications that users can interact with in real-time has become a norm for most of the developers. Most of the applications we see and interact with have at least a single real-time feature included. Real-time messaging, notifications are just two of commonly used real-time features used in applications.
While building applications it is not always clear how to achieve real time functionality, there exists a number due to many available technologies and platforms, complexity of setting up, provision of resources, scaling etc.
FAUNA
Fauna’s database is well optimized for the JamStack through its API first approach while offering powerful and useful query features through its own query language (FQL).
Fauna provides a variety of features including Streams. Using Streams, client code can subscribe to a document stored in a Fauna database and any changes to that document are immediately streamed to the client as event notifications.
With this, you can immediately interact with your users and maintain a consistent and high-level user experience, as well as keep your information and data constantly updated.
In this tutorial we will use React, Fauna and Netlify & Netlify Functions to build out a realtime serverless application.
TUTORIAL APPLICATION
As stated in our title, our application will simply allow you to post questions, following this, a user will be able to answer these questions. We will also maintain a real time leaderboard just to see how well one is stacking up against other players.
This application will:
- Allow users to answer questions
- Get their scores in real time
Project Setup
The recommended way to initialize a blank React app is by using create-react-app which sets up everything automatically for you.
You will be required to either have yarn or npm installed.
yarn create react-app trivia
Once this is complete,cd into the folder.
cd trivia
To quickly build out our UI, we will take advantage of Chakra UI which is a simple, modular and accessible component library that gives you the building blocks you need to quickly build your React applications.
To install Chakra UI simply use yarn or npm to do that.
yarn add @chakra-ui/react @emotion/react@^11 @emotion/styled@^11 framer-motion@^4
Basic Application Structure.
├── package.json
├── public
│   ├── favicon.ico
│   ├── index.html
│   ├── logo192.png
│   ├── logo512.png
│   ├── manifest.json
│   └── robots.txt
├── README.md
├── src
│   ├── App.css
│   ├── App.js
│   ├── App.test.js
│   ├── index.css
│   ├── index.js
│   ├── reportWebVitals.js
│   └── setupTests.js
└── yarn.lock
Installing Fauna
Install the faunadb npm package to allow our application to interact with our Fauna Instance.
yarn add faunadb
Setup your Fauna database.
To hold all our application’s data, we will first need to create a database.
Fortunately, this is just a single command or line of code, as shown below.
Don’t forget to create a Fauna account before continuing.
Fauna Shell
Fauna's API has various interfaces/clients, such as drivers in Javascript, Golang, Python, Java and more, a cloud console, local and cloud shells, and even a VS Code extension! For this article, we’ll start with the local Fauna Shell, which is almost 100% interchangeable with the other interfaces.
You will first be required to install the Fauna shell on your machine with the following command.
npm install -g fauna-shell
After installing the Fauna Shell with yarn, log in with your Fauna credentials using the fauna cloud-login command:
$ fauna cloud-login
For email login, enter your email below, and then your password.
For login with 3rd-party identity providers like Github or Netlify, please acquire a key from
Dashboard > Security and enter it below instead.

Email: email@example.com
Password: **********
Now we are able to create our database.
fauna create-database trivia
Create Collections and Indexes.
To start a shell with your new database, run:
fauna shell trivia
We can now operate our database from this shell.
$ fauna shell trivia
Starting shell for database trivia
Connected to https://db.fauna.com
Type Ctrl+D or .exit to exit the shell
trivia>
In the case of our application, we will have two collections.
- Questions - This will hold information about the questions.
- Answers - The responses provided by the users. We will also use this collection to grade the responses.
DATA SCHEMA
Questions Collection
Each question will have the following fields
- question_text - A questions eg. “Does Next.js support SSR or SSG?”
- correct_answer - The correct answer to the question asked in (1) eg. “Both”
- options - Distractors to the correct answer eg. [“SSR”, “SSG”]
Answers Collection
Each question response (answer) will have the following fields
- question_id - a reference to the question in the questions collection.
- user_id - A unique identifier for the respondent.(This value will be automatically generated and stored in the browser.)
- response - The user’s response from a list of possible options.
- isCorrect - A Boolean value to indicate it the answer provided is their correct (true) or incorrect (false)
Creating collections
To create our questions collection, run the following command in the shell to create the collection with the default configuration.
trivia> CreateCollection({ name: "questions" })
Next, let’s do the same for the answers’ collections.
trivia> CreateCollection({ name: "answers" })
Lastly, let’s do the same for the scores’ collections.
trivia> CreateCollection({ name: "scores" })
INDEXING OUR DATA.
Fauna highly recommends indexing your data for the purposes of searching, sorting and combining results from multiple collections.
In this application, a user will be allowed to attempt and respond to a question only once. We can enforce this constraint in our answers collection by creating an index as follows.
qna> CreateIndex({
name: "unique_question_user",
   unique: true,
   serialized: true,
   source: Collection("answers"),
   terms: [
     {
       field: ["data", "user_id"]
     },
     {
       field: ["data", "question_id"]
     }
   ]
})
SAMPLE RESPONSE
#SAMPLE RESPONSE…...
{
  ref: Index("unique_question_user"),
  ts: 1610301037970000,
  active: true,
  serialized: true,
  name: 'unique_question_user',
  unique: true,
  source: Collection("answers"),
  terms: [
    { field: [ 'data', 'user_id' ] },
    { field: [ 'data', 'question_id' ] }
  ],
  partitions: 1
}
Our second index is to enable us to quickly fetch a question based on the id.
CreateIndex({
  name: "question_by_id",
  source: Collection("questions"),
  terms: [
    {
      field: ["data", "id"]
    }
  ]
})
Lastly we will index our scores collection based on the user_id in order to allow faster retrieval and reads to this collection.
CreateIndex({
  name: "score_by_user",
  source: Collection("scores"),
  terms: [
    {
      field: ["data", "user_id"]
    }
  ]
})
SERVERLESS FUNCTIONS.
We will create two Netlify functions,
To create questions
To retrieve question data and metadata from the database.
To respond to the questions being asked and update the user’s scores.
Now let’s create our first Netlify function. To make the functions, first, we need to install Netlify CLI globally.
yarn global add netlify-cli -g
Now that the CLI is installed. We can create a key to allow our application to interact with Fauna.
CREATE A FAUNA KEY
In order for our application to send and receive data to Fauna we will need to create a key and provide its secret when performing queries.
For this application, a key with a Server Role is sufficient to create, read and delete data.
Head over to your database’s Fauna Shell and create a key using the following command.
CreateKey({
      name: "trivia-app",
      role: "server"
   })
# Example result.
# NOTE: Make sure you copy and store the secret!
# {
#   ref: Ref(Keys(), "280185139463529993"),
#     ts: 1603464278974000,
#     role: 'server',
#     secret: '<FaunaDB secret key>’',
#     hashed_secret: ...
# }
let’s create a .env file on our project root with the following fields.
netlify env:set FAUNADB_SERVER_SECRET “<FaunaDB secret key>”
Next, Let’s see how we can start with creating Netlify functions. For this, we will need to create a directory in our project root called functions and a file called netlify.toml, which will be responsible for maintaining configurations for our Netlify project. This file defines our function’s directory, build directory, and commands to execute.
[build]
command = "npm run build"
functions = "functions/"
publish = "build"

[[redirects]]
  from = "/api/*"
  to = "/.netlify/functions/:splat"
  status = 200
  force = true
We will do some additional configuration for the Netlify configuration file, like in the redirection section in this example. Notice that we are changing the default path of the Netlify function of /.netlify/** to /api/. This configuration is mainly for the improvement of the look and field of the API URL. So to trigger or call our function, we can use the path:
First, let’s make a connection file for Fauna called lib/fauna.js, returning a Fauna connection object.
const faunadb = require('faunadb');
const q = faunadb.query

const client = new faunadb.Client({
  secret: process.env.FAUNADB_SERVER_SECRET,
});

module.exports = { client, q };
We would
For our first function, we create a file: functions/createQuestion.js and add the following
const { client, q } = require("../src/lib/fauna");

exports.handler = async (event, context) => {
  try {
    let { question, answer, options } = JSON.parse(event.body);
    let results = await client.query(
      q.Create(q.Collection("questions"), {data: { question, answer, options },}),
    );
    return {statusCode: 200, body: JSON.stringify({ id: results.ref.id, data: results.data }),};
  } catch (err) {
    return { statusCode: 500, body: JSON.stringify({ error: err.toString() }) };
  }
};
For our second function, we create a file: functions/getQuestion.js and add the following.
const { client, q } = require("../src/lib/fauna");

exports.handler = async (event, context) => {
  try {
    let {id} = event.queryStringParameters
    let results = await client.query(q.Get(q.Ref(q.Collection("questions"), id )));
    return { statusCode: 200, body: JSON.stringify({ id: results.ref.id, data: results.data }),};
  } catch (err) {
    return { statusCode: 500, body: JSON.stringify({ error: err.toString() }) };
  }
};
For our last function create a functions/provideAnswer.js and add the following to the file.
// Docs on event and context https://www.netlify.com/docs/functions/#the-handler-method
const { client, q } = require("../src/lib/fauna");

exports.handler = async (event, context) => {
  try {
    let { question_id, answer, user_id } = JSON.parse(event.body);

    // ensure no missing values
    if (!(question_id && answer && user_id)) {
      return {
        statusCode: 500,
        body: JSON.stringify({
          error: "Fields question_id & answer & user_id required ",
        }),
      };
    }

    let results = await client.query(
      q.Get(q.Ref(q.Collection("questions"), question_id)),
    );
    let question = results.data;
    let isCorrect = false;
    if (question.answer === answer) isCorrect = true;
    try {
      let query = await client.query(
        q.Create(q.Collection("answers"), {
          data: {
            question_id,
            user_id,
            isCorrect: isCorrect,
            response: answer,
          },
        }),
      );
      query.data.correct = question.correct_answer;
      if (isCorrect) {
        // update the user's score if correct
        try {
          let score = await client.query(
            q.Get(q.Ref(q.Collection("scores"), process.env.LEADERBOARD_ID)),
          );
          console.log("S", score,)
          let req = await client.query(
            q.Update(q.Ref(q.Collection("scores"), process.env.LEADERBOARD_ID), {
              data: { [user_id]: ( (user_id in score.data) ? (score.data[user_id] + 10) : 10) },
            }),
          );
        } catch (error) {
            console.log(error)
            return {
                statusCode: 500, body: JSON.stringify({ error: error.toString() }),};
        }
      }
      return {
        statusCode: 200,
        body: JSON.stringify({ ref: query.ref.id, data: query.data }),
      };
    } catch (error) {
      if (error.message === "instance not unique") {
        return {
          statusCode: 500,
          body: JSON.stringify({ error: "Question is already answered" }),
        };
      }
      return {
        statusCode: 500,
        body: JSON.stringify({ error: error.toString() }),
      };
    }
  } catch (err) {
    return { statusCode: 500, body: JSON.stringify({ error: err.toString() }) };
  }
};
UI
Now that we have all our function endpoints working. We can now work on the UI for this application.
REALTIME LEADERBOARD.
For our real time leaderboard we will utilize Fauna Streaming which
Create a server-only key to be able to interact between the frontend
import {Box, Stack, useMediaQuery} from '@chakra-ui/react'
import {useEffect, useState} from 'react'
import {query as q, Client} from 'faunadb'
import rw from 'random-words'


function App() {

  let [isMobile] = useMediaQuery("(max-width:600px)");
  let [leaderboard, setLeaderboard] = useState(null)
  let client = new Client({
    secret: process.env.REACT_APP_FAUNA_CLIENT_SECRET
  })
  let stream
  const startStream = () => {
    stream = client.stream.document(q.Ref(q.Collection('scores'), process.env.REACT_APP_LEADERBOARD_ID))
    .on('snapshot', snapshot => {
      console.log("S", snapshot)
      setLeaderboard(snapshot.data)
    })
    .on('version', version => {
      console.log("V", version)
      setLeaderboard(version.document.data)
    })
    .on('error', error => {
      console.log('Error:', error)
      stream.close()
      setTimeout(startStream, 1000)
    })
    .start()
  }

  useEffect(()=>{

    if(! window.localStorage.getItem("user_id")){
      window.localStorage.setItem("user_id", `${rw()}_${Math.floor((Math.random() * 999) + 900)}` )
    }
    startStream()

  }, [])

  return (
    <div className="">
      <Stack direction={isMobile ? "column" : "column"} p="64">
        <h3>Leaderboard</h3>
        {leaderboard && Object.keys(leaderboard).map((k)=>{
          console.log(k,)
          return <><h4>{`${k} ------------ ${leaderboard[k]}`}</h4><br/></>
        })}
      </Stack>

    </div>
  );
}

export default App;
DEPLOYING TO NETLIFY.
When deploying your site, you can easily set your environment variables with the Netlify CLI using the netlify env:set command..
Deploying to Netlify is relatively easy, all you need to do is to create a git repository.
This is a good practice as you are able to easily version control your entire application.
Next, commit your changes and push to the repository you created.
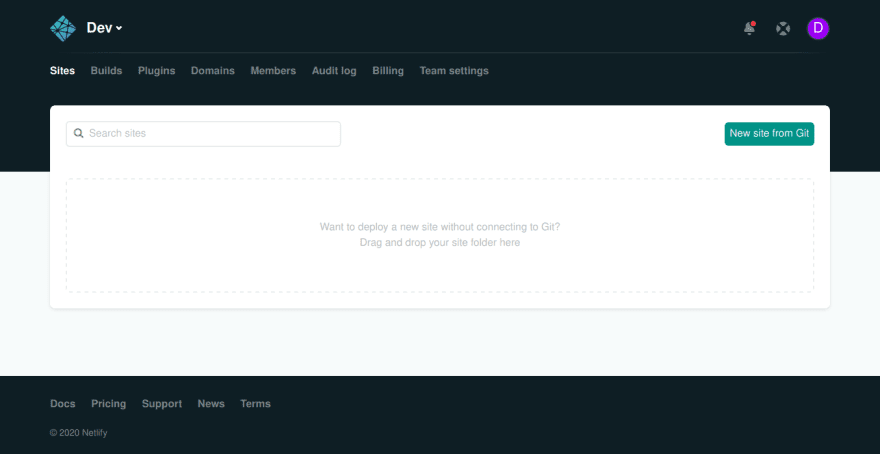
On the Netlify GUI, go to [New Site from Git]
Then select your desired project and Netlify will take care of the building, provisioning and deploying.
Once it's done, you will be provided with a URL to access your application.
Wasn’t that easy?

Top comments (0)