Time Saved: 3 hrs → 20 mins
Goodies
Try the live demo at https://lucid-ramanujan-f21cd3.netlify.app/
Need source code? https://github.com/bdcorps/one-time-payments-html-landing-page
Collecting pre-sales revenue is the best way to validate a product idea. Stripe makes it easy to set up one-time payments on a really simple static HTML site. In this guide, we will implement a pre-order button with Stripe so that our visitors can request to pre-order our awesome product.
https://www.loom.com/share/62c5eda8089e42fc8de9577de0158df9
Let's get started!
Create an HTML landing page
First things first, we need a landing page that speaks to our target market. That means having:
- Description of our product
- Value Props as to what value the product will provide
- A shiny payment button so we can securely collect payments
Our lovely team at SaaSBase decided to build a super easy ready-to go project here that you can use. Feel free to use it however you like, for personal or for commercial purposes.
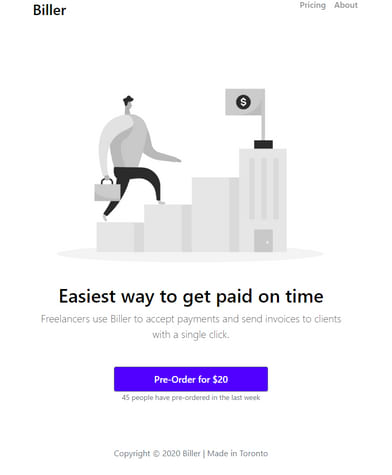
It includes a Headline and a Sub-Headline that you can edit to match your offering. And most importantly it contains a Pre-Order button that when clicked should trigger the Stripe payment process.
<button class="btn btn-outline-secondary"
    type="submit"
    id="order-btn"> Pre-Order for $20</button>
Sign up for Stripe account
Create a new Stripe account here.
A newly created Stripe account is put into Test Mode by default. This makes it easier to test the payment system without actually getting charged. Switch your account to Live Mode once you are ready to move to Production. For more information on Stripe's Test vs. Live Mode, click here.
Add a name for your account by clicking the Add a name button on the top left.

Enable Client-Only Integration
Enable Client-Only Integration under Settings > Checkout Settings.
Remember to add your hosting URL to Domains once you're live in Production to secure your payment gateway.
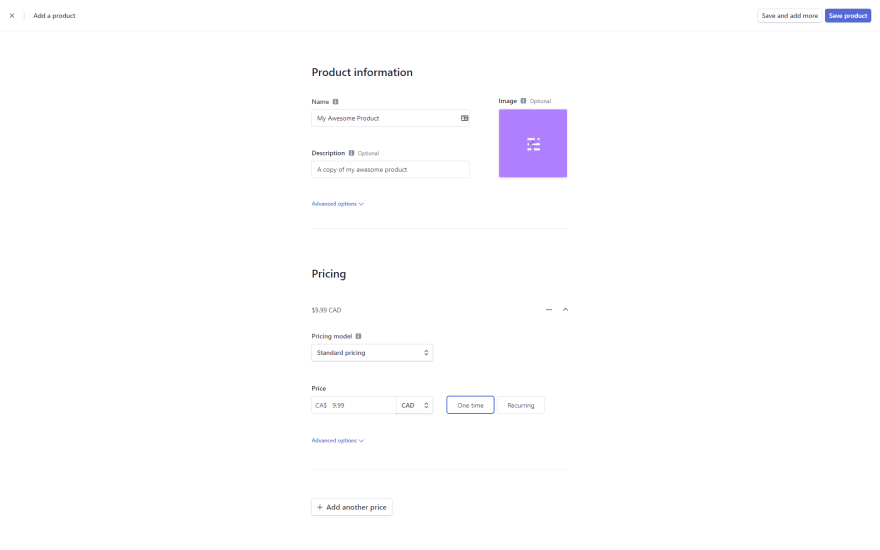
Create a product on Stripe
To add a new product, click on Products > Add a New Product. Add a meaningful name, icon, and the price. Make sure to set the price to One time.
Copy the API ID under Pricing.
Edit the Pre-Order button by pasting in the API ID from before.
<button
            class="btn btn-outline-secondary"
            style="width: 50%;"
            type="submit"
            id="order-btn"
            data-checkout-mode="payment"
            data-price-id="price_1H8sRrJZydwyZEHEvdH1j1r1"
          >
            Pre-Order for $20
</button>
Add Stripe Libraries
Let's add the libraries to the body of our page.
<body>
  <script
      src="https://cdnjs.cloudflare.com/ajax/libs/jquery/3.5.1/jquery.min.js"></script>
    <script src="https://js.stripe.com/v3/"></script>
  <script src="js/main.js"></script>
</body>
Create a new file called js/main.js. Replace the PUBLISHABLE_KEY with yours from Developers > API Key.
var PUBLISHABLE_KEY ="pk_test_51H8rt4JZydwyZEHEJVKNfKacIDRxR0i7YuprjgpREhVNUKr8v2a9yz8S9ZAiWdGKN8vM2KFHYukjTU0eAOzrk1Qe00KyY6NxL4";

var DOMAIN = location.href.replace(/[^/]*$/, "");

var stripe = Stripe(PUBLISHABLE_KEY);

var handleResult = function (result) {
  if (result.error) {
    console.log(result.error.message);
  }
};

$(document).ready(function () {
  var urlParams = new URLSearchParams(window.location.search);
  if (urlParams.has("success")) {
    var success = urlParams.get("success") == "true";
    if (success) {
      $("#payment").hide();
      $("#status").text(
        "Thank you for purchasing Biller! Your order will arrive within the hour."
      );
    } else {
      $("#status").text(
        "There was an error processing your payment. Please try again."
      );
    }
  }

  $("#order-btn").click(function (event) {
    var checkoutMode = $(event.target).data("checkoutMode");
    var priceId = $(event.target).data("priceId");
    var items = [{ price: priceId, quantity: 1 }];

    stripe
      .redirectToCheckout({
        mode: checkoutMode,
        lineItems: items,
        successUrl: DOMAIN + "main.html?success=true",
        cancelUrl: DOMAIN + "main.html?success=false",
      })
      .then(handleResult);
  });
});
Try a test payment
That's it for the integration. We can try out our payment system with a test credit card.
Click on the Pre-Order button. Use the card number 4242 4242 4242 4242. More on that here.
If everything goes well. your payment will go through and show up in the Dashboard.

Enable Email Receipts (Optional)
By default, a successful Stripe payment does not send an acknowledgement to the customer. Let's change that by enabling Email Receipts. Turn on Successful Payments and Refunds under Settings > Email > Customer Emails.
The Email Receipts feature only works in Live Mode.
There we go! Now we have a responsive landing page where early adopters can go and pay for the early access of a product. And we saved a ton of time! Now go collect your revenue :)
Try the live demo yourself at https://lucid-ramanujan-f21cd3.netlify.app/
Need source code? https://github.com/bdcorps/one-time-payments-html-landing-page
Found this guide useful? Access more guides and build your SaaS faster at saasbase.dev

Top comments (0)