Intro
Writing code is cool and there is always new or different tech to work with which will make programming always interesting. Today we will be talking about geolocation. What is geolocation, well it refers to the geographical location of an Internet-connected device. We will be using this to track users' location that access your website.
ipify API
Before we can find a user location we will need a way to access their ip address. The api we will be using to accomplish this task is called ipify API. This is a very useful and simple api to use to get a public IP address. Also it is free and has no cap on usage. To use this api all you have to do is make a request to “https://api.ipify.org” and you will get your public ip address.
ipstack API
ipstack API is an API for software developers to search the geolocation of IP addresses. It is also one of the top geolocation api out today. This api is also easy and quite simple to use. First you will have to create a free account at “https://ipstack.com/product” after you will get an api key that you can use. Now all you have to do to get your location is make a request to http://api.ipstack.com/${ip}?access_key=${key} with the ip address and the key provided with your account. This will return an object with information to your address.
DEMO
This is going to be a demo on how to code your application to get geo location after your api key is available to use. Allowing you to get the location of every visitor to your site.
const App = () => {
  const [input, setIput] = useState('')
  useEffect(() => {
    axios.get('https://api.ipify.org')
      .then(({data}) => axios.get(`http://api.ipstack.com/${data}?access_key=${key}`))
      .then(({data}) => setIput(`${data.city},${data.region_name} ${data.zip} ${data.country_name}`))
      .catch((err) => console.warn(err));
  }, [])
  return (
    <div>
      <h1>{input}</h1>
    </div>
  );
};
Conclusion
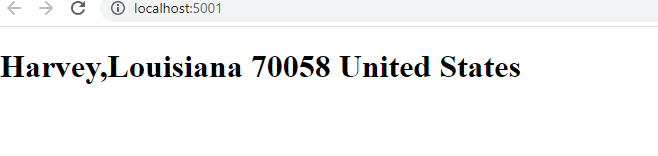
If you followed the step correctly then the result should look like this on the client side.

Top comments (0)