
Please have a look at this first: https://dev.to/hungrushb/amazon-rds-create-database-deep-dive-2m8j
I. Preparation
Create VPC
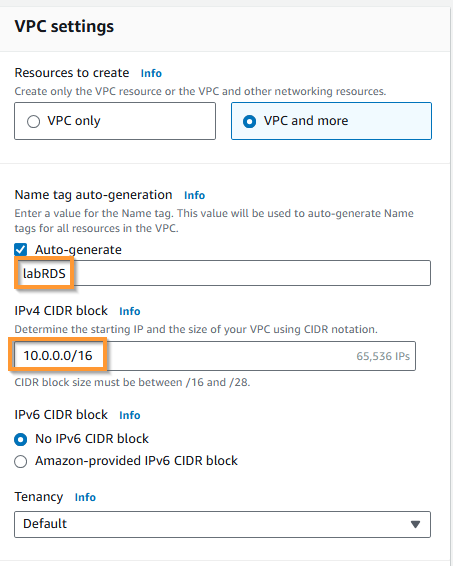
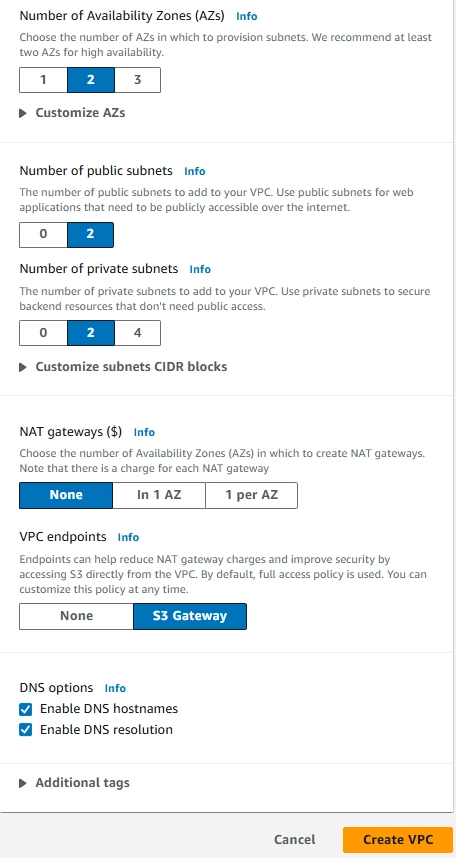
1 . Create a simple VPC with name labRDS. Keep everything as default and create.


2 . Update Enable auto-assign public IPv4 address for 2 public subnets.


Repeat for public subnet 2.
Create EC2 security group
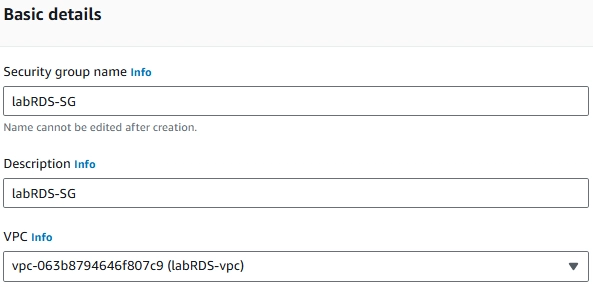
3 . Head to EC2 console, choose Security Groups, and Create security group.
Choose your VPC.
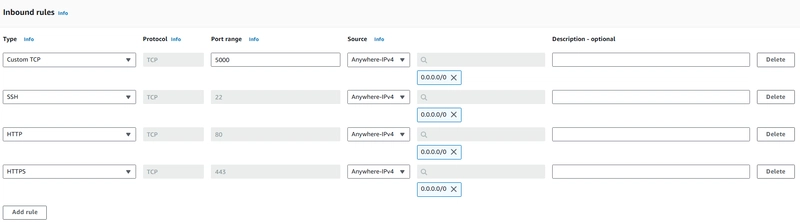
Add inbound rules:
- HTTP (80): Select HTTP from the list or enter port 80.
- HTTPS (443): Select HTTPS from the list or enter port 443.
- Custom TCP Rule (5000): Select Custom TCP Rule and enter port 5000.
- SSH (22): Select SSH from the list or enter port 22.
All source is Anywhere IPv4
Scroll down and create.
Create a Security Group for a DB Instance
4 . Create another SG with name labRDS-DB-SG.

- Choose MYSQL/Aurora and port 3306.
- For source, choose the EC2 SG we've created from last step.


Scroll down and create.
Creating a DB Subnet Group
5 . Go to RDS console, create a new subnet group.

6 . Enter name labRDS-subnet-group and choose VPC correctly.
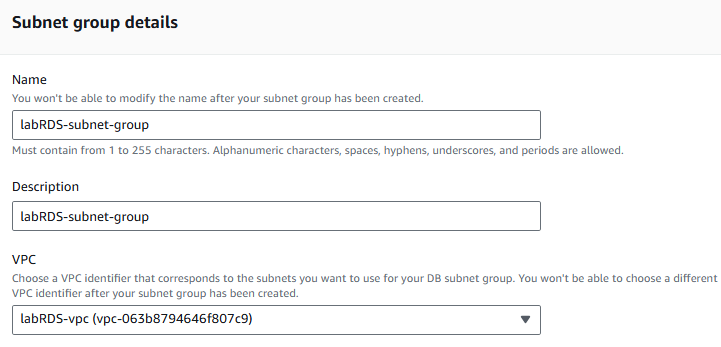
Select 2 AZs that had 2 private subnet we created.
![]()

Scroll down and create.
An Amazon Relational Database Service (RDS) Subnet Group is an Amazon Virtual Private Cloud (VPC) resource used to define a particular set of network addresses that are accessible by an RDS instance. The subnet group defines the IP ranges for each Availability Zone, which allows for increased availability and reliability of the database instance. It also ensures that only authorized databases can access the associated subnets and prevents any unauthorized access from outside sources. Additionally, by using a Subnet Group, the user has full control over which resources have access to their database instances.
II. Create EC2 instance
7 . Go to EC2 console and launch a new instance.
Enter name labRDS-server. From the Amazon Machine Image (AMI), choose an HVM version of Amazon Linux 2023.

Under the Instance type section, choose the t2.micro instance type, which is pre-selected by default.

8 . Create a new key pair labRDS, download the key and choose it from the options.


9 . Edit Networking, choose VPC, Subnet, enable public IP and security group exactly like in picture.
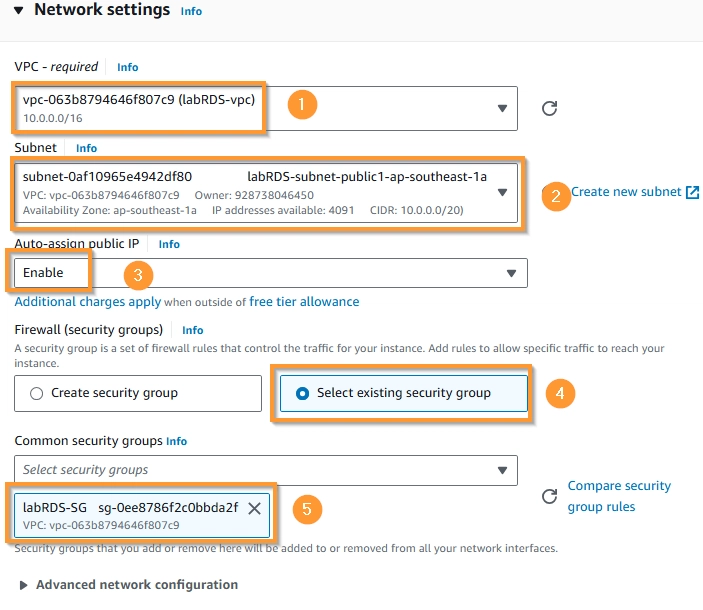
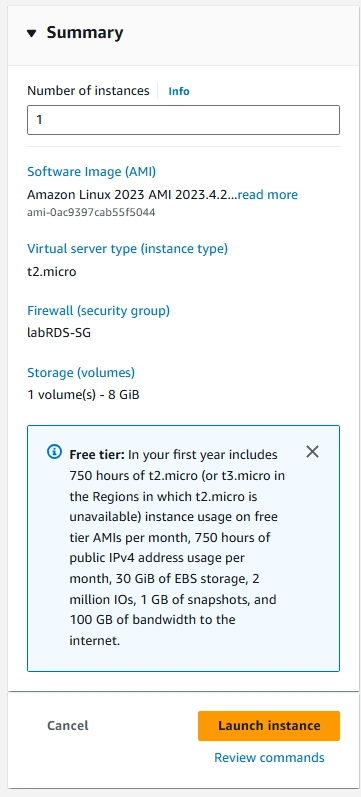
Check again and launch.
10 . Access EC2 instance with the downloaded keypair. You can use MobaXTerm or Putty.

III. Creating a RDS DB Instance
Install Git and NodeJS
11 . First, update your system packages to make sure you’re using the latest version.
Find Git Packages.
Install Git.
Finally, check the Git version was successfully installed.
sudo dnf update -y
sudo dnf search git
sudo dnf install git -y
git --version
![]()
12 . Install Node.js with the script below.
#!/bin/bash

# Color for formatting
GREEN='\033[0;32m'
NC='\033[0m' # Colorless

# Check if NVM is installed
if ! command -v nvm &> /dev/null; then
  # Step 1: Install nvm
  curl -o- https://raw.githubusercontent.com/nvm-sh/nvm/v0.39.0/install.sh | bash
  source ~/.nvm/nvm.sh
fi

# Verify nvm installation
nvm --version

# Install the LTS version of Node.js
nvm install --lts

# Use the installed LTS version
nvm use --lts

# Verify Node.js and npm installation
node -v
npm -v

# Step 4: Create package.json file (if it doesn't exist yet)
if [ ! -f package.json ]; then
  npm init -y
  echo -e **${GREEN}Created file package.json.${NC}**
fi

#Step 5: Install necessary npm packages
echo -e **Installing required npm packages...**
npm install express dotenv express-handlebars body-parser mysql

#Step 6: Install nodemon as a development dependency
echo -e **Installing nodemon as a development dependency...**
npm install --save-dev nodemon
npm install -g nodemon

# Step 7: Add npm start script to package.json
if ! grep -q '**start**:' package.json; then
  npm set-script start **index.js** # Replace **your-app.js** with your entry point file
  echo -e **${GREEN}Added npm start script to package.json.${NC}**
fi

echo -e **${GREEN}Installation completed. You can now start building and running your Node.js application using 'npm start'.${NC}**

Create RDS DB Instance
13 . Navigate to RDS console to create a new database.

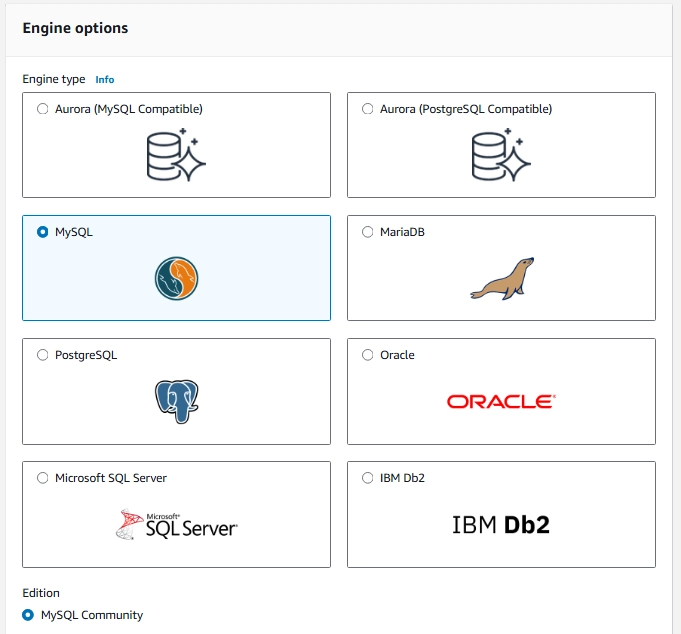
14 . Choose Standard.

Choose MySQL.
For Templates, choose Dev/Test.

Choose Single DB instance.

- Enter database-labRDS for DB indentifier.
- Open Credential Settings. If you want to specify a password, uncheck the Auto generate a password box if it’s already selected.
- Change the Master username value if you want.
- Enter the same password in both Master password and Confirm password.

For configuration, choose Burstable classes and db.t3.micro.

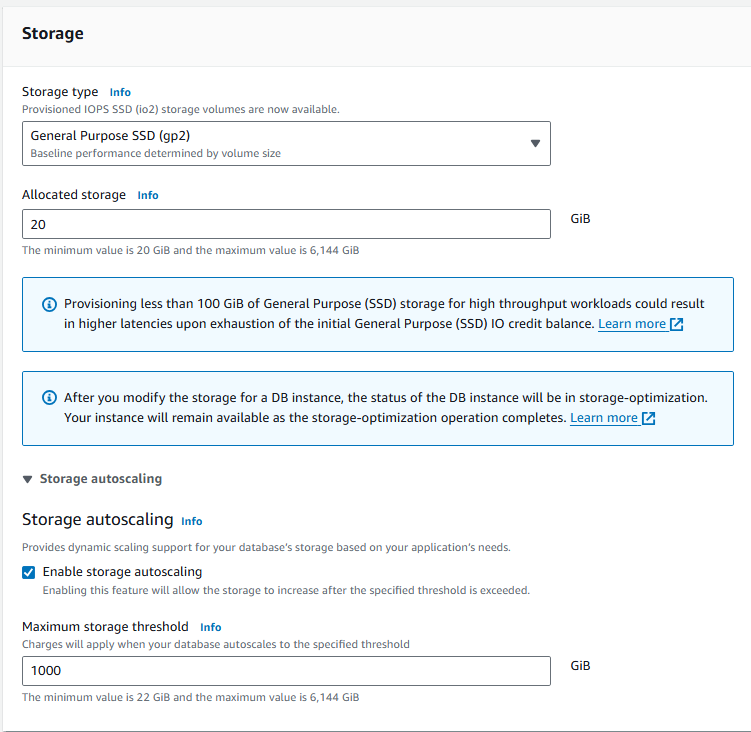
For Storage, choose General purpose (gp2), change Allocated storage to 20 GiB.
For Connectivity, choose Connect to an EC2 compute resource, then choose your server instance.
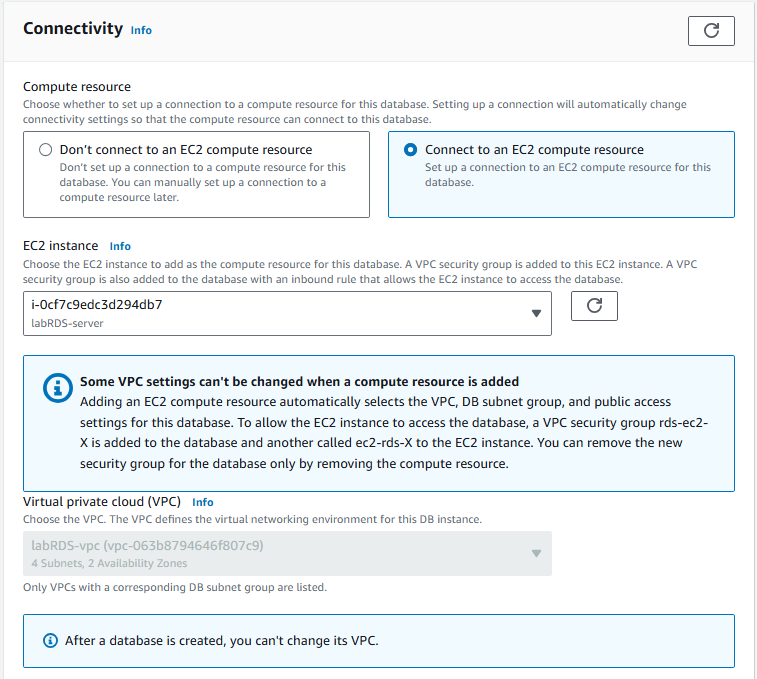
In Additional VPC security group, choose your DB security group.

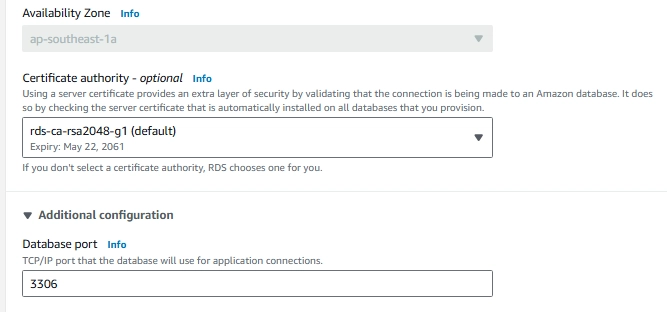
Keep the rest default like below.
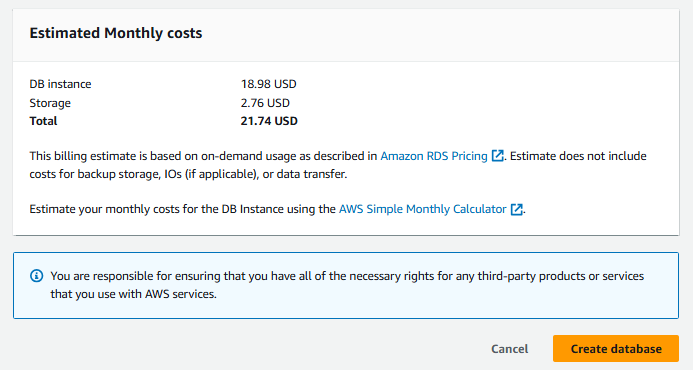
Scroll down and create.
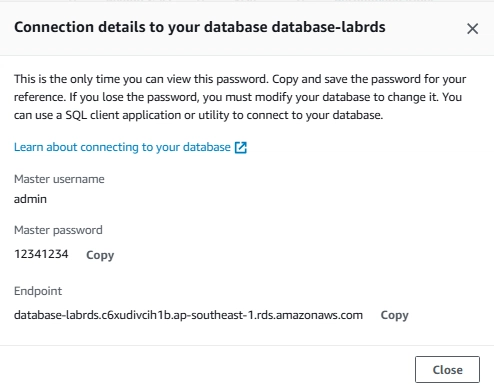
View your connection detail.
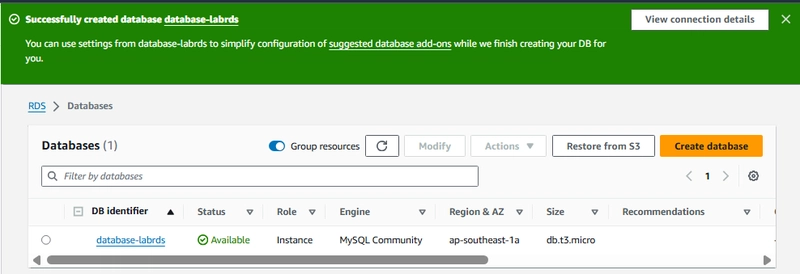
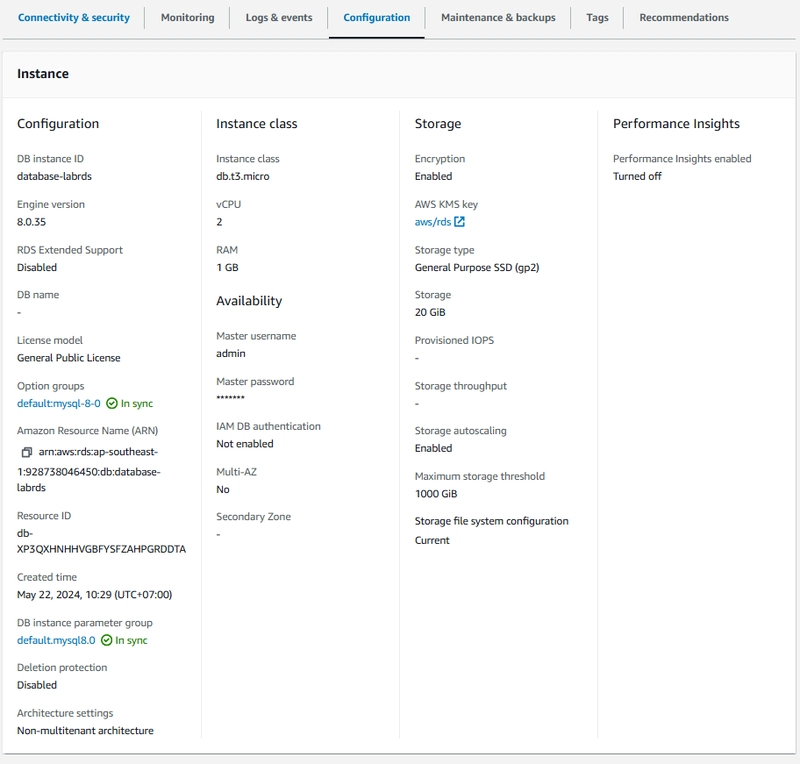
15 . Inspect your new database


Viewing Logs and Events on AWS RDS
16 . Click on the Log & events tab. Here, you can view various logs such as:
- Error log: Records errors that occur on the instance.
- General log: Records general activities on the instance.
- Slow query log: Records slow queries.
- Event log: Displays important events related to the instance.

Choose one log and view it.

Viewing Maintenance Information
Here, you will see information about the maintenance schedule, including the times when the DB instance will be automatically backed up and maintenance tasks will be performed. You can also view the history of previous maintenance events.
You can also view automatic backups and manual backups. You can also configure and manage backup settings.

IV. Deploy the application
17 . Clone this repo.
git clone https://github.com/AWS-First-Cloud-Journey/AWS-FCJ-Management

18 . Install MySQL.
First, go save your database endpoint.

Note: To execute this script, you need to have sudo permissions and make sure you have provided the correct database information (RDS Endpoint, database name, username and password) before run script.
#!/bin/bash

# Set variables for MySQL RPM and database information
MYSQL_RPM_URL="https://dev.mysql.com/get/mysql80-community-release-el9-1.noarch.rpm"
DB_HOST="replace this with your database endpoint"
DB_NAME="first_cloud_users"
DB_USER="admin"
DB_PASS="12341234"

# Check if MySQL Community repository RPM already exists
if [ ! -f mysql80-community-release-el9-1.noarch.rpm ]; then
  sudo wget $MYSQL_RPM_URL
fi

# Install MySQL Community repository
sudo dnf install -y mysql80-community-release-el9-1.noarch.rpm

# You need the public key of mysql to install the software.
sudo rpm --import https://repo.mysql.com/RPM-GPG-KEY-mysql-2023

# Install MySQL server
sudo dnf install -y mysql-community-server

# Start MySQL server
sudo systemctl start mysqld

# Enable MySQL to start on boot
sudo systemctl enable mysqld

# Check MySQL version
mysql -V

# Create or update the .env file with database information
echo "DB_HOST=$DB_HOST" >> .env
echo "DB_NAME=$DB_NAME" >> .env
echo "DB_USER=$DB_USER" >> .env
echo "DB_PASS=$DB_PASS" >> .env

# Connect to MySQL
mysql -h $DB_HOST -P 3306 -u $DB_USER -p
Then enter your password to login.

CREATE DATABASE IF NOT EXISTS first_cloud_users;

USE first_cloud_users;

CREATE TABLE `user`
(
    `id` INT NOT NULL AUTO_INCREMENT PRIMARY KEY,
    `first_name` VARCHAR(45) NOT NULL,
    `last_name` VARCHAR(45) NOT NULL,
    `email` VARCHAR(100) NOT NULL UNIQUE,
    `phone` VARCHAR(15) NOT NULL,
    `comments` TEXT NOT NULL,
    `status` ENUM('active', 'inactive') NOT NULL DEFAULT 'active'
) ENGINE = InnoDB;

INSERT INTO `user`
(`first_name`, `last_name`, `email`, `phone`, `comments`, `status`)
VALUES
('Amanda', 'Nunes', 'anunes@ufc.com', '012345 678910', 'I love AWS FCJ', 'active'),
('Alexander', 'Volkanovski', 'avolkanovski@ufc.com', '012345 678910', 'I love AWS FCJ', 'active'),
('Khabib', 'Nurmagomedov', 'knurmagomedov@ufc.com', '012345 678910', 'I love AWS FCJ', 'active'),
('Kamaru', 'Usman', 'kusman@ufc.com', '012345 678910', 'I love AWS FCJ', 'active'),
('Israel', 'Adesanya', 'iadesanya@ufc.com', '012345 678910', 'I love AWS FCJ', 'active'),
('Henry', 'Cejudo', 'hcejudo@ufc.com', '012345 678910', 'I love AWS FCJ', 'active'),
('Valentina', 'Shevchenko', 'vshevchenko@ufc.com', '012345 678910', 'I love AWS FCJ', 'active'),
('Tyron', 'Woodley', 'twoodley@ufc.com', '012345 678910', 'I love AWS FCJ', 'active'),
('Rose', 'Namajunas', 'rnamajunas@ufc.com', '012345 678910', 'I love AWS FCJ', 'active'),
('Tony', 'Ferguson', 'tferguson@ufc.com', '012345 678910', 'I love AWS FCJ', 'active'),
('Jorge', 'Masvidal', 'jmasvidal@ufc.com', '012345 678910', 'I love AWS FCJ', 'active'),
('Nate', 'Diaz', 'ndiaz@ufc.com', '012345 678910', 'I love AWS FCJ', 'active'),
('Conor', 'McGregor', 'cmcGregor@ufc.com', '012345 678910', 'I love AWS FCJ', 'active'),
('Cris', 'Cyborg', 'ccyborg@ufc.com', '012345 678910', 'I love AWS FCJ', 'active'),
('Tecia', 'Torres', 'ttorres@ufc.com', '012345 678910', 'I love AWS FCJ', 'active'),
('Ronda', 'Rousey', 'rrousey@ufc.com', '012345 678910', 'I love AWS FCJ', 'active'),
('Holly', 'Holm', 'hholm@ufc.com', '012345 678910', 'I love AWS FCJ', 'active'),
('Joanna', 'Jedrzejczyk', 'jjedrzejczyk@ufc.com', '012345 678910', 'I love AWS FCJ', 'active');

SHOW DATABASES;
USE first_cloud_users;

SHOW TABLES;
DESCRIBE user;


19 .
Go to application directory.
cd AWS-FCJ-Management/
Once you are in the application directory, run the following command to start the application:
npm start

Get your instance's public IPv4, access it with http through port 5000 and you should see the app is running:


Try to add new user and check.


VI. Clean up
- Terminate EC2 instance
- Delete DB Instance, also release the Elastic IP addresses if there is any left.
- Delete DB Snapshots
- Delete VPC

Congratulation!
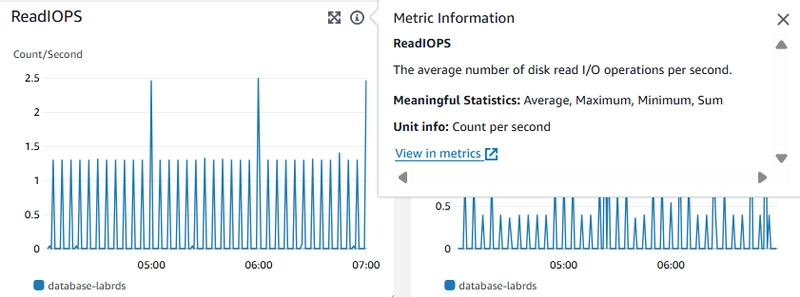
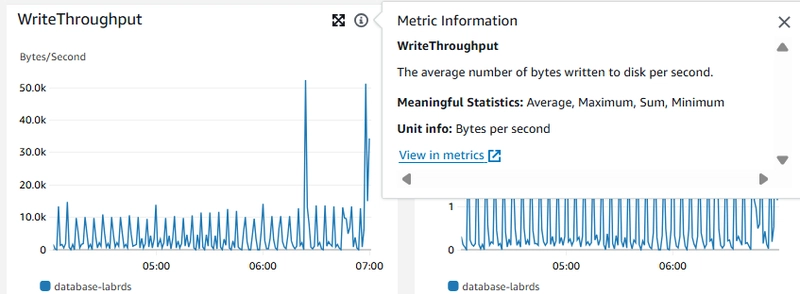
20 . You can go and check log to see the difference:


V. Create snapshot and restore
Create a snapshot.
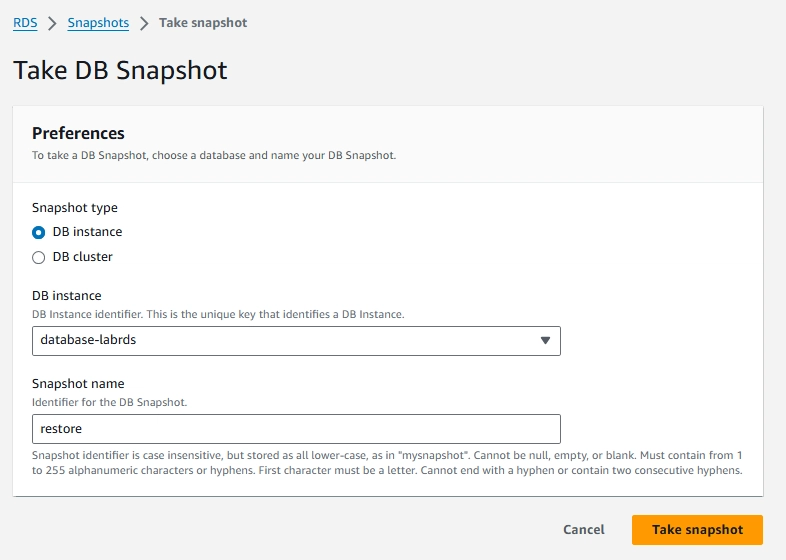
Wait for it to be Available.

Choose Restore.

Enter labRDS-restore. Also remember to choose Burstable classes and db.t3.micro. Then Restore DB instance.

You then can return to step 18 to set up a new database connection to labRDS-restore. Re-run the app and you will see it can fetch data normally again.

Top comments (0)