
If you are watching some Gaming/Tech influencers, you have probably seen in their background they have a little screen that shows current time or followers counter.
This is a Lametric Time.
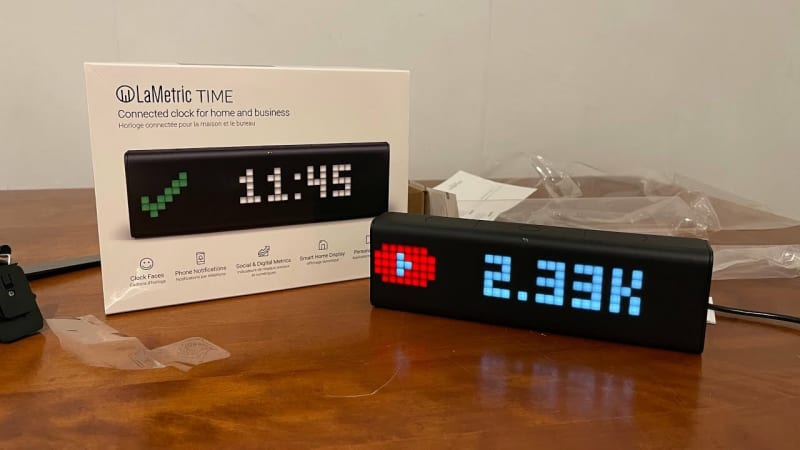
Lametric Time is a smart clock who display information from the Internet and smart appliances in style on a pixelated clock.
You can show for example:
- Followers counter (Instagram, Youtube, Twitter, TikTok, etc)
- Weather
- Results of Sport (Ligue 1, Premiere League, Formula 1, etc)
- News
- Stock market value
- Notification from IFTT, your home, etc
- And many more
Lametric provides official apps to get you started, but the most of the apps are provided by the community.
So, How these apps are built ? Which knowledge is required to built an app on this smart clock ?
It's very simple, you don't necessary need to know a programming language to build an embedded systems
You need to know how to make a REST API.
In this article, i will show you:
- How to develop a little app that shows us some data
- How to manage the input the user can provide on Lametric App
- How we can deploy this app on the cloud and on Lametric's App Store
For this tutorial, i will develop this app in TypeScript with ExpressJS, but you can also use another languages like Python, GoLang or PHP as long as your application can handle a HTTP response.
Let's do it...
A bit of theory
Before to started, a bit of theory is needed to understand how the clock can get the data from your application and return to the screen.
As I said above, your application is not an application for embedded system but and REST API.
When you choose an application on App market of Lametric's phone app, and you download this on clock.
Your clock will obtain the url of your API in order to call it every X minutes (it is configured on developer panel on developer.lametric.com)

When you choose an application on App market of Lametric's phone app, and you download this on clock.
Your clock will obtain the url of your API in order to call it every X minutes (it is configured on developer panel on developer.lametric.com) from Lametric's servers.
When your app is installed on clock, you see on your phone app the configuration panel of your app. If this app can be configured with some options, you can configure it on this panel. And the clock will send this configuration to app's API.
Now, how the clock made the request to your API ? After installation, the clock will made a HTTP request of type GET to the app. If your app is configured with some options, the clock will send the configuration on the query string.
Like this:
GET https://myapp.com?&city=Paris&pills=blue
On Developer Panel, you can add many parameters as you like, you have a very large choice of parameters:
- Text Field
- Number Field
- Boolean Field
- Single Choice
- Multiple Choice
When you add parameters on your app, the website will shows a sample of params that clocks will sent.
Now, after the clock made the request to your API, your API will return a JSON response with the data to display on the clock like this:
{
    "frames": [
        {
            "text": "Hello World"
        }
    ]
}
A JSON with a key frames and an array of objects. Each object is a frame of the clock.
The clock can show 4 types of frames:
- Text
- Metric
- Goal
- Sparkline
Text

If you want to show a text on the screen, you need to add a key text on the frame object.
{
    "frames": [
        {
            "text": "Text"
        }
    ]
}

{
    "frames": [
        {
            "text": "Text",
            "icon": 5588
        }
    ]
}
If you thinking that only the text is little sad, you can add an icon on the frame. You can find the list of icons on developer.lametric.com.
You need to add the icon id on the key icon on the frame object.
Each icons are made by the community, you can also create your own icon and submit it on the website if you don't found what you want.

{
    "frames": [
        {
            "text": "1295 ฿",
            "icon": 857
        }
    ]
}
The clock can shows special caracters like °, %, $, £, €, ¥, ฿.
Metric

{
    "frames": [
        {
            "text": "1.04%",
            "icon": 120
        },
    ]
}
Goal

{
    "frames": [
        {
            "goalData": {
                "start": 70,
                "current": 67,
                "end": 60,
                "unit": "KG"
            },
            "icon": 87
        }
    ]
}
If you want to show a goal, you need to add a key goalData on the frame object. This key is an object with 4 keys:
-
start: The start value of the goal -
current: The current value of the goal -
end: The end value of the goal (The goal to reach) -
unit: The unit of the goal (is optional, you put what you want)
Sparkline

{
    "frames": [
        {
            "index": 2,
            "chartData": [
                90,
                80,
                66,
                30,
                55,
                40,
                10,
                34,
                50
            ]
        }
    ]
}
If you want to show a sparkline on the entire screen, you need to add a key chartData on the frame object. This key is an array of numbers. The clock will show a sparkline with these numbers. You don't have a limit for the numbers.
Now you know how to work the clock, let's go to the practice.
Create the app
For this tutorial, i will create an app that shows the current price of Bitcoin and Ethereum in USD.
We are going use the API CoinLore, it is free and don't need an API key.
Init the project
Firstly, we need to create a repository on Github. Create a repository and clone it on your computer.
Go to your repository and init a NodeJS project.
For this tutorial, i will use yarn, but is according to your preference
yarn init -y
We need to install the needed dependencies for TypeScript and ExpressJS.
yarn add -D typescript @types/express @types/node ts-node ts-node-dev
yarn add express axios
Create a tsconfig.json file and add this code:
{
  "compilerOptions": {
    "module": "commonjs",
    "declaration": true,
    "removeComments": true,
    "emitDecoratorMetadata": true,
    "experimentalDecorators": true,
    "allowSyntheticDefaultImports": true,
    "target": "es2017",
    "sourceMap": true,
    "outDir": "./dist",
    "baseUrl": "./",
    "incremental": true,
    "skipLibCheck": true,
    "strictNullChecks": false,
    "noImplicitAny": false,
    "strictBindCallApply": false,
    "forceConsistentCasingInFileNames": false,
    "noFallthroughCasesInSwitch": false,
    "resolveJsonModule": true,
    "esModuleInterop": true,
  }
}
Create a index.ts file, and create a src folder with some directories to organize the code.
touch index.ts
mkdir src
mkdir src/controllers src/services
In package.json, add some scripts to run the project.
  "scripts": {
    "start": "yarn run build && node dist/index.js",
    "build": "npx tsc",
    "start:dev": "ts-node-dev index.ts"
  }
-
start: Build the project and run the compiled file -
build: Build the project -
start:dev: Run the project in development mode (that will be useful for the next part)
If everything is good, your project should look like this:
.
├── index.ts
├── package.json
├── src
│   ├── controllers
│   └── services
├── tsconfig.json
└── yarn.lock
Create the server
Now, we need to create the server with ExpressJS.
In index.ts we need to import ExpressJS and create the server.
import express from 'express';

const main = async () => {
    const app = express();
    const port = process.env.PORT || 3000;

    app.use(express.json());
    app.use((req, res) => {
        res.status(404).json({ message: "Route not found !" })
    })
    app.listen(port, () => console.log(`My Lametric App server started on: ${port}`));
}
main();
In this code, we create a server with ExpressJS, we set the port to 3000 or the port provided by the environment variable PORT.
To handle the JSON request, we use the middleware express.json().
To check if the server is working, run the command yarn start:dev and go to http://localhost:3000 on your navigator or use postman/curl then you should see this:
{
    "message": "Route not found !"
}
As you can see the server is working, but the server return an error 404 with as message: Route not found !. It is normal, we don't have any route on the server, let's go to create a route.
Create the route
In the directory "controllers", create a file api.controllers.ts and add this code:
import { Router } from "express";
import { getResponse } from "../services/api.service";

const ApiController: Router = Router();

ApiController.get('/', getResponse);

export default ApiController;
In this code, we import the Router from ExpressJS, we import the function getResponse from the file api.service.ts and we create a route / with the method GET.
getResponse will be the function that will return the response to the clock, for now it is not exist, we will create it now.
We are going now on the directory "services" and create a file api.service.ts and add this code:
import { Request, Response } from "express";

const getResponse = async (req: Request, res: Response) => {
    return res.status(200).json({
        frames: [
            {
                icon: 857,
                text: "฿itcoin"
            }
        ]
    });
};

export {
    getResponse
};
We import the Request and Response from ExpressJS that will be usefull to handle the request and response of the clock.
We create a function getResponse with the parameters req and res and we return a JSON with a key frames and an object that contain a frame with the word "Bitcoin" and Bitcoin's icon.
Then, we don't forget to import the route on the index.ts file.
import express from 'express';
import ApiController from './src/controllers/api.controller'; // We import the route

const main = async () => {
    const app = express();
    const port = process.env.PORT || 3000;

    app.use(express.json());
    app.use(ApiController); // We say to ExpressJS to use the controller for any request

    app.use((req, res) => {
        res.status(404).json({ message: "Route not found !" })
    })

    app.listen(port, () => console.log(`My Lametric App server started on: ${port}`));
}
main();
After reload the server, and remade the request, you should see this:
{
    "frames": [
        {
            "icon": 857,
            "text": "฿itcoin"
        }
    ]
}
And your clock should show this:

That's good, we have the first result, but we want to show the price of Bitcoin and Ethereum, we need to call the API CoinLore.
Call the API CoinLore
We are going to create a new file named coinlore.service.ts on the directory "services". This file will contain the function that will call the API CoinLore.
In this file, we are going to create a function getPrice that will return a Promise with the price of currency as we want.
import axios from 'axios';

enum ECoinId {
    BTC = 90,
    ETH = 80,
}

const getPrice = async (coinId: ECoinId): Promise<any> => {
    try {
        const response = await axios.get(`https://api.coinlore.net/api/ticker/?id=${coinId}`);
        if (!response.data || !response.data[0])
            return null;
        return response.data;
    }
    catch (error) {
        console.log(error);
        return null;
    }
}

export {
    getPrice,
    ECoinId
}
In this code, the function getPrice will return a Promise with several information of the currency as we want.
To ask to CoinLaure the price of a currency, we need to call the API with the id of the currency. For example, if we want the price of Bitcoin, we need to call the API with the id 90 or 80 if we want the price of Ethereum.
To avoid to keep in mind each ID we create an enum ECoinId with the id of the currency we want to get the price.
Now, we need to import this function on the api.service.ts file.
const getResponse = async (req: Request, res: Response) => {
    const currencyData = await getPrice(ECoinId.BTC); // We get currency data
    const price = currencyData ? currencyData[0].price_usd : "N/A";

    return res.status(200).json({
        frames: [
            {
                icon: 857,
                text: `${price} $`
            }
        ]
    });
};
After call the function getPrice, we get the data of the currency and we get the price of the currency. If we encounter a problem with CoinLore API, we set the price to "N/A".
Now let's watch the result on the clock.
{
    "frames": [
        {
            "icon": 857,
            "text": "29059.83 $"
        }
    ]
}

Great! This is beginning to bear fruit. But for moment, we only have the price of Bitcoin, we need to get the price of Ethereum.
And...if the user want know only the price of Ethereum, how we can do ? Now we are going to see how we can manage the parameters of the user.
Manage the parameters
If you follow the theory, you know that the clock can send some parameters to the API in form of query string like this:
GET https://myapp.com?¤cy=BTC
To manage this, we need to modify the api.service.ts file.
const iconDict: { [key: number]: number } = {
    [ECoinId.BTC]: 857,
    [ECoinId.ETH]: 17007
}

const currencyDict: { [key: string]: ECoinId } = {
    "BTC": ECoinId.BTC,
    "ETH": ECoinId.ETH
}

const getResponse = async (req: Request, res: Response) => {
    const currency: ECoinId = req.query.currency ? currencyDict[req.query.currency as string] || ECoinId.BTC : ECoinId.BTC;
    const currencyData = await getPrice(currency);
    const price = currencyData ? currencyData[0].price_usd : "N/A";
    const icon = iconDict[currency] || ECoinId.BTC;

    return res.status(200).json({
        frames: [
            {
                icon: icon,
                text: `${price} $`
            }
        ]
    });
};
We create a variable currency that will be the currency that the user want to get the price. If we don't recognize the currency in query, we set the currency to Bitcoin.
We create a variable icon that will be the icon of the currency that the user want to get the price.
The icons id are available on developer.lametric.com
To get the icon and good id of the currency, we create two dictionary. One for the icon and one for the id of the currency.
Now, try to made a request with our API to get the price of Ethereum.
GET https://myapp.com?¤cy=ETH
{
    "frames": [
        {
            "icon": 17007,
            "text": "1848.15 $"
        }
    ]
}

Now what happen if the user don't provide any parameters ?
GET https://myapp.com
{
    "frames": [
        {
            "icon": 857,
            "text": "29059.83 $"
        }
    ]
}
Very good, we can manage the parameters of the user. Now i'm think is time to deploy our app on the cloud.
Deploy the app
In order to all users can uses our app for their clock, we must deploy our app on the cloud. For this tutorial, i will use Render that can allow us to deploy our app for free.
Firstly push your code on Github.
git add .
git commit -m "First commit"
git push
Go to Render and create an account. After that, create a new web service.
Render should invite you to choose a github repoitory, choose the repository you just created.
Next step, Render will ask you some information to deploy your app.

On this page, you can choose the name of your app, the region where your app will be deployed, the branch to deploy and the command to run your app.
Caution ! It is very import to set exatly value for Root Directory, Build command and Start Command otherwise your build will fail
-
Root Directory:. -
Build command:yarn -
Start command:yarn start
Select the free plan and click on "Create Web Service".
After some minutes, your app should be deployed.
If everything is good, you should see this:
And if you go to the url of your app, you should see this:
{
    "frames": [
        {
            "icon": 857,
            "text": "29059.83 $"
        }
    ]
}
Congratulations ! Your app is deployed on the cloud ! The more difficult is done.
After your app is deployed, you can go to the Developer Panel on developer.lametric.com and add your app.
Add the app on Lametric's App Store
To add your app on Lametric's App Store, you need to go to the Developer Panel on developer.lametric.com and create and account if you don't have one.
After that, go to the tab "My Apps" and click on "Create" and select Indicator app

In this page, you can create user interface. This interface will be show on the phone app of Lametric to shows a preview of your app. Add some frames if you want and play with the options.

In next section, you must add your App's URL, and his pool time. The pool time is the time that the clock will call your API.
For this tutorial, i will set the pool time to 10 minutes. It is highly recommended to set the pool time to 10 minutes or more to avoid to spam the API and risk to exceed the limits of your offer on Render.
Keep in your mind that your app can be installed on many clocks, it is important to not spam the API.
Fill the fields url and pool time and click on "Next" and click on Validate. The website will check if your app respond is operational.

In next section Add options to your app, you can add some options to your app.
As we must know the currency that the user want to get the price, we are going to add a single choice with the two currencies that we can get the price.

When you click on next, the website will ask to you to give a name, an icon, a description, the type, and the visibility of your app.
It also ask a link to you a Privacy Policy and a Terms of Use.
Don't worry about that, as your app is a simple app that don't collect any sensible data, you can put the link of your Github repository.
And now click on "Save".
Now your app is created, but it is not published on the App Store.
Go to the tab "My Apps" and click on your app and click on "Publish".
Go back to the tab "My Apps" look at the status of your app. If the status is "Published", your app is published on the App Store.

Congratulations ! You have made and publish your first app for Lametric Time !
Go to find your app on the App Store and install it on your clock.

Conclusion
If you want to see the code of this tutorial, you can go to my repository to look at the code.
If you don't have to time to do this tutorial, i have create a little template that you can use to create your app. You can find it here.
Lametric provides a documentation if you want to go further. You can find it here.
Also, i have an application on the App Store that shows the current number player connect on different games (Minecraft, CS:GO, etc). You can find it here.
I hope this tutorial was very useful for you and that you have learned a lot of things. That is my first tutorial and article, if you have any feedback, don't hesitate to tell me, it will be very useful for me.
Thanks for reading and see you soon !
BliShikata

Top comments (0)