
In this post, we will learn about all of the hooks available for use in your Vue JS workflow.
Vue
Vue JS is a very progressive JavaScript framework created by Evan you and the Vue core team plus contributions from over 230 open source community lovers. Vue is used by more than 870,000 people and has been starred 140,000 times on GitHub. It consists of an approachable core library that focuses on the view layer only, and an ecosystem of supporting libraries that helps you tackle complexity in large single-page applications.
In this post, you will be introduced to the whole lifecycle, from creation to destruction, of a Vue instance.

Before you start
This post is suited for all stages of developers that use Vue JS, including beginners. Here are a few prerequisites you should already have before going through this article.
You will need the following:
- Node.js version 10.x and above installed. You can verify if you do by running the command below in your terminal/command prompt:
node -v
- The node package manager 6.7 or above (NPM) also installed
- A code editor: Visual Studio Code is highly recommended
- Vue’s latest version, installed globally on your machine
- Vue CLI 3.0 installed on your machine. To do this, uninstall the old CLI version first:
npm uninstall -g vue-cli
then install the new one:
npm install -g @vue/cli
- Download a Vue Mixins starter project here
- Unzip the downloaded project
- Navigate into the unzipped file and run the command to keep all the dependencies up-to-date:
npm install
Vue instance
A Vue application consists of a root Vue instance created with new Vue, optionally organized into a tree of nested, reusable components. Whenever you create a new Vue project, the Vue instance gets activated by default in the main.js file by this code:
new Vue({
 render: h => h(App),
 }).$mount(‘#app’)
Signifying a Vue instance that contains the app component, this syntax is a bit different with variants like single-file applications.
Lifecycle hooks
Every Vue instance goes through a series of initialization steps. When it is created from setting up data observation to compiling the template, to mounting the instance to the DOM, and finally to updating the DOM during data changes. This process is known as the lifecycle of a Vue instance and they have some functions run inside them by default as they go through this process of creating and updating the DOM. It is inside them that Vue components are created and exist, these functions are called lifecycle hooks.

There are eight lifecycle methods:
- Before create
- Created
- Before mount
- Mounted
- Before update
- Updated
- Before destroy
- Destroyed
In this post, you will be introduced to each one of these hooks and what actions are permissible at each stage with sample illustrations. If you have followed this article from the beginning, you should already have a Vue starter application up and running.
For this post, we will be making use of the test component, it is located in the components folder that is inside the src folder. It should look something like this:
// src/components/Test.vue
<template>
 <div>
 </div>
</template>
<script>
export default {
 name: ‘Test’,
 props: {
  msg: String
 }
}
</script>
<! — Add “scoped” attribute to limit CSS to this component only →
<style scoped>

h3 {
 margin: 40px 0 0;
}
ul {
 list-style-type: none;
 padding: 0;
}
li {
 display: inline-block;
 margin: 0 10px;
}
a {
 color: #42b983;
}
</style>
The script section alone will be used for the various hooks illustrations throughout the course of this tutorial.
beforeCreate()
This is the very first lifecycle hook that gets called in Vue JS, it gets called immediately after the Vue instance has been initialized.
<script>
export default {
name: 'Test',
beforeCreate() {
 alert('beforCreate hook has been called');
 console.log('beforCreate hook has been called');
 }
}
</script>
You can check out the interface by running your application in development environment.
npm run serve
This will output the interface below:

Notice that the alert statement written inside the lifecycle hook executed first before the component loaded. This is exactly the function: to be called before Vue engine creates the app component. This way at the beforeCreate stage, things like computed properties, watchers, events, data properties , and manipulation are not set up yet.
created()
This is, as you have guessed, the second lifecycle hook that is called right after the beforeCreated hook. At this stage, the Vue instance has been initialized and has activated the start of things like computed properties, watchers, events, data properties and manipulations that come with it.
<script>
export default {
name: 'Test',
data() {
return {
books: 0
}
},
created() {
 alert('Created hook has been called');
 console.log(`books is of type ${typeof this.books}`);
 }
}
</script>
If you run the application you will quickly notice that the type of data can now be displayed. It was not possible at the beforeCreated stage because the activation that takes place here has not taken place at the time. However, the Vue instance has not been mounted at this stage so you cannot manipulate the DOM here, the element property is not available for use yet.
beforeMount()
This is the next lifecycle hook that gets called after the created hook is called. This is the moment immediately before the instance is mounted on the DOM, the template and the scoped styles are all compiled here but you still cannot manipulate the DOM yet, the element property is not still available. Here is where initializations that you do not want lying around in your component should go into:
<script>
export default {
  beforeMount() {
    alert('beforeMount is called')
  }
}
</script>
mounted()
This is the next lifecycle hook to be called after the beforeMounted is called. It is called right after the instance has been mounted. Here the app component, or any other component in the project becomes functional and can now be used. The data is fit into the template, the DOM element is replaced with data filled element and can now be manipulated here, the element property is now available for use.
<script>
export default {
  mounted() {
    alert('mounted has been called');
   }
}
</script>
This is the default place any project created with the Vue CLI is at because the mounting is already done in the main.js file as we saw in the beginning. This is why you may not get to use the other hooks because the instance is already mounted by default for you.
beforeUpdate()
This is the lifecycle hook called after the mounted hook, anytime a change is made to the data that requires the DOM to be updated. This stage is great for any logic before data changes like removing an event listener.
<template>
 <div> {{hello}}
 </div>
</template>
<script>
 export default {
  name: 'Test',
  data() {
   return {
    books: 0,
    hello: 'welcome to Vue JS'
   }
 },
beforeUpdate(){
 alert('beforeUpdate hook has been called');
},
mounted(){
 this.$data.hello= 'lalalalallalalalalaalal';
 }
}
</script>
This originally has a welcome note on the DOM but in the mounted stage (which is where the DOM can be manipulated), the data gets changed and so the alert for beforeUpdate appears just before it changes.
updated()
This lifecycle hook is called just after a DOM update has occurred, so this means immediately after the beforeUpdate hook is called. DOM related operations can be performed here, although it is not advisable to change state inside this hook as Vue already provides platforms specifically for that.
<template>
 <div> {{hello}}
 </div>
</template><script>
 export default {
  name: 'Test',
  data() {
   return {
    books: 0,
    hello: 'welcome to Vue JS'
   }
  },
beforeUpdate(){
 alert('beforeUpdate hook has been called');
},
updated(){
 alert('Updated hook has been called');
},
mounted(){
 this.$data.hello= 'lalalalallalalalalaalal';
 }
}
</script>
beforeDestroy()
This Vue lifecycle hook is called just before a Vue instance is destroyed, the instance and all the functionalities are still intact and working here. This is the stage where you can do resource management, delete variables and clean up the component.
<script>
export default {
name: 'Test',
 data() {
    return {
      books: 0
    }
  },
  beforeDestroy() {
    this.books = null
    delete this.books
  }
}
</script>
destroyed()
This is the final stage of the Vue lifecycle where all the child Vue instances have been destroyed, things like event listeners and all directives have been unbound at this stage. It gets invoked after running destroy on the object.
<script>
export default {
  destroyed() {
    this.$destroy()
    console.log(this)
  }
}
</script>
When you run the app and take a look at the console, you will see nothing.
Conclusion
You have been introduced to the eight lifecycle hooks in Vue JS and what and when they are to be used. Now you can use the lifecycle hooks to add our custom logic at different stages of the lifecycle of your Vue instance controlling the flow from creation to destruction. This will deepen your understanding of the reasoning behind the everyday features you use in Vue JS. Happy hacking!
Plug: LogRocket, a DVR for web apps
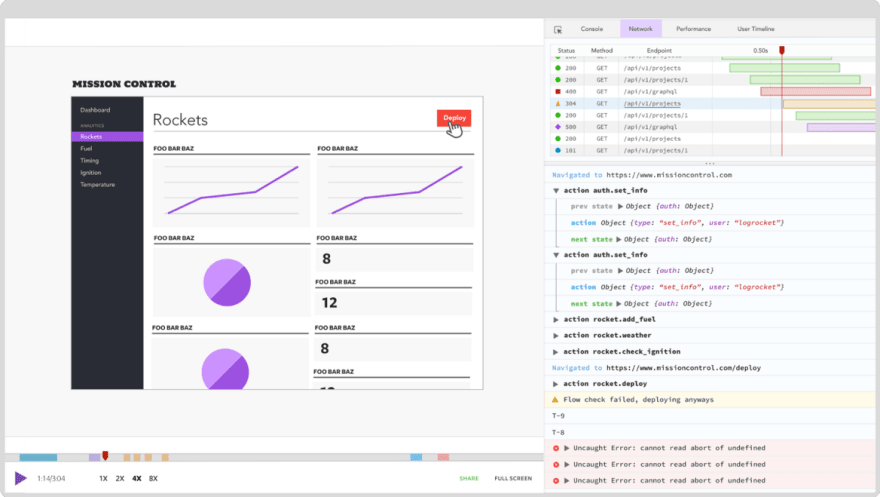
LogRocket is a frontend logging tool that lets you replay problems as if they happened in your own browser. Instead of guessing why errors happen, or asking users for screenshots and log dumps, LogRocket lets you replay the session to quickly understand what went wrong. It works perfectly with any app, regardless of framework, and has plugins to log additional context from Redux, Vuex, and @ngrx/store.
In addition to logging Redux actions and state, LogRocket records console logs, JavaScript errors, stacktraces, network requests/responses with headers + bodies, browser metadata, and custom logs. It also instruments the DOM to record the HTML and CSS on the page, recreating pixel-perfect videos of even the most complex single-page apps.
The post Introduction to Vue lifecycle hooks appeared first on LogRocket Blog.

Top comments (0)