
Table Of Contents
- Prerequisites
- Step 1 — Module Repo Folder Structure
- Step 2 — Types of Testing
- Step 3 — Static Analysis
- Step 4— Unit Testing
- Step 5 — Integration Testing
- Step 6 — End-to-End Testing
- Conclusion
In software development, testing code is a common practice. Software developers need to be able to validate parts of their code to ensure it is working in an automated fashion. The realm of infrastructure development takes software best practices to create and manage infrastructure code, and with that comes testing. You should be writing tests for your Terraform code.
Writing tests for Terraform provides many benefits that make life easier as an infrastructure developer. Automated tests provide faster loop feedback. No more making a change to a Terraform configuration and manually running terraform apply and then checking the Azure portal to ensure that the change is there. Instead, we can use tools like Terratest to perform these steps for us and allow us to test our modules much faster than we could manually. Not only do we get faster feedback, but also fewer bugs. Automating tests for every possible scenario in a Terraform configuration provides better code coverage and can catch bugs much quicker. Tests give us increased confidence in our changes and provide us with greater predictability for our change. We can now accurately predict that our code deploys what we designed it to deploy without destroying other resources.
One common misconception is that because Terraform is declarative, we don't need to write tests for it. We are already declaring the resource that needs to exist. If there is an issue with provisioning that resource, Terraform automatically provides the error. This is a valid point, which is why when we talk about testing our Terraform code, we want to write tests for sanity checks, conditional logic, and variable outcomes in our code. For example, writing a test for the following code to create a resource group would add minimal benefit:
resource "azurerm_resource_group" "rg" {
    name     = "rg-myrg"
    location = var.location
}
If we wrote in a check to ensure that the resource group deploys to the proper location, this would be a redundant check. The resource group will automatically be built in the location we specify, and if it's not successful, an error event occurs natively through Terraform. Writing hundreds of tests in this way could become more of a maintenance burden since we would have to continually modify the test to keep up with changes to the module.
On the other hand, writing a test for the example below would be more beneficial since it contains more variance in the outcome and could potentially become altered when changes are made to the module:
resource "azurerm_resource_group" "rg" {
    name     = "rg-myrg"
    location = var.environment != "Production" ? "southcentralus" : "northcentralus"
}
In this guide, we are going to clone a module repository and walk through writing and running tests for it.
Prerequisites
Before you begin, you'll need to set up the following:
Since we will be writing tests in GO, we will need an environment set up to write these tests. We are going to use Visual Studio Codespaces to walk through this guide. Visual Studio Codespaces is an online version of Visual Studio Code. It allows us to automatically deploy an environment with a code repository so we can dive into creating tests with minimal setup.
Note: We will be using the basic sized environment for our Visual Studio Codespace. The compute for this service will be hosted in your Azure tenant, so there will be some charges associated. The average cost for a basic environment is around $0.08 per hour. Also, environments can be in a "suspended" and "active" state, which reduces pricing even further. For more information on VSC billing, check out the pricing page.
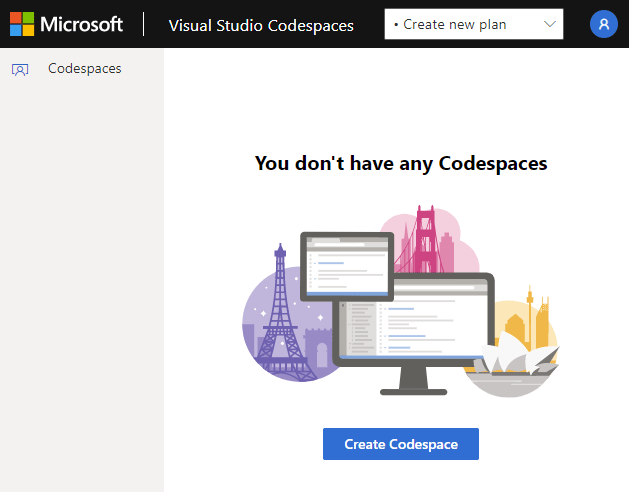
To create the Codespaces environment, navigate to the Visual Studio Codespaces login page and sign in with your Azure credentials. Make sure to use Google Chrome as FireFox and Edge are not yet supported. Once logged in, we will be presented with the following page below. Select Create Codespace:
Next, we need to create a billing plan. The billing plan connects the Visual Studio Codespace environment to our Azure subscription. Select a location that makes sense for you. Also, you can input a plan name according to your Azure naming standards. The plan name is the name of the Azure resource that deploys to your subscription. Next, we need to specify the resource group to host the Visual Studio Codespace resource. When done configuring these settings select Create:

Now we can set up our Codespace; this is the Visual Studio environment. We could have multiple Codespaces in our plan if we wanted to. Input a Codespace Name for the Codespace. Under Git Repository paste in the following GitHub repo:
https://github.com/allanore/terraform-azure-testing
The GitHub repo contains the code for the Terraform module that we will create tests for in this guide. There is also a post-create.sh script in this repo that automatically installs the tools we want for our environment, like Go and Terraform. Under Instance Type, select the Basic type. Next, select Create to build out our VSC environment finally:

We should see our environment starting to build and the post-create.sh script automatically executes and installs our tools and extensions. We are installing GO, Terraform, and a few other tools:
Note: You may need to refresh your browser at some point to get this screen to show up.

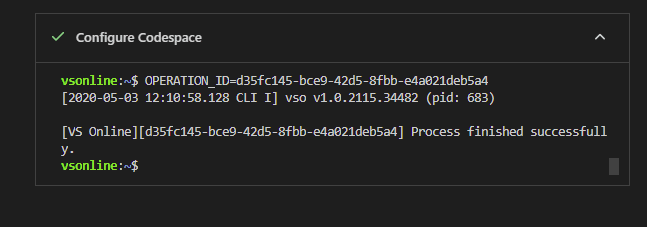
Once the Configure Codespace section shows complete, we are ready to move on to reviewing the folder structure of this repository:
Step 1 — Module Repo Folder Structure
Before we can write our tests, we need to know a little more about what this module does and the structure of the repo. The function of this Terraform module is to deploy a virtual network. There are also submodules for creating a network security group and virtual network peer. In Visual Studio Codespaces, you should see the following folder structure on the left-hand side:

At the root of this repo we can see several files, we have our .gitignore file, which contains a list of file types that we don't want to save into source control, like .tfstate. Next, we have our .pre-commit-config.yaml file, which contains a list of tools to execute on each git commit. We will go deeper into this in a later step. Last, we have our Terraform configuration files main.tf, output.tf, and variables.tf. These are the root Terraform files and perform the base function of our module, which is to create a virtual network and subnet.
Now that we've gone over the files in the root folder of this module, let's go over each folder so we have a better understanding:
- .devcontainer - This folder is only used to automate the Visual Studio Codespace environment. It does not affect our terraform module.
- .azuredevops - Contains our CI pipeline for Azure DevOps. We won't be going over Azure DevOps in this guide, but if you wanted to take this guide a step further and add this repository into an Azure DevOps pipeline, this is the yml file with all the steps needed.
- examples - The examples folder serves two purposes. First, it serves as documentation on how to use the module. Second, it serves as Terraform code that we can use for testing. We can execute these examples in our test files to stand up resources that we can test against. There are two subfolders in the examples folder. Each one has code for performing different tasks of the module. The network folder contains code for standing up a Virtual Network and Network Security Group. The vnet-peering folder contains code for standing up two virtual networks and then peering them together.
- modules - The modules folder contains our sub-modules or helper modules that provide additional features like creating a Network Security Group or Virtual Network Peer. These are optional modules that provide more flexibility and options for those that are using the module.
- test - This is where our test files will live.
It is best practice in Terraform to split up tasks or services into modules. We want to use our modules as building blocks to build infrastructure one piece at a time. From a developer perspective, one might think of modules like functions. Where each module is performing the heavy lifting of a specific task:

Having our infrastructure built in smaller units like modules allows us to write tests for them. You can't write a test for a Terraform configuration that is thousands of lines of code. This also provides us with a smaller blast radius when making changes to code. If I make a change to my web app module, I don't put the entire application at risk.
Even though there is a smaller blast radius, there is still potential to destroy infrastructure when making changes to modules, which is why there needs to be a thorough automated way to test our modules and test them often. Next, we will go over the different types of tests we can write.
Step 2 — Types of Testing
There are four basic types of testing. These terms are loosely categorized in the infrastructure as code world. We are still in the infant stages, and there hasn't been a standardized definition for each category. We will be going over the way that Gruntwork defines testing in Terraform. Gruntwork is a company that provides Terraform modules to companies that desire to have IaC in their environment but don't have the skillset or time to create their own. They have years of experience developing infrastructure in Terraform and are also the creators of Terratest, which is the tool we will be using for some of our tests.
These are the four basic types of tests:
- Static Analysis - Testing code without running it.
- Unit Testing - Testing a single unit.
- Integration Testing - Testing the functionality between two or more units.
- End-to-End Testing - Testing an entire application infrastructure from the ground up.
Below is a diagram demonstrating the cost of each test. We want to run most of our tests at the bottom because that is the quickest and least costly to run. Each test will also catch different types of bugs. If we aim to catch most bugs with static analysis and unit tests, we will gain much more speed in development than if we are testing for the same bug in an end-to-end test.

Step 3 — Static Analysis
Static analysis tests involve testing our code without running it. We want to run a tool that can look at our code and analyze if there is a bug in it. A great way to perform static analysis testing is by using a tool called pre-commit. Pre-commit packages git hooks together to allow for tools to be run after each commit. If we look at the contents of the .pre-commit-config.yaml file in our repo, we can see it's configured to run several hooks. We can also see the repository URL, which contains all the git hook scripts for these hooks. This allows us to manage our git hooks and distribute them amongst team members in a much more manageable fashion. This pre-commit repo is from Gruntwork, they've done all the work to create the hooks and bundle them up into a pre-commit repository for community use:
repos:
  - repo: https://github.com/gruntwork-io/pre-commit
    rev: v0.1.4
    hooks:
      - id: terraform-fmt
      - id: terraform-validate
      - id: gofmt
      - id: golint
In the .precommit-config.yaml, there are two hooks for Terraform and two for GO. Terraform-fmt is a hook that runs the terraform fmt command, which automatically formats code to look pretty with proper spacing. Terraform-validate runs the terraform validate command against our code to ensure it is syntactically correct by checking for no misplaced { } or invalid Terraform syntax.
Let's give these two hooks a test by modifying some Terraform code. Open the variables.tf file in the root of the repo and add a description to the system variable. Let's purposely use the argument descriptions instead of description in our variable to catch the error in the pre-commit hook. Copy the snippet below and overwrite the content currently there for the system variable:
variable "system" {
  type         = string
  descriptions = "Name of the system or environment"
  default      = "terratest"
}
Save the changes by entering CTRL + S on the keyboard. Before pre-commit can run, we need to configure the hooks for this repository. Open up the terminal by entering CTRL + ~ on the keyboard and run the following command:
pre-commit install
Now let's try to commit our change we made to the system variable in the variables.tf file. When we run our commit, the pre-commit hooks for terraform fmt and terraform validate are triggered:
git add .
git commit -m "this is a test commit to trigger our pre-commit hooks"
We should see in the output that terraform validate has run and failed. We should also see the error message describing why it failed, which is because we used the argument descriptions instead of description which is the correct argument:
Terraform has installed the required providers to support the configuration
upgrade process. To begin upgrading your configuration, run the following:
    terraform 0.12upgrade

To see the full set of errors that led to this message, run:
    terraform validate

Error: Unsupported argument

  on variables.tf line 3, in variable "system":
   3:   descriptions = "Name of the system or environment"

An argument named "descriptions" is not expected here. Did you mean
"description"?
To fix the change, rename thedescriptions argument to description, which should clear our invalid syntax error. But this time, add a large number of spaces in the default argument. This unsightly formatting will trigger our terraform fmt pre-commit hook:
variable "system" {
  type         = string
  description = "Name of the system or environment"
  default      =                        "terratest"
}
Now, let's add and commit the changes again in git:
git add .
git commit -m "this is a test commit to trigger our pre-commit hooks"
This time we see that terraform fmt failed. We added that additional spaces in there which goofed up the formatting in our code. Terraform fmt automatically runs and corrects these changes when the pre-commit hook runs, if it detects any formatting changes made, it will cause a failure like so:
Note: The
gofmtandgolinthooks display as skipped. This is because we did not modify any GO files. The pre-commit hooks only run against the files that have been modified and will only trigger against each one's respective file type.
Terraform fmt............................................................Failed
- hook id: terraform-fmt
- files were modified by this hook

variables.tf

Terraform validate.......................................................Passed
gofmt................................................(no files to check)Skipped
golint...............................................(no files to check)Skipped
If we look at our variables.tf file, we can see that terraform fmt has corrected our spaces. Now we can run our add and commit again to save all our changes finally. In the output we can see that both checks pass this time:
vsonline:~/workspace/terraform-azure-testing$ git add .
vsonline:~/workspace/terraform-azure-testing$ git commit -m "this is a test commit to trigger our pre-commit hooks"
Terraform fmt............................................................Passed
Terraform validate.......................................................Passed
gofmt................................................(no files to check)Skipped
golint...............................................(no files to check)Skipped
[master 9b67894] this is a test commit to trigger our pre-commit hooks
 1 file changed, 3 insertions(+), 2 deletions(-)
Now our commit is complete. With pre-commit hooks, we can catch bugs before they are committed to code. This process makes our commits much cleaner and prevents silly mistakes from getting committed to source control. It also helps out with code reviews by weeding out syntactical mistakes. We can catch errors quicker in development, where if we just made a change and ran Terraform apply to test, we would have to wait for that process to kick-off before we realized our configuration wasn't syntactically correct. We can iterate through our code quicker, which speeds up development. We could also perform static analysis testing within a CI/CD pipeline to analyze our Terraform plan.
Terraform validate is a basic static analysis test that we can perform. There are many other static analysis tools in the community that provide great benefits. Below are a few to note:
TFlint - Catch provider specific bugs like incorrect Azure VM sizes.
ConfTest - Analyze TF plan files and enforces defined policies and governance.
CheckOV - Security and compliance on the Terraform configuration level.
Step 4— Unit Testing
A unit test involves testing a single unit or individual component. This is the smallest testable piece of code that can be achieved. In Terraform, we could write tests that check the resource blocks in our Terraform configuration, however many in the Terraform community agree that it offers very little value. To write a valuable unit test, we need to communicate with the provider and stand up infrastructure, which by software development testing standards is technically not a true unit test. Its an integration test. In infrastructure development with Terraform, Gruntwork defines a unit test as testing a single module by itself.
We are going to write a unit test for our networking module. We will create a test that uses Terratest. Terratest is a GO library, built by Gruntwork, for testing Terraform. Our unit test will automatically deploy the Terraform code from the examples/network folder, test to ensure the desired outcome is achieved in Azure using the Azure API, then run a terraform destroy and tear down our test infrastructure at the end. The process is the same as if we were manually testing the module, except we are automating it.
First, we need to create a GO test file called terraform_azure_network_test.go. To make this file, right-click on the test folder in Visual Studio Codespace and select new file. Then name the file terraform_azure_network_test.go. Notice that file ends in _test.go. This format indicates that the file is a GO test file. Go will automatically see this file as a test file and execute it when we run our test command later. Now we will create the foundational code for our unit test.
Base Setup
Below is the code for a base test setup. I typically use this as a starting point for creating a test and then expand from there. Copy this code to the terraform_azure_network_test.go file:
package test

import (
  "github.com/gruntwork-io/terratest/modules/terraform"
  "testing"
)


func TestTerraformAzureNetworkingExample(t *testing.T) {
    t.Parallel()

    terraformOptions := &terraform.Options{
    }

    // At the end of the test, run `terraform destroy` to clean up any resources that were created
    defer terraform.Destroy(t, terraformOptions)

    // This will run `terraform init` and `terraform apply` and fail the test if there are any errors
    terraform.InitAndApply(t, terraformOptions)

}
Let's review all the parts and pieces of the code. Starting from the top we have package test declaring that the name of our package is test (which describes the purpose of our package):
package test
Next, we have our import declaration. The import declaration contains libraries or packages used in the Golang code. In Golang, libraries and packages are similar to modules in PowerShell. We can reference packages native to GO, or we can reference ones from source control repos like GitHub. We will be adding more libraries as we build out our unit test, for now, we are using the testing GO package and the github.com/gruntwork-io/terratest/modules/terraform library created by Gruntwork, which allows us to automate deploying code with Terraform during the test:
import (
  "github.com/gruntwork-io/terratest/modules/terraform"
  "testing"
)
After our import declaration, we have our testing function, which we called TestTerraformAzureNetworkingExample. Testing functions in GO have the following format; they also need to start with the word Test with a capital T followed by a capitalized letter after Test. We also are using t.Parallel() which indicates that we want to run this test in parallel with other tests. This parallel statement is a big deal because we can run multiple tests at once to test our module in several different ways:
func TestTerraformAzureNetworkingExample(t *testing.T) {
    t.Parallel()
Inside our function is a variable called terraformOptions. In GO, we can declare variables by using :=, which is different than in PowerShell, where we would use $variables = somevalue to declare a variable. Inside our variable declaration, we are using the github.com/gruntwork-io/terratest/modules/terraform library by referencing the package name of our library terraform. Then we are referencing the object inside the library called Options. This object is called a struct in Golang. A struct is similar to an object in PowerShell. We are essentially making an options object that we can add a collection of settings to and pass them through to Terraform. For now, we have no options defined in our struct, but in the next step, we will add them:
    terraformOptions := &terraform.Options{
    }
To finish out our testing function, we have two more lines of code. We are using the Terratest library again by referencing terraform. However, this time we are using the Destroy and InitAndApply functions from the Terratest library to perform the standard terraform init, apply, and destroy commands using our defined options in the terraformOptions variables. Note, the defer in GO is similar to a finally in PowerShell. The defer means GO will run this function at the end and will always run it even if the test were to error out:
defer terraform.Destroy(t, terraformOptions)

terraform.InitAndApply(t, terraformOptions)
Configure Terraform Options
Let's add some options to our terraformOptions variable. Our Terraform code in the examples/network folder has a variables.tf file that allows us to input several parameters and customize our network infrastructure when deployed:
variable "system" {
  type        = string
  description = "Name of the system or environment"
  default     = "terratest"
}
variable "location" {
  type        = string
  description = "Azure location of terraform server environment"
  default     = "westus2"
}
variable "vnet_address_space" {
  description = "Address space for Virtual Network"
}

variable "subnet_prefix" {
  type = string
  description = "Prefix of subnet address"
}
We need to define the values for these variables in our unit test and then pass them through to Terraform using the terraformOptions variable.
If you notice in our variables.tf file, we have a variable for location. For the location variable value, we want to be able to randomly test deploying into different regions that could be a possibility for us to use. This randomization allows us to have a thorough test since each test can deploy infrastructure into one of the listed regions. We will do this by providing a list of possible regions to deploy to in our test and then randomly pick one when the test runs. Doing this can also help sniff out any region-specific incidents occurring in Azure when we run our tests.
To create a list of regions, we are declaring a variable called regions and setting the variable type to []string which stands for a list of strings. Then, we are filling out that list with various regions in Azure that we want to test in:
    var regions = []string{
        "centralus",
        "eastus",
        "eastus2",
        "northcentralus",
        "southcentralus",
        "westcentralus",
        "westus",
        "westus2",
    }
Next, we create a variable for our regions that uses the function RandomString to pick a region from our list of regions randomly:
azureRegion := random.RandomString(regions)
Now that we have a variable created for the Terraform location input variable, we can configure the values for the rest of the input variables. For the system variable, we are going to use a similar concept that we used for the Azure region. We are going to generate a random name for the system name.
systemName := strings.ToLower(random.UniqueId())
This random name generation allows us to run this test several times at the same time without overlapping within the same resource name. It is useful when multiple people are adding features to a module on their branches and are running the tests. Next, we have hardcoded values for our virtual network address and subnet prefix:
vnetAddress := "10.0.0.0/16"
subnetPrefix := "10.0.0.0/24"
Now that we have values for our input variables, we need to pass them into terraformOptions. We add the TerraformDir argument to specify the directory of the code we want to execute is the code in the examples/network folder of our repo. Next, we are importing a map of variables, which allows us to pass values through to Terraform as if we were using the -var option in the command line. We are passing through all four variables that we just set up in GO:
terraformOptions := &terraform.Options{

        TerraformDir: "../examples/network",

        Vars: map[string]interface{}{
            "system":             systemName,
            "location":           azureRegion,
            "vnet_address_space": vnetAddress,
            "subnet_prefix":      subnetPrefix,
        },
    }
We need to add two more packages and libraries to our import declaration since we are now using them to create a random string for the system name and to choose our Azure region randomly:
import (
    "strings"
    "testing"


    "github.com/gruntwork-io/terratest/modules/random"
    "github.com/gruntwork-io/terratest/modules/terraform"
)
Now we have our test configured to run our Terraform code in the examples/network folder with values for the variables.tf file. At this point, our unit test in terraform_azure_network_test.go should look like the following:
package test

import (
    "strings"
    "testing"

    "github.com/gruntwork-io/terratest/modules/random"
    "github.com/gruntwork-io/terratest/modules/terraform"
)

// An example of how to test the Terraform module in examples/terraform-azure-example using Terratest.
func TestTerraformAzureNetworkingExample(t *testing.T) {
    t.Parallel()

    var regions = []string{
        "centralus",
        "eastus",
        "eastus2",
        "northcentralus",
        "southcentralus",
        "westcentralus",
        "westus",
        "westus2",
    }

    // Pick a random Azure region to test in.
    azureRegion := random.RandomString(regions)

    // Network Settings for Vnet and Subnet
    systemName := strings.ToLower(random.UniqueId())
    vnetAddress := "10.0.0.0/16"
    subnetPrefix := "10.0.0.0/24"

    terraformOptions := &terraform.Options{

        // The path to where our Terraform code is located
        TerraformDir: "../examples/network",

        // Variables to pass to our Terraform code using -var options
        Vars: map[string]interface{}{
            "system":             systemName,
            "location":           azureRegion,
            "vnet_address_space": vnetAddress,
            "subnet_prefix":      subnetPrefix,
        },
    }

    // At the end of the test, run `terraform destroy` to clean up any resources that were created
    defer terraform.Destroy(t, terraformOptions)

    // This will run `terraform init` and `terraform apply` and fail the test if there are any errors
    terraform.InitAndApply(t, terraformOptions)
}
Add In The Tests
Now we are ready to add in some tests. We want to write tests that are meaningful and don't want the process to become a burden to maintain. Determining if a test is meaningful depends on the situation and environment. A meaningful test for someone else doesn't mean it is meaningful for your case. For this example, we are going to keep things simple. We want to test that our virtual network subnet is truly associated with an NSG after our Terraform example is deployed. This test ensures that any change to our module in the future won't interrupt this desired outcome, which could result in a potential security risk if the NSG was not assigned to the subnet.
Our Terraform code in the examples/network folder contains the following in the output.tf file. These are values we want to use to perform our tests:
output "vnet_rg" {
  description = "Location of vnet"
  value       = module.vnet.vnet_rg
}

output "subnet_id" {
  description = "Subnet ID"
  value       = module.vnet.subnet_id
}

output "nsg_name" {
  description = "Name of vnet Security Group"
  value       = module.nsg.nsg_name
}
Note: We want to make sure our modules are not too large to be tested. We don't want a 10,000 line module because it's not possible to unit test. The more you write tests for your modules, the more structured your modules become for testing. This practice becomes a great benefit as it allows for a more stable and better structured Terraform code.
The terraform.Output function allows us to collect output values from our Terraform deployment after the init and apply has completed. We are referencing the terraformOptions variable which contains our Terraform environment settings. Also we include each output value from output.tf. Then we save each output value into a variable in GO:
vnetRG := terraform.Output(t, terraformOptions, "vnet_rg")
subnetID := terraform.Output(t, terraformOptions, "subnet_id")
nsgName := terraform.Output(t, terraformOptions, "nsg_name")
Now we will use the output variables we created to directly check our Azure environment using the Azure API and confirm that the NSG we create is assigned to the subnet. We perform a lookup of all subnet IDs assigned to the NSG using the azure.GetAssociationsforNSG function, which requires the virtual network resource group and NSG name. Then we run a test using the assert GO package, which allows us to compare all the resources IDs in our nsgAssociations variable with the subnetID variable, which contains the output information from our Terraform code. This comparison allows us to take the subnet ID output from Terraform and look into Azure using the API and verify that it's assigned to the NSG we created:
    // Look up Subnet and NIC ID associations of NSG
    nsgAssociations := azure.GetAssociationsforNSG(t, vnetRG, nsgName, "")

    //Check if subnet is associated with NSG
    assert.Contains(t, nsgAssociations, subnetID)
If the subnet ID is in the list of NSG associations, our test will pass, if it is missing, the test will fail.
Lastly, we will need to add two more libraries to our import declaration. We are using assert to perform a comparison and validate our subnet ID is associated with the NSG, and we are using the function azure.GetAssociationsforNSG from the GO library aztest. The azure.GetAssociationsforNSG function allows us to quickly authenticate with our Azure environment and look up assigned resources to an NSG. It is just a helper function for working with the Azure GO SDK which communicates with the Azure API:
Note: The Azure test library in Terratest right now is fairly limited compared to AWS. Gruntwork has been heavily focused on building out the AWS and GCP modules. In the current state, most companies are just making their own private libraries for testing their resources in Azure. To help people get started writing tests for Terraform code in Azure, I have expanded upon the Terratest Azure testing functions and created a public GO library called AzTest, feel free to use it.
import (
    "strings"
    "testing"

    "github.com/allanore/aztest/modules/azure"
    "github.com/gruntwork-io/terratest/modules/random"
    "github.com/gruntwork-io/terratest/modules/terraform"
    "github.com/stretchr/testify/assert"
)
Now that we have our test written, our entire unit test is as follows. Copy the following to terraform_azure_network_test.go:
package test

import (
    "strings"
    "testing"

    "github.com/allanore/aztest/modules/azure"
    "github.com/gruntwork-io/terratest/modules/random"
    "github.com/gruntwork-io/terratest/modules/terraform"
    "github.com/stretchr/testify/assert"
)

// An example of how to test the Terraform module in examples/terraform-azure-example using Terratest.
func TestTerraformAzureNetworkingExample(t *testing.T) {
    t.Parallel()

    var regions = []string{
        "centralus",
        "eastus",
        "eastus2",
        "northcentralus",
        "southcentralus",
        "westcentralus",
        "westus",
        "westus2",
    }

    // Pick a random Azure region to test in.
    azureRegion := random.RandomString(regions)

    // Network Settings for Vnet and Subnet
    systemName := strings.ToLower(random.UniqueId())
    vnetAddress := "10.0.0.0/16"
    subnetPrefix := "10.0.0.0/24"

    terraformOptions := &terraform.Options{

        // The path to where our Terraform code is located
        TerraformDir: "../examples/network",

        // Variables to pass to our Terraform code using -var options
        Vars: map[string]interface{}{
            "system":             systemName,
            "location":           azureRegion,
            "vnet_address_space": vnetAddress,
            "subnet_prefix":      subnetPrefix,
        },
    }

    // At the end of the test, run `terraform destroy` to clean up any resources that were created
    defer terraform.Destroy(t, terraformOptions)

    // This will run `terraform init` and `terraform apply` and fail the test if there are any errors
    terraform.InitAndApply(t, terraformOptions)

    // Run `terraform output` to get the value of an output variable
    vnetRG := terraform.Output(t, terraformOptions, "vnet_rg")
    subnetID := terraform.Output(t, terraformOptions, "subnet_id")
    nsgName := terraform.Output(t, terraformOptions, "nsg_name")

    // Look up Subnet and NIC ID associations of NSG
    nsgAssociations := azure.GetAssociationsforNSG(t, vnetRG, nsgName, "")

    //Check if subnet is associated with NSG
    assert.Contains(t, nsgAssociations, subnetID)

}
Whew! We just built our first unit test in GO. Now, let's run it. First, we need to authenticate to Azure. The easiest way is to use Azure CLI. Type in the following command in the terminal while in the ~/workspace/terraform-azure-testing/test directory. Log in with your Azure account:
az login
Now, we need to set the ARM_SUBSCRIPTION_ID environment variable which is used for several functions in Terratest when deploying to Azure:
export ARM_SUBSCRIPTION_ID=$(az account show | jq '.id' -r)
Once logged in with Azure CLI, we need to download all of our dependencies for our tests. The dependencies include the packages that we specified during the import declaration. This concept is similar to running install-module in PowerShell to install all the external modules used in a script. Type the following command using go get while in the test directory:
go get -t -v
We see the libraries and packages download. This process may take a minute. Once complete, we are ready to run our test. To kick off the test, type in the following command. We are using the go test command with -v to specify verbose output. Also, we are specifying the GO test file that we just created:
go test -v terraform_azure_network_test.go
We will start to see Terraform executing our example code in the output display:
=== RUN   TestTerraformAzureNetworkingExample
=== PAUSE TestTerraformAzureNetworkingExample
=== CONT  TestTerraformAzureNetworkingExample
TestTerraformAzureNetworkingExample 2020-05-09T14:30:17Z retry.go:72: terraform [init -upgrade=false]
TestTerraformAzureNetworkingExample 2020-05-09T14:30:17Z command.go:86: Running command terraform with args [init -upgrade=false]
TestTerraformAzureNetworkingExample 2020-05-09T14:30:17Z command.go:168: Initializing modules...
TestTerraformAzureNetworkingExample 2020-05-09T14:30:17Z command.go:168:
TestTerraformAzureNetworkingExample 2020-05-09T14:30:17Z command.go:168: Initializing the backend...
TestTerraformAzureNetworkingExample 2020-05-09T14:30:17Z command.go:168:
TestTerraformAzureNetworkingExample 2020-05-09T14:30:17Z command.go:168: Initializing provider plugins...
TestTerraformAzureNetworkingExample 2020-05-09T14:30:19Z command.go:168:
TestTerraformAzureNetworkingExample 2020-05-09T14:30:19Z command.go:168: Terraform has been successfully initialized!
TestTerraformAzureNetworkingExample 2020-05-09T14:30:19Z command.go:168:
Don't hit CTRL + C during the test; this will prevent resources from being cleaned up in Azure. If the test should error out, the defer stage runs and executes Terraform destroy to remove anything that was provisioned.
The test is executing the Terraform code in the examples/network folder, running a test to ensure that the NSG is associated with the subnet, and running Terraform destroy at the end. Once the test run completes, we see the result like below:
TestTerraformAzureNetworkingExample 2020-05-09T14:32:01Z command.go:168: azurerm_resource_group.rg: Destruction complete after 47s
TestTerraformAzureNetworkingExample 2020-05-09T14:32:01Z command.go:168:
TestTerraformAzureNetworkingExample 2020-05-09T14:32:01Z command.go:168: Destroy complete! Resources: 7 destroyed.
--- PASS: TestTerraformAzureNetworkingExample (103.78s)
PASS
ok      command-line-arguments  103.783s
Now our unit test is complete! In the next step, we will add an integration test.
Step 5 — Integration Testing
An integration test with infrastructure code is defined as testing the functionality of two components interacting together. This could be a Webapp with a SQL database or two microservices interacting with each other. For demonstration purposes, we are going to keep it very simple and stand up two virtual networks and test that we can peer them together. The example code for each vnet is in the examples/vnet-peering directory. Our integration test will execute the Terraform code in vnet1 to deploy the first virtual network. Once complete, the test will execute the code in vnet2 to deploy a second virtual network and peer them together. We will then write a test that validates that the peering was successful:
examples
    └──networking
    └──vnet-peering
      └─vnet1
          └─main.tf
          └─output.tf
          └─variables.tf
      └─vnet2
          └─main.tf
          └─output.tf
          └─variables.tf
In our test directory, let's create another GO test file called terraform_azure_network_peering_test.go.
Base Test
We will copy the following code below and paste it in as our base test configuration. Notice we now have two sets of terraform.options as well as two sets of the destroy and apply steps:
package test

import (

    "testing"


    "github.com/gruntwork-io/terratest/modules/terraform"
)

// An example of how to test the Terraform module in examples/terraform-azure-example using Terratest.
func TestTerraformAzureNetworkingPeeringExample(t *testing.T) {
    t.Parallel()


    vnet1Opts := &terraform.Options{

    }

    // Deploy VNet1
    defer terraform.Destroy(t, vnet1Opts)
    terraform.InitAndApply(t, vnet1Opts)

    vnet2Opts := &terraform.Options{

    }

    // Deploy VNet2
    defer terraform.Destroy(t, vnet2Opts)
    terraform.InitAndApply(t, vnet2Opts)
}
Add in Terraform Options
Next, we will add in the Terraform options. We include the steps for randomized Azure regions as well as using random system names for our virtual networks. The big difference from our unit test is that we are passing the Terraform output values after deploying VNet1 to the terraform.options of VNet2, this allows us to configure the peering between them:
package test

import (
    "strings"
    "testing"

    "github.com/gruntwork-io/terratest/modules/random"
    "github.com/gruntwork-io/terratest/modules/terraform"
)

// An example of how to test the Terraform module in examples/terraform-azure-example using Terratest.
func TestTerraformAzureNetworkingPeeringExample(t *testing.T) {
    t.Parallel()

    var regions = []string{
        "centralus",
        "eastus",
        "eastus2",
        "northcentralus",
        "southcentralus",
        "westcentralus",
        "westus",
        "westus2",
    }

    // Pick a random Azure region to test in.
    azureRegion := random.RandomString(regions)

    // Network Settings for Vnet and Subnet
    vnet1Sysname := strings.ToLower(random.UniqueId())
    vnet1Address := "10.0.0.0/16"
    vnet1SubnetPrefix := "10.0.0.0/24"
    vnet2Sysname := strings.ToLower(random.UniqueId())
    vnet2Address := "10.1.0.0/16"
    vnet2SubnetPrefix := "10.1.0.0/24"

    vnet1Opts := &terraform.Options{

        // The path to where our Terraform code is located
        TerraformDir: "../examples/vnet-peering/vnet1",

        // Variables to pass to our Terraform code using -var options
        Vars: map[string]interface{}{
            "system":             vnet1Sysname,
            "location":           azureRegion,
            "vnet_address_space": vnet1Address,
            "subnet_prefix":      vnet1SubnetPrefix,
        },
    }

    // Deploy VNet1
    defer terraform.Destroy(t, vnet1Opts)
    terraform.InitAndApply(t, vnet1Opts)
    vnetOutRG := terraform.Output(t, vnet1Opts, "vnet_rg")
    vnetOutName := terraform.Output(t, vnet1Opts, "vnet_name")

    vnet2Opts := &terraform.Options{

        // The path to where our Terraform code is located
        TerraformDir: "../examples/vnet-peering/vnet2",

        // Variables to pass to our Terraform code using -var options
        Vars: map[string]interface{}{
            "system":             vnet2Sysname,
            "location":           azureRegion,
            "vnet_address_space": vnet2Address,
            "subnet_prefix":      vnet2SubnetPrefix,
            "peer_vnet_rg":       vnetOutRG,
            "peer_vnet_name":     vnetOutName,
        },
    }

    // Deploy VNet2
    defer terraform.Destroy(t, vnet2Opts)
    terraform.InitAndApply(t, vnet2Opts)
}
Add In The tests
Next, we will add in the tests. We are collecting the resource group and virtual network name from the output of deploying VNet2. Then we are using those values to look up the virtual network with the azure.GetVnetbyName function and storing them in the vnet2Properties variable. We are taking the virtual network peering properties from the vnet2Properties variable and using a for loop in GO to loop through all of the values within the VirtualNetworkPeerings property, which contains a list of all peerings made on the virtual network. We are then validating that all peerings in that property are in a Succeeded state, ensuring that they peered properly:
    // Collect RG and Virtual Network name from VNet2 Output
    vnet2RG := terraform.Output(t, vnet2Opts, "vnet_rg")
    vnet2Name := terraform.Output(t, vnet2Opts, "vnet_name")

    // Look up Virtual Network 2 by Name
    vnet2Properties := azure.GetVnetbyName(t, vnet2RG, vnet2Name, "")

    //Check if VNet Peering in VNet2 Provisioned Successfully
    for _, vnet := range *vnet2Properties.VirtualNetworkPeerings {
        assert.Equal(t, "Succeeded", string(vnet.VirtualNetworkPeeringPropertiesFormat.ProvisioningState), "Check if Peerings provisioned successfully")
    }
Our final integration test file should look like the following:
package test

import (
    "strings"
    "testing"

    "github.com/allanore/aztest/modules/azure"
    "github.com/gruntwork-io/terratest/modules/random"
    "github.com/gruntwork-io/terratest/modules/terraform"
    "github.com/stretchr/testify/assert"
)

// An example of how to test the Terraform module in examples/terraform-azure-example using Terratest.
func TestTerraformAzureNetworkingPeeringExample(t *testing.T) {
    t.Parallel()

    var regions = []string{
        "centralus",
        "eastus",
        "eastus2",
        "northcentralus",
        "southcentralus",
        "westcentralus",
        "westus",
        "westus2",
    }

    // Pick a random Azure region to test in.
    azureRegion := random.RandomString(regions)

    // Network Settings for Vnet and Subnet
    vnet1Sysname := strings.ToLower(random.UniqueId())
    vnet1Address := "10.0.0.0/16"
    vnet1SubnetPrefix := "10.0.0.0/24"
    vnet2Sysname := strings.ToLower(random.UniqueId())
    vnet2Address := "10.1.0.0/16"
    vnet2SubnetPrefix := "10.1.0.0/24"

    vnet1Opts := &terraform.Options{

        // The path to where our Terraform code is located
        TerraformDir: "../examples/vnet-peering/vnet1",

        // Variables to pass to our Terraform code using -var options
        Vars: map[string]interface{}{
            "system":             vnet1Sysname,
            "location":           azureRegion,
            "vnet_address_space": vnet1Address,
            "subnet_prefix":      vnet1SubnetPrefix,
        },
    }

    // Deploy VNet1
    defer terraform.Destroy(t, vnet1Opts)
    terraform.InitAndApply(t, vnet1Opts)
    vnetOutRG := terraform.Output(t, vnet1Opts, "vnet_rg")
    vnetOutName := terraform.Output(t, vnet1Opts, "vnet_name")

    vnet2Opts := &terraform.Options{

        // The path to where our Terraform code is located
        TerraformDir: "../examples/vnet-peering/vnet2",

        // Variables to pass to our Terraform code using -var options
        Vars: map[string]interface{}{
            "system":             vnet2Sysname,
            "location":           azureRegion,
            "vnet_address_space": vnet2Address,
            "subnet_prefix":      vnet2SubnetPrefix,
            "peer_vnet_rg":       vnetOutRG,
            "peer_vnet_name":     vnetOutName,
        },
    }

    // Deploy VNet2
    defer terraform.Destroy(t, vnet2Opts)
    terraform.InitAndApply(t, vnet2Opts)

    // Collect RG and Virtual Network name from VNet2 Output
    vnet2RG := terraform.Output(t, vnet2Opts, "vnet_rg")
    vnet2Name := terraform.Output(t, vnet2Opts, "vnet_name")

    // Look up Virtual Network 2 by Name
    vnet2Properties := azure.GetVnetbyName(t, vnet2RG, vnet2Name, "")

    //Check if VNet Peering in VNet2 Provisioned Successfully
    for _, vnet := range *vnet2Properties.VirtualNetworkPeerings {
        assert.Equal(t, "Succeeded", string(vnet.VirtualNetworkPeeringPropertiesFormat.ProvisioningState), "Check if Peerings provisioned successfully")
    }
}
Now, let's run our integration test. No need to download the dependencies because we downloaded them already when we ran the unit test. Run the following command in the terminal specifying the terraform_azure_network_peering_test.go file:
go test -v terraform_azure_network_peering_test.go
We should see both virtual networks get deployed, followed by our test to verify the peering state between them. Then a terraform destroy is ran to tear down our test infrastructure. At the end we should see that our test has passed:
TestTerraformAzureNetworkingPeeringExample 2020-05-10T13:22:40Z command.go:168: azurerm_resource_group.rg: Destruction complete after 48s
TestTerraformAzureNetworkingPeeringExample 2020-05-10T13:22:41Z command.go:168:
TestTerraformAzureNetworkingPeeringExample 2020-05-10T13:22:41Z command.go:168: Destroy complete! Resources: 7 destroyed.
--- PASS: TestTerraformAzureNetworkingPeeringExample (347.89s)
PASS
ok      command-line-arguments  347.890s
For an extra challenge, we could run both tests at the same time using the following command. Because we have t.Parallel() in our test functions, each test can be run in parallel. This is incredibly powerful because we can test our modules in several different ways at the same time:
Note: In a typical continuous integration pipeline for our module, we would ideally be running all tests in our test folder at the same time when we commit our changes to the module repo. This allows us to get a full amount of test coverage against our module.
go test -v
In the next step we go over how to perform end to end testing.
Step 6 — End-to-End Testing
End-to-end testing involves standing up the entire application composed of multiple modules. This can take hours, depending on how big the application is, which can make it incredibly time-consuming to run end-to-end tests. If the application takes a significant amount of time to deploy, it is recommended to deploy a copy of the entire application in a separate test environment and keep it deployed for a specific amount of time. Then, when we make a change to any of the modules in the application, we can re-deploy that module out to the application and then test the application functionality as a whole with automated tests.
Conclusion
As you can see, writing tests can take a bit of work. Because IaC is such a newly adopted concept, the tooling and concepts for writing tests can be awkward and complex. However, the rewards are worth it. A module with thorough tests will have much more stability and provides greater confidence when teams are executing that code.
Infrastructure code typically "rots" quickly. There are constantly new updates made to Azure, Terraform providers, and Terraform itself, which can make it a full-time task to ensure modules are always working as they should. To help with this, consider scheduling tests to run nightly to catch these types of bugs as early as possible.
It is strongly encouraged to run your tests in an Azure subscription separate from production and even development. When developing and testing modules, there is always a risk of destroying other resources. Also, this allows for safely configuring automated cleanup on the testing subscription to ensure any tests that bombed-out arent leaving remnants of infrastructure.
There is also the concept of test-driven development (TDD), which is a software development practice where tests are written first before the code is written. This is not very common in the infrastructure development world yet because of its infancy stage. However, IaC veterans like Kief Morris are huge advocates for TDD and describe that performing TDD for infrastructure code drives better design as it requires one to think through the outcome and function of their infrastructure when developing.
Tests for infrastructure code are critical to the stability of the infrastructure. Jacob Kaplan-Moss, software developer and co-creator of Django said it best, "Code without tests is broken as designed". Writing tests for IaC can be time-consuming and difficult because of the immaturity of the tooling; however, it is an essential piece of infrastructure development that shouldn't be overlooked.
In the next article, we will complete out this series by reviewing best practices when using Terraform.

Top comments (2)
Hi I am new to this testing concept in terraform. It seems very interesting subject and thread. However, I am a little bit confused, is this for testing terraform or testing the GO application as well?
2nd, After running
pre-commit installI get a message3rd, Running a commit it displays
Also, whenever I modify 1 file such as variables.tf, then do
git add, then check withgit status, I get a lot of files from go have been addedThanks in adavance for your help.
Really great insights, thanks a lot for sharing @lukeorellana