


The resmush package has recently been accepted on CRAN! This small utility package allows for the optimization (i.e., compression) of local and online images using reSmush.it.
You can install resmush from CRAN with:
install.packages("resmush")
This post was featured in episode 152 of R Weekly Highlights.
What is reSmush.it?
reSmush.it is a free online API that provides image optimization and has been implemented in WordPress, Drupal and Magento. Some features of reSmush.it include:
- Free optimization services, no API key required.
- Optimization of local and online images.
- Supported image file formats: PNG, JPG/JPEG, GIF, BMP, TIFF, WebP.
- Maximum image size: 5 MB.
- Compression using several algorithms:
Why the resmush package?
One of the main reasons I developed resmush is because I usually include precomputed vignettes with my packages (see tidyterra as an example). I found that the plots created on CRAN with the standard configuration (i.e., not precomputed vignettes but built on CRAN itself) were not very satisfying. In some of the packages I developed, especially those related to mapping, they didn’t do justice to the actual results when a user runs them.
Precomputing vignettes has the drawback of producing higher-quality images at the expense of size. To avoid exceeding CRAN’s 5 MB maximum size policy, I developed resmush, which enables me to reduce the size of the images without a significant loss in quality.
Another use case for resmush is optimizing images in the context of web page development and SEO optimization. For example, I optimized all the images on this blog using resmush_dir(), which is a shorthand for optimizing all files in a specific folder.
There are other alternatives that I discuss at the end of this post, but briefly, the reSmush.it API works quickly with minimal configuration for a wide range of formats without needing an API key.
Using the resmush package
With local files
Let’s present an example of how a local file can be optimized. First, we create a large plot with ggplot2.
library(tidyterra)
library(ggplot2)
library(terra)
library(maptiles)

cyl <- vect(system.file("extdata/cyl.gpkg", package = "tidyterra")) %>%
  project("EPSG:3857")
cyl_img <- get_tiles(cyl, "Esri.WorldImagery", zoom = 8, crop = TRUE)
cyl_gg <- autoplot(cyl_img, maxcell = Inf) +
  geom_spatvector(data = cyl, alpha = 0.3)

cyl_gg

Original satellite image before optimization.
# And we save it for resmushing
ggsave("cyl.png", width = 5, height = 0.7 * 5)
The file has a size of 1.7 MB. We can use resmush_file() to reduce it:
library(resmush)
resmush_file("cyl.png")
#> ══ resmush summary ══════════════════════════════════════════
#> ℹ Input: 1 file with size 1.7 Mb
#> ✔ Success for 1 file: Size now is 762.2 Kb (was 1.7 Mb). Saved 948.9 Kb (55.46%).
#> See result in directory '.'.

# Check
png::readPNG("cyl_resmush.png") %>%
  grid::grid.raster()

Satellite image after optimization with resmush_file().
By default, resmush_file() and resmush_dir() do not overwrite the original file, although this behavior may be modified with the overwrite = TRUE parameter. Now, the optimized file ("cyl_resmush.png") has a size of 762.2 kB.
Let’s compare the results side-by-side:
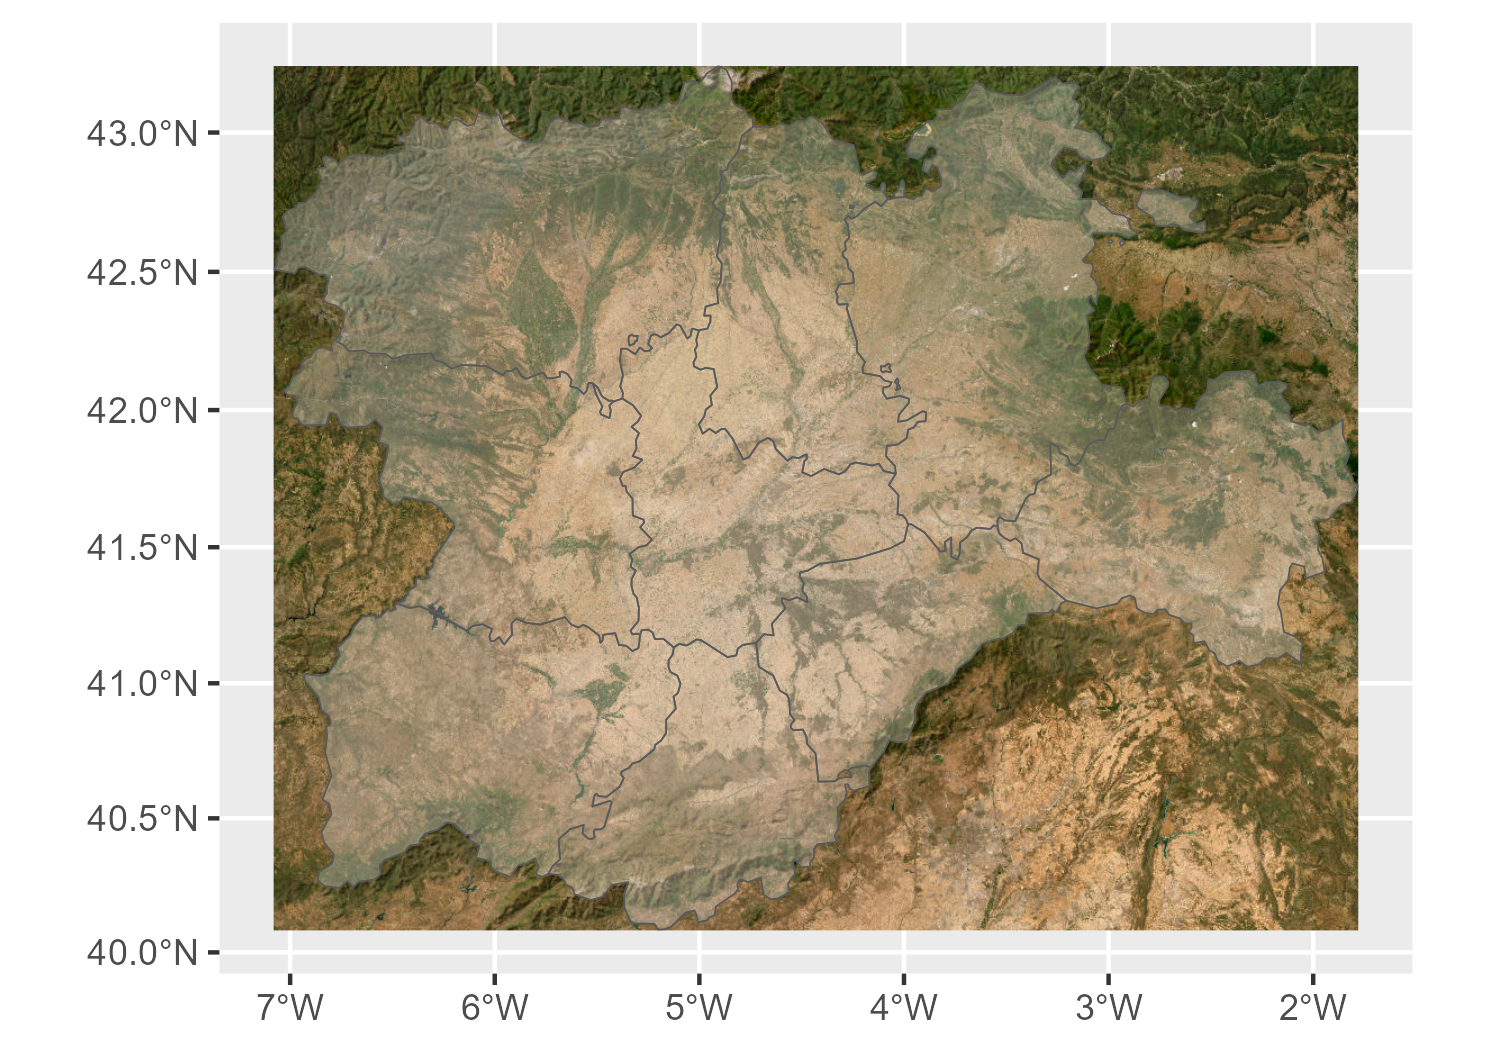
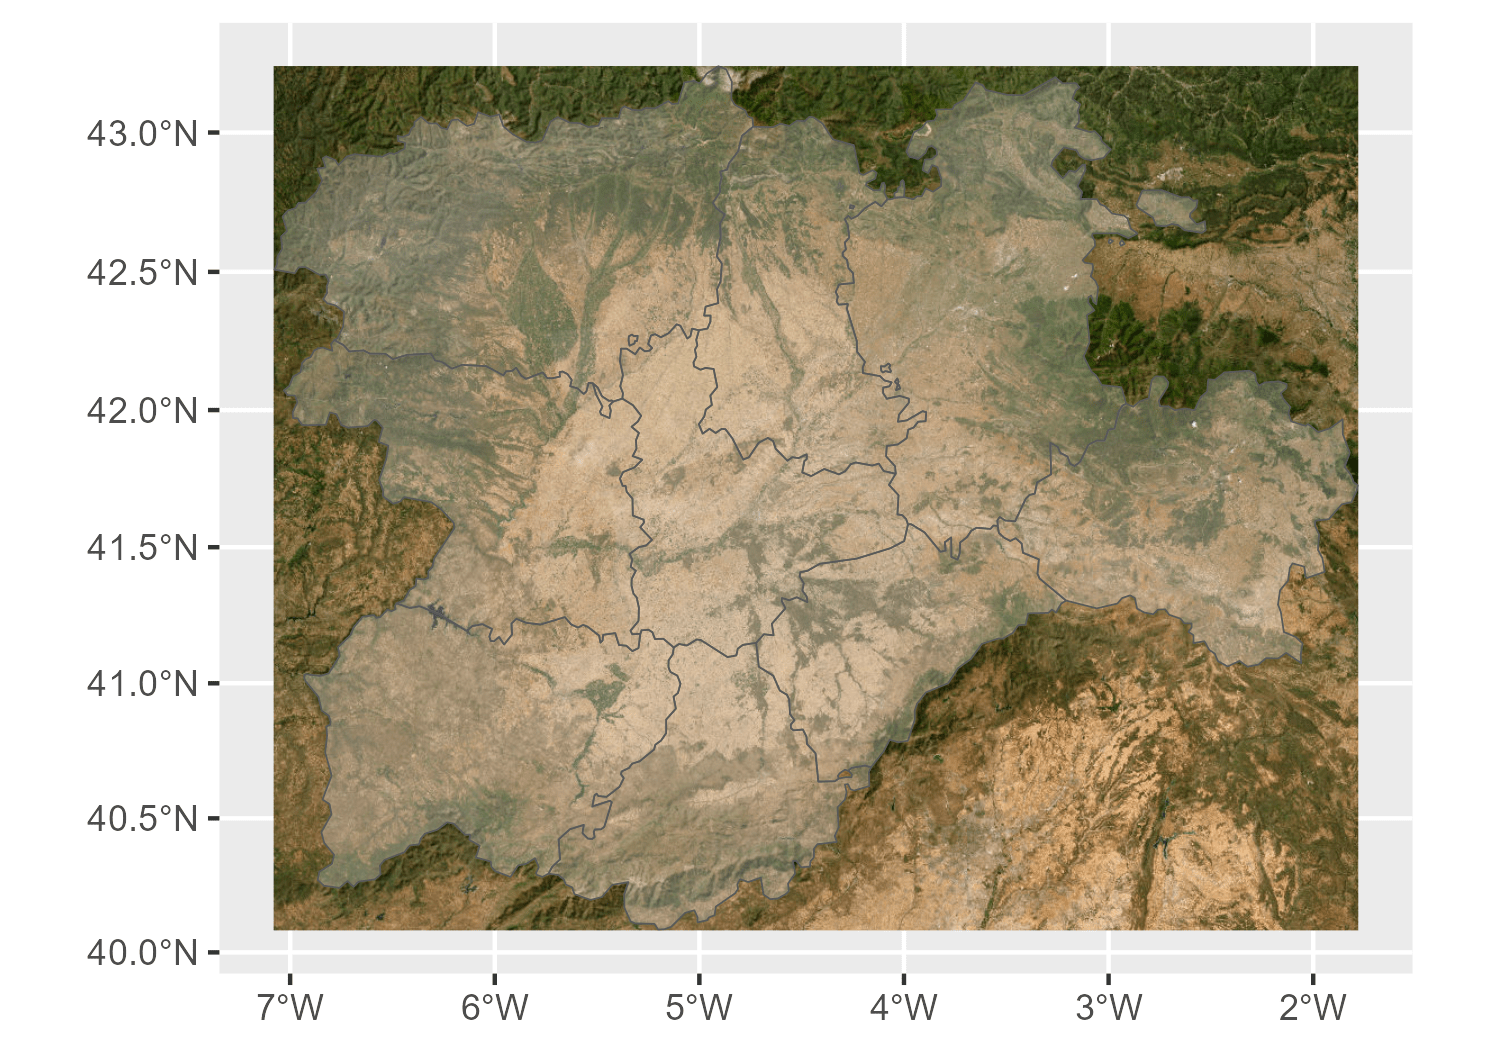
The original image (left/top) is 1.7 MB. The optimized image (right/bottom) is 762.2 kB, a 55.46% reduction in file size. Click either image to enlarge.
We can verify that the image has been compressed without reducing its dimensions.
size_src <- file.size("cyl.png") %>%
  `class<-`("object_size") %>%
  format(units = "auto")
size_dest <- file.size("cyl_resmush.png") %>%
  `class<-`("object_size") %>%
  format(units = "auto")

dim_src <- dim(png::readPNG("cyl.png"))[1:2] %>% paste0(collapse = "x")
dim_dest <- dim(png::readPNG("cyl_resmush.png"))[1:2] %>% paste0(collapse = "x")

data.frame(
  source = c("original file", "compressed file"),
  size = c(size_src, size_dest),
  dimensions = c(dim_src, dim_dest)
) %>%
  knitr::kable()
| source | size | dimensions |
|---|---|---|
| original file | 1.7 Mb | 1050x1500 |
| compressed file | 762.2 Kb | 1050x1500 |
With online files
We can also optimize online files with resmush_url() and download them to disk. In this example, I demonstrate a feature of all the functions in resmush: they return an invisible data frame with a summary of the process.
url <- "https://dieghernan.github.io/assets/img/samples/sample_1.3mb.jpg"

# Invisible data frame
dm <- resmush_url(url, "sample_optimized.jpg", report = FALSE)
knitr::kable(dm)
| src_img | dest_img | src_size | dest_size | compress_ratio | notes | src_bytes | dest_bytes |
|---|---|---|---|---|---|---|---|
| https://dieghernan.github.io/assets/img/samples/sample_1.3mb.jpg | sample_optimized.jpg | 1.3 Mb | 985 Kb | 26.63% | OK | 1374693 | 1008593 |


The original image (left/top) is 1.3 MB. The optimized image (right/bottom) is 985 kB, a 26.63% reduction in file size. Click either image to enlarge.
Other alternatives
There are other alternatives for optimizing images with R, but first…
- One of the many packages developed by Yihui is xfun, which includes the following functions for optimizing image files:
-
xfun::tinify()is similar toresmush_file()but uses TinyPNG. An API key is required. -
xfun::optipng()compresses local files with OptiPNG (which needs to be installed locally).
-
- tinieR package by jmablog. An R package that provides a full interface with TinyPNG.
-
optout package by @coolbutuseless. Similar to
xfun::optipng()with additional options. Requires additional software to be installed locally.
| tool | CRAN | Additional software? | Online? | API Key? | Limits? |
|---|---|---|---|---|---|
xfun::tinify() |
Yes | No | Yes | Yes | 500 files/month (Free tier) |
xfun::optipng() |
Yes | Yes | No | No | No |
| tinieR | No | No | Yes | Yes | 500 files/month (Free tier) |
| optout | No | Yes | No | No | No |
| resmush | Yes | No | Yes | No | Max size 5Mb |
| tool | png | jpg | gif | bmp | tiff | webp | |
|---|---|---|---|---|---|---|---|
xfun::tinify() |
✅ | ✅ | ❌ | ❌ | ❌ | ✅ | ❌ |
xfun::optipng() |
✅ | ❌ | ❌ | ❌ | ❌ | ❌ | ❌ |
| tinieR | ✅ | ✅ | ❌ | ❌ | ❌ | ✅ | ❌ |
| optout | ✅ | ✅ | ❌ | ❌ | ❌ | ❌ | ✅ |
| resmush | ✅ | ✅ | ✅ | ✅ | ✅ | ✅ | ❌ |
Additionally, if you host your projects on GitHub, you can try Imgbot, which is free for open-source projects. Imgbot provides automatic optimization for files in your repositories, and the optimized files will be included in specific pull requests before merging into your work.


Top comments (0)