
We all know testing is very important for software. And when it comes to UI testing, over last few years, many different solutions changed. Selenium is still big, Airbnb Enzyme was quite big, there are Mocha, Chai, Jasmine etc. Lately, I have been looking into and using more Cypress. In this post I will explain initial Cypress setup and discuss some benefits, but also challenges when using Cypress. To keep it small and simple, I will not be covering setup for reports or actual writing tests, that will be covered in different post. Only basic installation and running.
About Cypress
Cypress is one of newer solutions for UI applications testing. What makes it different from other solutions is that it is one for all. It comes bundled with tools like Mocha, Chai and Sinon. This means that once you add it, you can start writing both unit and e2e tests without installing anything else. Another, huge difference between Cypress and other solutions is that for e2e tests, it does not use Selenium. This means no known Selenium issues. Cypress runs in browser along with your application, so it has access to all native browser APIs. There are many other good sides of Cypress, but in my opinion, these are main ones. These are the reason why it is so easy to start and write tests.
Installation
Cypress can be installed from npm by executing following command in your CLI tool:
npm install cypress
At the moment of writing, current version of Cypress is 4.0.1.
Running Cypress
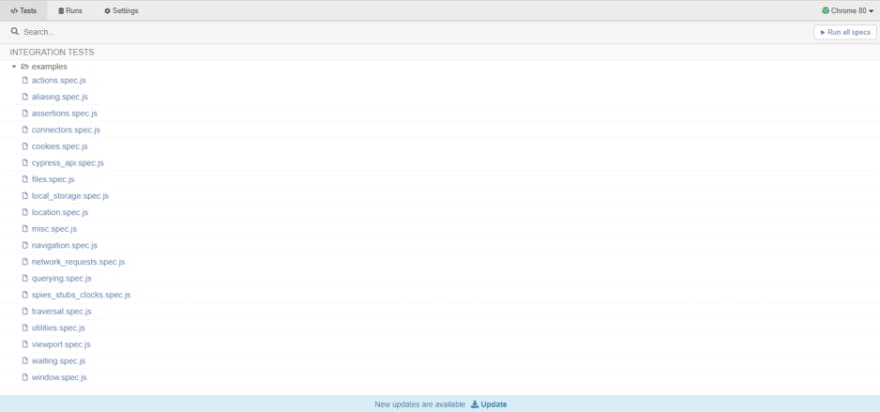
Cypress can be run in two ways, headed or headless. Difference is that if run headed, new window will be opened where you will be able to choose tests you want to run and in which browser.
Headless, will just run all tests without opening a full browsers window.
To run those you can use following commands, that you can add to your package.json scripts:
Headed:
cypress open
Headless:
cypress run
There are number of options you can pass to those commands. Following are some that I use more often:
--browser
Defines which browser to run tests in
cypress run --browser chrome
--headless
If you execute cypress run by default it runs tests headless in electron, but if you run same command with browser flag, it will run it headed. With passing extra --headless you specify to run that browser headless.
cypress run --headless --browser chrome
--spec
You can use this flag to run only run some tests, if you don’t want to run all of them. Do keep in mind, location of spec is from cypress generated folder.
cypress run --spec folder/test.spec.js
--config-file
Configuration can also be set in cypres.json config file. If you have multiple configurations, you can choose which you want with this flag.
cypress run --config-file test/cypress.json
Cypress folder
During first run, cypress will generate some files. All of them are going to be in cypress folder in root of your project. They are grouped in multiple folders. Some of them are:
Integration
This is where your tests are going to be located. Cypress initially generates many example tests for different scenarios. They are good to examine and use as reference point, but also, you are safe to delete them.
Plugins
This is where you can change internal process of cypress. While that might sound bad, think of it as adding support for Typescript or React. This is the place to do it.
Support
Here you would add some common stuff for your test. Do you want to modify existing cypress command, add new one or just define some steps to be taken before each test suit, this is where it would be added.
ESLint
If you are using ESLint, you might need to do some extra configuration to prevent linting errors. First one, if you don’t want to run linting on cypress folder, as you probably don’t want to do on plugins and support files, you should add them it to .eslintignore file.
Further than, you will have to add cypress eslint plugin to .eslintrc file. This plugin you can get by installing eslint-plugin-cypress package from npm.
npm install eslint-plugin-cypress
Last step in this is to add cy to list of globals.
globals: {
  cy: true
}
Video and snapshots
One great feature of Cypress is video generation. While it is running tests, it records a video. Like that you can replay video and check what happened during execution. And if some test fails, it will make screenshot of that moment. This helps you find problems easier.
Possible limitations
Just like any other library, Cypress has some limitations. I mentioned it not being based on Selenium as good thing. And it is. But it can be also a problem. While it may not share same issues with Selenium, it can have different ones. I, for example, encouraged issue with accessing iframes, especially cross-domain one. There are solutions in git issues, so it most definitely is possible, but it was a bit harder to track it all than with Selenium which has been used so long that most of things have solution somewhere.
Another problem is browser support. Cypress v4 was released just few days before writing this text and support for Firefox and Edge has been added. But before that, there was not, and only out-of-box support was for Chrome and Electron.
There was also problem with reports. When using mochawesome, generating reports fails, and even though it should have been solved in v4, it was not, and solution was to add mocha v^5.2.0 to project dependencies. This is not a huge problem, especially because once you set it up you can get a lot of nice reports, but it is something to think about.
Another important issue is mocking network. Cypress does have server function which you can use for that. But it works only on XMLHttpRequest. If you are using FetchAPI it won’t work. However, again, it isn’t deal breaking issue as you do have access to window object, and you can stub fetch like that.
Conclusion
This was just post on setting up Cypress. But I also touched some pros and cons on it. And yes, there are cons, however, community and support from Cypress is very active. And in my opinion, it is currently easiest and most complete solution to use
Project
Code with initial setup for Cypress and some demo usages can be found in my Github repository.

Top comments (0)