Hello folks.
In the last couple of weeks I've seen more and more content being posted about Rails (possibly because Hey officially launched) as well as Stimulus and Stimulus Reflex.
I've used Stimulus in the past and thought that it was a very good solution to wiring up the HTML with your javascript, however, that still didn't take care of the infamous reactivity that frontend frameworks like Vue and React offer.
Stimulus reflex is supposed to help with that. The route that Stimulus reflex takes, however, is very different. It doesn't rely on you having to add any more JavaScript to your project as the reactivity is made possible thanks to some ruby files called reflexes.
Let's see how it works. I chose again to use a very common "feature" often implemented by my students: a map that you can add markers onto.
Project Setup
Let's start by creating a new Rails project using Stimulus.
rails new mapbox_reflex --webpack=stimulus
Then we can add the Stimulus reflex gem
bundle add stimulus_reflex
And finally we can run the installer
rails stimulus_reflex:install
The installer will do a couple of things:
- It will create a
app/reflexesdirectory and populate it with anapplication_reflex.rbandexample_reflex.rbfiles - Update the javascript dependencies as well as the stimulus controller files to support Stimuls reflex
To make things slightly easier on the eye let's also add bootstrap using a CDN (I know, not the best practice but this is about Stimulus reflex after all, no need to further complicate things). Let's go in our application.html.erb and add the link tag
<!DOCTYPE html>
<html>
  <head>
    <title>MapboxReflex</title>
    <%= csrf_meta_tags %>
    <%= csp_meta_tag %>

    <%= stylesheet_link_tag 'application', media: 'all', 'data-turbolinks-track': 'reload' %>
    <link rel="stylesheet" href="https://stackpath.bootstrapcdn.com/bootstrap/4.3.1/css/bootstrap.min.css" integrity="sha384-ggOyR0iXCbMQv3Xipma34MD+dH/1fQ784/j6cY/iJTQUOhcWr7x9JvoRxT2MZw1T" crossorigin="anonymous">
    <%= javascript_pack_tag 'application', 'data-turbolinks-track': 'reload' %>
  </head>

  <body>
    <%= yield %>
  </body>
</html>
Mapbox Setup
Before moving forward, let's create the db
rails db:create
To generate the sqlite3 db file and, before migrating the thing let's quickly scaffold a new table and migrate the database.
rails g scaffold Poi name latitude:float longitude:float
rails db:migrate
This is going to create a new migration/model/controller/views for the Pois table (short for Points Of Interest).
As you can see we added a latitude and longitude columns that we'll need to populate when creating a new POI. We can easily do that using the geocoder gem.
Let's add the gem to the gemfile bundle add geocoder and wire it up with the Poi model.
class Poi < ApplicationRecord
  geocoded_by :name
  after_validation :geocode, if: :will_save_change_to_name?
end
This will make sure that every time a certain POI gets an update to the name, we geocode it with the right latitude and logitude.
Of course, we'll need to display this POI on a map and to do that, we'll use Mapbox. First of all let's install it yarn add mapbox-gl then, you'll need to generate a new API token after creating a new account.
To use this token, let's create a new .env file and add this line
MAPBOX_API_KEY=pk. ***********************************
This is not really going to work unless we first add the dotenv gem to our Gemfile.
...
group :development, :test do
  gem 'byebug', platforms: [:mri, :mingw, :x64_mingw]
  gem 'dotenv-rails'
end
...
and install the dependency bundle.
Let's now add the map to the page. First of all, let's add some code to the pois_controller.rb
class PoisController < ApplicationController
  def index
    @pois = Poi.geocoded
    @markers = @pois.map do |poi|
      { lat: poi.latitude, lng: poi.longitude}
    end
  end
end
Here we're simply getting the Pois along with their coordinates and we're creating a simple hash with their latitute and longitude.
Next, let's edit the views/pois/index.html.erb
  <div
    id="map"
    style="width: 100%; height: 600px;"
    data-controller="mapbox"
    data-markers="<%= @markers.to_json %>"
    data-mapbox-api-key="<%= ENV['MAPBOX_API_KEY'] %>"
  ></div>
As you can see, I also added a bunch of data properties that will be used by Stimulus. The first one data-controller will create a new instance of the class defined in mapbox_controller.js. This file doesn't exist yet, let's create it
touch touch app/javascript/controllers/mapbox_controller.js
And add this code
import { Controller } from 'stimulus'
import mapboxgl from 'mapbox-gl'
export default class extends Controller {
  connect() {
    this.map = null
    this.initMapbox()
  }

  initMapbox() {
    const mapElement = document.getElementById('map')
    const markers = JSON.parse(mapElement.dataset.markers)

    if (mapElement) {
      mapboxgl.accessToken = mapElement.dataset.mapboxApiKey
      this.map = new mapboxgl.Map({
        container: 'map',
        style: 'mapbox://styles/mapbox/streets-v10',
        zoom: 5,
        center: ['12.4964', '41.9028']
      })

      markers.forEach((marker) => {
        this.addMarker(marker)
      })
    }
  }

  addMarker(marker) {
    new mapboxgl.Marker().setLngLat([marker.lng, marker.lat]).addTo(this.map)
  }
}
Let's see what is happening in here.
- The connect method is called whenever the a new instance of the class is created (this is what the
data-controlleris for). In this method we set the map to null and we call another method calledinitMapbox. - In this method we grab the markers from the
data-markersproperty (that is mapped to the instance variable@markers) and create a new map usingmapbox-gl. Then, we add each one of those markers to the map using theaddMarkermethod
Let's set the root of the app to the pois index page, start the rails server and test this out.
Rails.application.routes.draw do
  root 'pois#index'
  resources :pois
end

This is what you should be greeted with. Beautiful Italy.
As you can see, the style is a bit off. Simply importing the mabox scss file inside our app/assets/stylesheets/application.scss will make things look a lot better:
@import 'mapbox-gl/dist/mapbox-gl';
There may be a chance that your map is gray and you have js errors in your console. If that is the case add this line to your environment.js
environment.loaders.delete('nodeModules')
Just before exporting the module.
All good for now. There are still no markers, though. Let's take care of that.
Adding markers with Stimulus Reflex
Let's add some more code to the pois index view
<div
id="map"
style="width: 100%; height: 600px;"
data-controller="mapbox"
data-markers="<%= @markers.to_json %>"
data-mapbox-api-key="<%= ENV['MAPBOX_API_KEY'] %>"
></div>
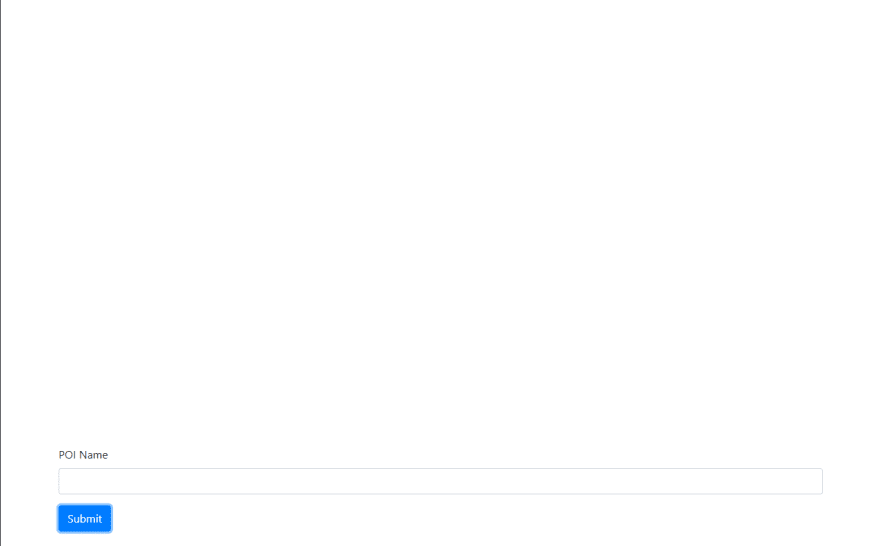
<form data-controller="pois" class="mt-5 container">
<div class="form-group">
<label for="poi_name">POI Name</label>
<input
class="form-control"
type="text"
data-target="pois.address"
name="poi_name"
id="poi_name"
>
</div>
<button
data-action="click->pois#add"
type="submit"
class="btn btn-primary"
>Submit</button>
</form>
This is simply going to add a new form to the view. As you can see, we're also instantiating another stimulus controller called pois_controller and we're wiring up the button click event to a method inside that controller called add.
This controller doesn't exist yet. Let's create it
touch app/javascript/controllers/pois_controller.js
And add this stuff in there
import ApplicationController from './application_controller'
import Rails from '@rails/ujs'

export default class extends ApplicationController {
  static targets = ['address']

  add(e) {
    Rails.stopEverything(e)

    this.stimulate('PoisReflex#add', this.addressTarget.value)
  }

  afterAdd() {
    this.addressTarget.value = ''
  }
}
Let's see what is happening in here:
- We're declaring a target called address. This is directly connected to the input tag where we used the data property
data-target. This will make it easier for us to access that element using javascript - In the add method we're first stopping any Rails default behavior and then, we're calling the
stimulatemethod that was made available by Stimulus reflex (inside theapplication_controller.jsconnect method). The stimulate method will now call thePoisReflexadd method passing through the input value of the address text field
We haven't created yet the PoisReflex.rb file. We can do so by using a rails generator rails g stimulus_reflex Pois. This will create the PoisReflex.rb file inside app/reflexes.
In this file we now need to define a method add that gets called by the stimulus controller
class PoisReflex < ApplicationReflex
  def add(name)
    Poi.create(name: name)
  end
end
As you can see, this method is pretty simple. We simply grab the POI name and create a new POI with it. And this is it. Stimulus Reflex is now connected.
Lets test restart our server and test this out. Go to the web page and type a POI, for instance Colosseum and hit the submit button.
You will see that the map suddenly disappears
This is because behind the scenes, Stimulus Reflex refreshes the bits of the page that are impacted by whatever happened in the reflex. In this case, in the reflex we created a new POI, which means that inside the index method of the pois_controller.rb a new POI was added to the @markers instance variables that the map depends on and thus the whole map element got re-rendered.
This means that now all we need to do is initialize the map back every time a new reflex has completed. Luckily, this is pretty easy to do thanks to the Stimulus Reflex hooks. Let's go in application_controller.js and add the afterReflex hook to reinitialize mapbox.
import { Controller } from 'stimulus'
import StimulusReflex from 'stimulus_reflex'
import MapboxController from './mapbox_controller'

export default class extends Controller {
  connect() {
    StimulusReflex.register(this)
  }

  afterReflex() {
    const map = new MapboxController()

    map.initMapbox()
  }
}
As you can see here we're importing MapboxController and in the afterReflex hook we are initializing mapbox again using an instance of the controller class.
Now if we test things out again we'll see something like this

Pretty awesome if you ask me. With just a couple of lines of code Stimulus Reflex allowed us to create a fully reactive map.
I've just started to play around with it so I'm sure things can be also further improved. If you want to get access to the code, you can find it here, if you want to get it touch, you can tweet me @ilrock__ or email me @ andrearocca [at] hey [dot] com.
Update
The awesome StimulusReflex community came to the rescue after posting this and shared with me an improvement that I could have worked on. At the moment, every time a new POI is added, the whole map gets re-initialized. It works, but that is not ideal. To tackle this issue, I've changed pois/index.html.erb to this
<div
  data-controller="pois"
>
  <div
    style="width: 100%; height: 600px;"
    data-controller="mapbox"
    data-target="mapbox.wrapper"
    data-markers="<%= @pois.to_json %>"
    data-mapbox-api-key="<%= ENV['MAPBOX_API_KEY'] %>"
  >
    <div
      data-target="mapbox.map"
      data-reflex-permanent
      class="w-100 h-100"
    >
    </div>
  </div>

  <form
    data-target="pois.form"
    class="mt-5 container"
  >
    <div class="form-group">
      <label for="poi_name">POI Name</label>
      <input
        class="form-control"
        type="text"
        data-target="pois.address"
        name="poi_name"
        id="poi_name"
      >
    </div>
    <button
      data-action="click->pois#add"
      type="submit"
      class="btn btn-primary"
    >Submit</button>
  </form>
</div>
The main changes here are:
- I nested the div that holds the map inside a wrapper. The wrapper has access to all the needed data (markers and api key)
- I marked the nested div with the data attribute data-reflex-permanent. This is a nifty StimulusReflex utility that will skip this div when reloading the interface (do you remember the blank div we were getting before re-initializing the map?)
I then made some changes to the mapbox_controller.js file
import { Controller } from 'stimulus'
import mapboxgl from 'mapbox-gl'

let currentInstance = null

export default class extends Controller {
  static targets = ['map', 'wrapper']

  connect() {
    this.map = null
    this.markers = null
    this.initMapbox()
  }

  initMapbox() {
    this.markers = JSON.parse(this.wrapperTarget.dataset.markers)

    mapboxgl.accessToken = this.wrapperTarget.dataset.mapboxApiKey

    this.map = new mapboxgl.Map({
      container: this.mapTarget,
      style: 'mapbox://styles/mapbox/streets-v10',
      zoom: 5,
      center: ['12.4964', '41.9028']
    })

    currentInstance = this

    this.markers.forEach((marker) => {
      this.addMarker(marker)
    })
  }

  showNewMarkers() {
    const allMarkers = JSON.parse(this.wrapperTarget.dataset.markers)

    const newMarkers = allMarkers
      .filter((marker1) => !this.markers.some((marker2) => marker1.name == marker2.name))

    this.showNewMarkers()
  }

  addMarker(marker) {
    new mapboxgl.Marker().setLngLat([marker.longitude, marker.latitude]).addTo(this.map)
  }
}

export {
  currentInstance
}
The changes here are:
- I added a variable currentInstance that is assigned to
thiswhen Stimulus instantiate an object with this class. This is then exported as it will be used at a later stage - I added a new method
showNewMarkersthat gets the difference between the markers that had already been added to the map (this.markers) and the ones coming from the data property of the now-reloaded wrapper (because it was reloaded it will also include the newly added marker)
Last but not least, I moved the afterReflex code to pois_controller.js that now looks like so:
import ApplicationController from './application_controller'
import Rails from '@rails/ujs'
import { currentInstance } from './mapbox_controller'

export default class extends ApplicationController {
  static targets = ['address', 'form']

  add(e) {
    Rails.stopEverything(e)
    this.stimulate('PoisReflex#add', this.addressTarget.value)
  }

  afterAdd() {
    this.addressTarget.value = ''
  }

  afterReflex() {
    currentInstance.showNewMarkers()
  }
}
Here now we're simply importing the currentInstance that we exported earlier and calling the showNewMarkers method.
These small changes now yield this result

Let me know if the changes do make sense! Thanks again a lot to @leastbad for the help.

Top comments (3)
Really great tutorial, very easy to follow. I'm new to both RoR and Stimulus and learned a bunch from this!
Any ideas on how I could extend this to also show some more data about each POI when clicking or hovering on a marker? I can see in the Mapbox documentation that they have something called "Display popup", but I'm not sure how to connect that event to the stimulus controller. Any tips or advice where I could learn more about this?
Hey @tommy! Sorry for being so late. Somehow I don't get notified when I get comments on dev. Either way, you can follow this guide: docs.mapbox.com/help/tutorials/cus....
When you setup your markers in the stimulus controller, there you can add the JS code required to also attach the popup to those markers.
showNewMarkers() {
const allMarkers = JSON.parse(this.wrapperTarget.dataset.markers)
const newMarkers = allMarkers
.filter((marker1) => !this.markers.some((marker2) => marker1.name == marker2.name))
this.showNewMarkers()
}
I think there is a problem with this.showNewMarkers() inside of this function, it is not the same with your latest github repo commit