

Today I got hands-on with Amazon S3 and Amazon CloudFront to understand how a static website can be stored, hosted, and delivered using AWS.
The practical started with a simple S3 bucket and an uploaded image. After that, I created a separate S3 bucket for my portfolio, deployed my index.html, configured public access, and finally created a CloudFront distribution for the portfolio.
Here's the complete process 👇
☁️ AWS Services Used
- Amazon S3 – Object storage and static website hosting
- Amazon CloudFront – Content delivery and CDN
1️⃣ Logging into AWS
I started by logging into the AWS Management Console and opening the Amazon S3 service.
Amazon S3 (Simple Storage Service) is an object storage service where data is stored inside buckets as objects.
2️⃣ Creating an S3 Bucket 🪣
The first step was to create an S3 bucket.
I created a bucket named:
keerthana-s3-practice-2026
This bucket was created to practice the basic S3 workflow.
After creating the bucket, I opened it and uploaded an image object.

3️⃣ Uploading an Object to S3 📷
After creating the bucket, I uploaded an image into it.
The uploaded object was:
harriss.jpg
This helped me understand the basic S3 concept:
S3
│
└── Bucket
│
└── Object
A bucket acts as a container, while the uploaded file is stored as an object.

4️⃣ Creating an S3 Bucket for My Portfolio 🌐
After practicing with the image upload, I created another S3 bucket specifically for my portfolio website.
The bucket was:
keerthana-s3-portfolio-2026
This bucket was used to store my portfolio website files.
5️⃣ Uploading My Portfolio index.html
I uploaded my portfolio's main HTML file:
index.html
into the portfolio bucket.
The index.html file contains the main structure and content of my portfolio website.

6️⃣ Deploying the Portfolio Using S3 🚀
Next, I configured the S3 bucket for static website hosting.
The index document was set to:
index.html
After configuring the website hosting, I opened the generated S3 website endpoint in the browser.
The portfolio was successfully served by S3.

7️⃣ A Small Problem I Encountered 🧐
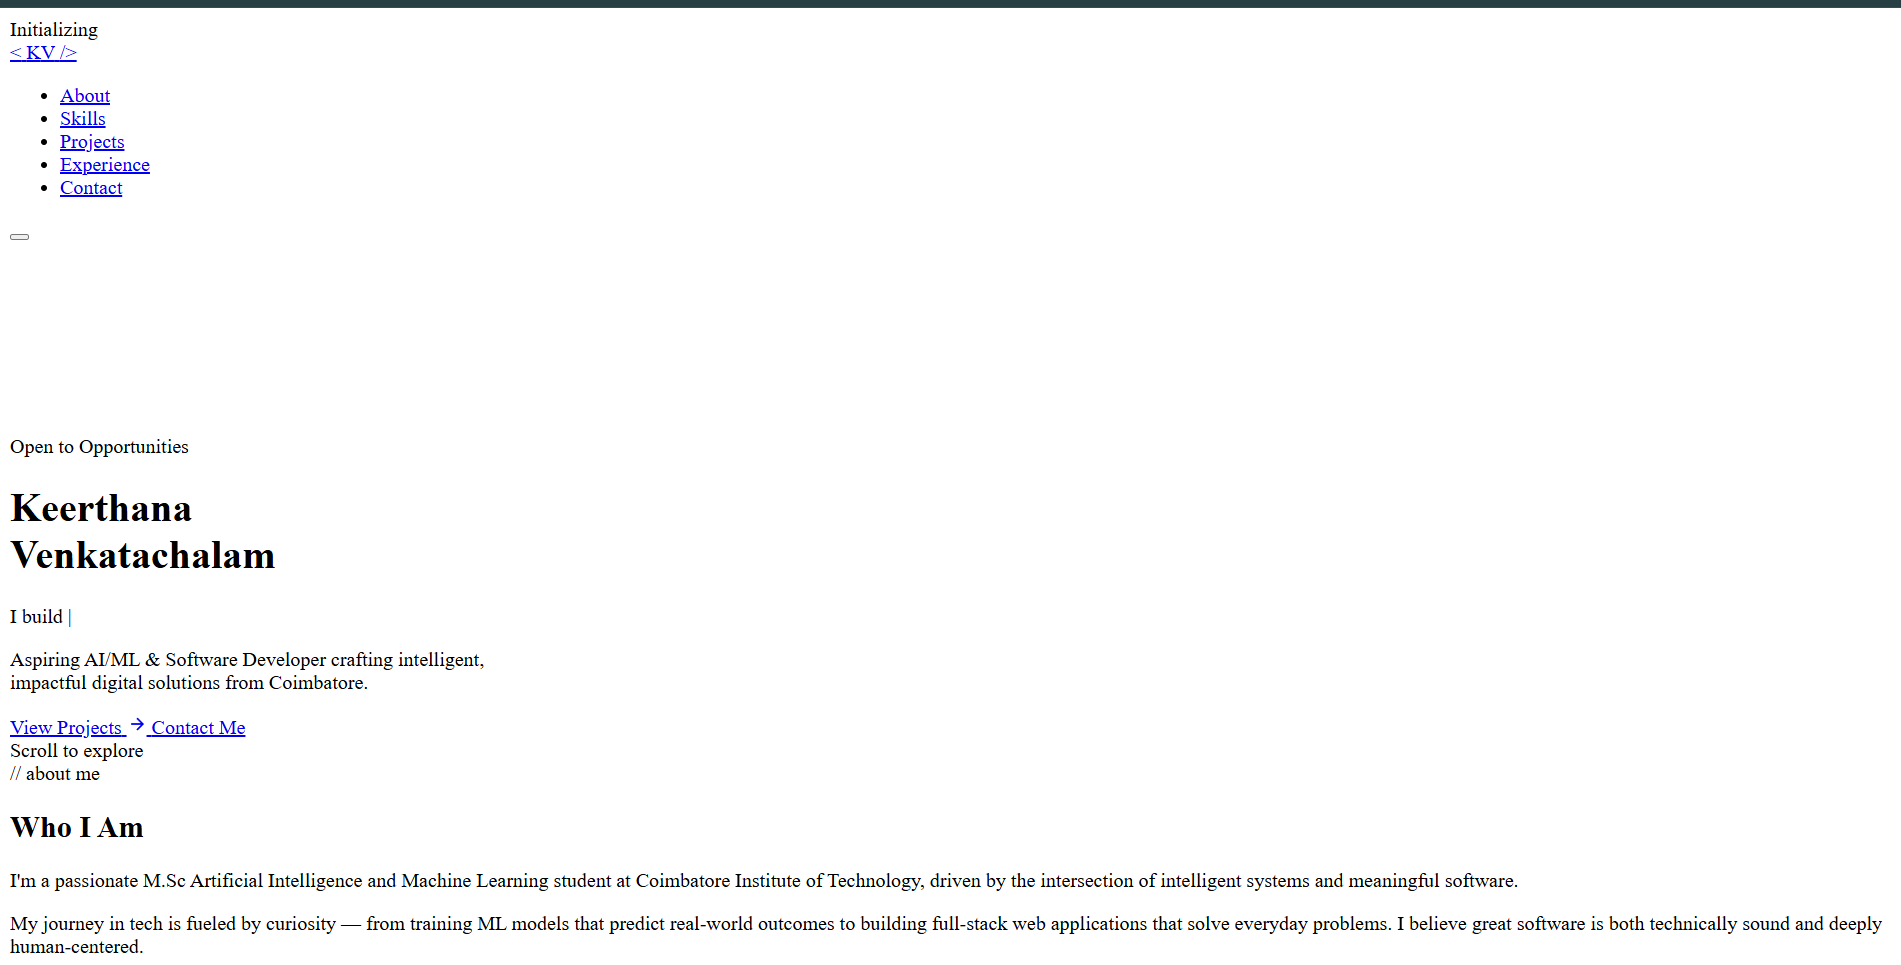
When I first opened the portfolio, the HTML content was visible, but the original UI styling was not displayed properly.
Instead, the browser showed the page using basic HTML styling.
This made me realize something important:
Uploading
index.htmlalone is not always enough for a complete website.
If the HTML file references other files such as:
style.css
script.js
images/
fonts/
those files also need to be available at the correct paths.
So, if the required CSS or other assets are missing, the HTML may still load but the website can appear unstyled.
This was a useful part of the practical because it helped me understand how static websites actually work when deployed to cloud storage.
8️⃣ Configuring the S3 Bucket Policy 🔐
After deploying the portfolio, I configured the S3 bucket policy to allow public access to the portfolio objects.
The main permission involved was:
s3:GetObject
This permission allows objects in the bucket to be read.
The policy was configured for the portfolio bucket.
The basic structure was:
{
  "Version": "2012-10-17",
  "Statement": [
    {
      "Sid": "PublicReadGetObject",
      "Effect": "Allow",
      "Principal": "*",
      "Action": "s3:GetObject",
      "Resource": "arn:aws:s3:::YOUR-BUCKET-NAME/*"
    }
  ]
}
Here, YOUR-BUCKET-NAME represents the actual portfolio bucket.
9️⃣ Accessing the Portfolio Through the S3 Website URL 🌍
After configuring the bucket policy, I accessed the portfolio using the S3 static website endpoint.
The endpoint follows this format:
http://YOUR-BUCKET-NAME.s3-website.ap-south-1.amazonaws.com/
For this practical, the website endpoint was:
http://ashwina-006-15092006.s3-website.ap-south-1.amazonaws.com/
The portfolio could then be accessed through the S3 website endpoint.
🔟 Creating an Amazon CloudFront Distribution ⚡
After successfully deploying the portfolio through S3, I moved on to Amazon CloudFront.
CloudFront is AWS's Content Delivery Network (CDN). It is used to deliver content through a distributed network of edge locations.
I opened:
AWS Console
↓
CloudFront
↓
Create Distribution
During the configuration, I specified the portfolio S3 bucket as the origin.
The origin is the source from which CloudFront retrieves the website content.
1️⃣1️⃣ Creating the CloudFront Distribution 🚀
After completing the required configuration, I created the CloudFront distribution.
The distribution created during my practical had the ID:
E1GCVH4NTUDX8S
The distribution was enabled and deployed successfully.
CloudFront then provided a domain name that could be used to access the distribution.

1️⃣2️⃣ Accessing the Portfolio Through CloudFront 🌎
Finally, I used the CloudFront-generated domain name to access the portfolio.
The overall deployment flow became:
                User
                  │
                  ▼
            CloudFront
                  │
                  ▼
             Amazon S3
                  │
                  ▼
          Portfolio Website
            ┌─────┼─────┐
            │     │     │
           HTML  CSS    JS
# 🧠 What I Learned
This practical helped me understand several important AWS concepts.
### Amazon S3
I learned:
* How to create an S3 bucket
* How to upload objects
* The difference between a bucket and an object
* How to host static website files
* How bucket policies control access
* How public read access works
* How an S3 website endpoint can be used to access a static website
### Amazon CloudFront
I learned:
* What a CDN is
* Why CloudFront is used
* How to create a CloudFront distribution
* How to configure an origin
* How S3 can be used as a CloudFront origin
* How CloudFront provides a distribution domain name
---
# 🔄 Complete Workflow
The complete process I followed was:
text
Login to AWS
↓
Open Amazon S3
↓
Create S3 Bucket
↓
Upload Image Object
↓
Create Portfolio S3 Bucket
↓
Upload index.html
↓
Configure Static Website Hosting
↓
Configure Bucket Policy
↓
Access Portfolio using S3 Website URL
↓
Open Amazon CloudFront
↓
Create Distribution
↓
Configure S3 as Origin
↓
Deploy Distribution
↓
Get CloudFront Domain
↓
Access Portfolio using CloudFront
This practical gave me a hands-on introduction to deploying a static website using AWS.
I started by creating an S3 bucket and uploading an image object. Then I created a separate bucket for my portfolio and uploaded index.html.
After configuring static website hosting and the bucket policy, I was able to access my portfolio using the S3 website endpoint.
Finally, I created an Amazon CloudFront distribution with the S3 bucket as the origin and obtained a CloudFront domain for accessing the portfolio.
This helped me understand how Amazon S3 and CloudFront can work together to store, host, and deliver a static website. 🚀


Top comments (0)