
In this short tutorial I would like to describe the installation and setup of CI/CD Actions for a self-hosted Gitea server running on an Ubuntu. I will describe a script for testing and compiling code written in C# in a Visual Studio environment. I decided to separate the Actions server to a separate Ubuntu server instance for easier administration and to keep running processes from overwhelming the standalone git server. Anyway, it is possible to run Actions on the same server as Gitea, or to run Runners in Dockers. I described the installation and setup of a self-hosted git server in the previous article Gitea Self-Hosted Action Ubuntu Server. All the steps described below assume that you already have Gitea (Git-Server) installed.
Gitea Actions consists of several components. For our purpose, it is enough to know that we need ActRunner to run Actions. Like other CI Runners, ActRunner is designed to run independently on another server. It can be run using Docker or directly on the host. In this guide I will focus on running with the Docker engine. More information can be found on the official Gitea website.
Docker
The first component we will need is Docker. Using Docker we will later start ActRunner. For more information about installing Docker, see the official guide.
Let's do this.
-
Update local packaged:
$ sudo apt update -
Allow APT to access repositories via the HTTPS orotocol:
$ sudo apt install apt-transport-https ca-certificates curl software-properties-common -
Add the Docket GNU Privacy Guard key to the APT keyring:
$ curl -fsSL https://download.docker.com/linux/ubuntu/gpg | sudo apt-key add - -
Add the Docker repository to the APT package manager:
$ sudo add-apt-repository "deb [arch=amd64] https://download.docker.com/linux/ubuntu focal stable" -
Prepare an installation from a Docker repository:
$ apt-cache policy docker-ce -
Install Docker:
$ sudo apt install docker-ce -
Check the status of the Docket service:
$ sudo systemctl status docker

-
Enable Docker to start automatically on system boot:
$ sudo systemctl enable docker -
Adding an account to a Docker group:
$ sudo usermod -aG docker ${USER} -
Set permissions to run the service.
$ sudo chmod +x /var/run/docker.sock
Act Runner
Once we have Docker up and running, we can start installing ActRunner. In order for ActRunner to run on a separate server, or in a separate container, and connect to a correct Gitea instance, we need to register it with a token.
- Download the current version of ActRunner using
wget. Replace the URL with the desired version. We recommend opting for the latest version. Here's an example for 64-bit Linux, version 0.2.10. For the full list, visit https://dl.gitea.com/act_runner/:
$ sudo wget -O act_runner https://dl.gitea.com/act_runner/0.2.10/act_runner-0.2.10-linux-amd64
$ sudo chmod +x act_runner
-
Check the version of ActRunner:
$ ./act_runner --version

- ActRunner registration is important for the Runner to know for which Gitea instance to run the jobs. For this you need to generate a token. Gitea provides three levels of tokens:
Instance level: The admin settings page, like <your_gitea.com>/admin/actions/runners.
Organization level: The organization settings page, like <your_gitea.com>/org/settings/actions/runners.
Repository level: The repository settings page, like <your_gitea.com>/settings/actions/runners.
You can find your token on Gitea <your_gitea.com>/admin/actions/runners under Create new runner. Or separately for each repository <your_gitea.com>/settings/actions/runners under Create new runner.

Instead of <INSTANCE> enter your own URL and instead of <TOKEN> enter your own token:
$ ./act_runner register --no-interactive --instance <INSTANCE> --token <TOKEN>
For Example:
$ ./act_runner register --no-interactive --instance http://192.168.52.130:3000 --token MyAyfw5v4i8hwVGZR9NXjW0ikIHOXXXXXXXXXXXX

-
After registration, all you have to do is launch ActRunner using Daemon:
$ sudo ./act_runner daemon

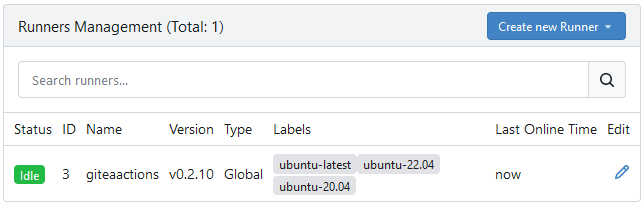
You should now see the service tunning in the Gitea web environment.
If you want the service to start automatically after rebootong the server, write a simple bash script and add it to Crontab:
-
Create a file and insert the following script into it. Change the
<USER>to your administrator account or choose any other location to store the file:$ nano /home/<USER>/start_act_runner.sh Insert the script into the created file and edit the path to
act_runnerif it is different:
#!/bin/sh
sleep 60        # waiting for all services to be started
cd /home/<USER>
./act_runner daemon
-
Enable the execution rule of our new script:
$ sudo chmod +x /home/<USER>/start_act_runner.sh -
Open and edit Crontab:
$ crontab -e -
Adding an instruction to the Crontab. Ensures that the script is run after the server restarts. Change
<USER>to the administrator account or location where you saved the script:@reboot /home/<USER>/start_act_runner.sh

Write Workflow Action
Now that everything is set up and the Runner is running, we can create a script to automate the building and testing of source code written in the Visual Studio environment.
We'll start by creating a simple console application for testing. In this application, we'll write a basic class, such as MyMath, which will contain a function to add two numbers.
public class MyMath
{
    public double Add(double num1, double num2)
    {
        return num1 + num2;
    }
}
Next, we will add a new NUnit Test Project to our solution. Left-click on your Solution and select Add -> New Project. Visual Studio will automatically install all the necessary NUnit packages. In the newly created NUnit test project, we will add a dependency on our console application to access the MyMath class. Now, we can write a simple test for our mathematical function.

namespace TestProject1
{
    public class Tests
    {
        private MyMath _myMath;

        [SetUp]
        public void Setup()
        {
            _myMath = new MyMath();
        }

        [TestCase(100000.0, 10.1, 100010.1)]
        [TestCase(-100000.0, -10.1, -100010.1)]
        [TestCase(0.0, 0.0, 0.0)]
        [Description("Verifies that the MyMath.Add() function works correctly with real numbers.")]
        public void MyMath_Add_RealNumber(double number1, double number2, double expected)
        {
            // Act
            double result = _myMath.Add(number1, number2);
            // Assert
            Assert.That(expected, Is.EqualTo(result), $"Not Correct: ({number1}) + ({number2})");
        }
    }
}
Don't forget to add dependency to your test project. As shown, three test cases are performed. The first test case checks positive numbers, the second tests negative numbers, and the last one tests zero. If the function calculates correctly, the test should pass.
You can try to run your test in Visual Studio.

Now for the interesting part. We will create a new repository on Gitea and link it to the project in Visual Studio. After that, we simply push the project to Gitea. With the foundation in place, we can start writing the action to run the automated testing.
All actions must be stored in the .gitea/workflows folder in our repository. Actions are written in YAML format, and any file with the yaml suffix placed in .gitea/workflows/ will be automatically executed.
Let's create the following action, name it for example nunit_test.yaml, and save it in the .gitea/workflows/ directory of the repository:

name: Testing Example
on:
  push:
    branches:
      - master

jobs:
  build-and-test:
    runs-on: ubuntu-latest
    steps:
      - name: Check out repository code
        uses: actions/checkout@v4

      - name: Setup dotnet
        uses: actions/setup-dotnet@v3
        with:
          dotnet-version: '8.0.x'

      - name: Restore dependencies
        run: dotnet restore

      - name: Build app
        run: dotnet build -c Release --no-restore

      - name: Run automated tests
        run: dotnet test -c Release --no-build
The first line name: Testing Example is the name of the workflow. We can name the workflow action as it suits us.
on:             # The trigger for this workflow.
  push:         # Push event, it is run whenever someone makes a push.
    branches:   # Filter for a specific branche. You can skip it if you want to run action for each branche.
      - master
The jobs: section represents a group of tasks that will run sequentially. In this case, the job is named build-and-test. The runs-on: attribute specifies the operating system for the job.
Steps Breakdown
- Check out the repository code: It's always a good idea to check out the source code of your repository within your workflow at the beginning.
- name: Check out repository code
  uses: actions/checkout@v4
- Set up the .NET SDK environment: Ensure the correct version of the .NET SDK is installed for the next steps. Specify your required version(s).
- name: Setup dotnet
  uses: actions/setup-dotnet@v3
  with:
    dotnet-version: '8.0.x'
-
Restore dependencies: Execute shell commands directly from the script using the run command. The
dotnet restorecommand will ensure that all required dependencies and NuGet packages are downloaded and restored.
- name: Restore dependencies
  run: dotnet restore
- Build the application: Build the source code to check if the compiler finds any errors in the code.
- name: Run automated tests
  run: dotnet build -c Release --no-restore
- Run the automated tests: Execute the tests you wrote.
- name: Run automated tests
  run: dotnet test -c Release --no-build
Enhancing the Workflow
To improve the workflow, we can log the test results and upload them as an artifact. Rewrite the test execution and add another step to the job, specifying your own path to the generated file.
- name: Generate test report
  run: dotnet test -c Release --no-build --logger "html;logfilename=test_results.html"

- name: Upload report as artifact
  uses: actions/upload-artifact@v3
  with:
    name: test-reports
    path: ${{ gitea.workspace }}/TestProject1/TestResults/test_results.html
Test Workflow Action
If we have both the console project and the test project stored in the Gitea repository and our workflow action is ready, the next step is to test it. Let's make a change to our code, commit the changes, and push them to the master branch of the repository. Then, in the Gitea web interface, we will see the action running.

Conclusion
With Gitea up and running, we added Docker to our setup to facilitate containerized environments, which streamline development and deployment processes. We then configured a Gitea Actions runner using Docker, allowing us to automate our build and test workflows. To demonstrate of this setup, we created a simple console application in Visual Studio, wrote a basic MyMath class, and then added an NUnit Test Project to test our code. We crafted a Gitea workflow action to automatically build and test our application whenever changes are pushed to the repository. By following these steps, we have created self-hosted Git server environment that supports automated testing and continuous integration.
With your Gitea server fully operational, you can now enjoy the benefits of a self-hosted Git solution, customize it to fit your team's needs, and continue to expand its capabilities with additional workflows and integrations. May your code bring you joy!
For more details on configuring Gitea and other settings, be sure to check out my article Gitea Self-Hosted Action Ubuntu Server.
If you found this useful, consider supporting me:
👉 My github profile GitHub
👉 My blog page Hashnode
📷 Cover photo by Yancy Min

Top comments (0)