I had recently a Sommer Twist 200E controller installed for my car gate. As I already have a Node-RED and Zigbee2mqtt set up for my home automations, and, most importantly, operating a gate by pressing a button on a remote is so 1990s, I knew right away I want to be able to connect it to my Node-RED somehow.
The hardware setup
To do that, I had a CAT6 cable installed between the controller and my house. The way to send signals to the gate controller is to use the two button-input interfaces it provides: one for opening/closing one side of the gate, the other one for opening/closing both sides of the gate.
To mimic the click of a button, I found it easiest to use a relay that I could control via Zigbee. Although I could not see a need for more than 2 relays, bought one with 4 relays that has the relays outputs not connected to the power. Unfortunately, the case for the module was out of stock, so got myself only a board.
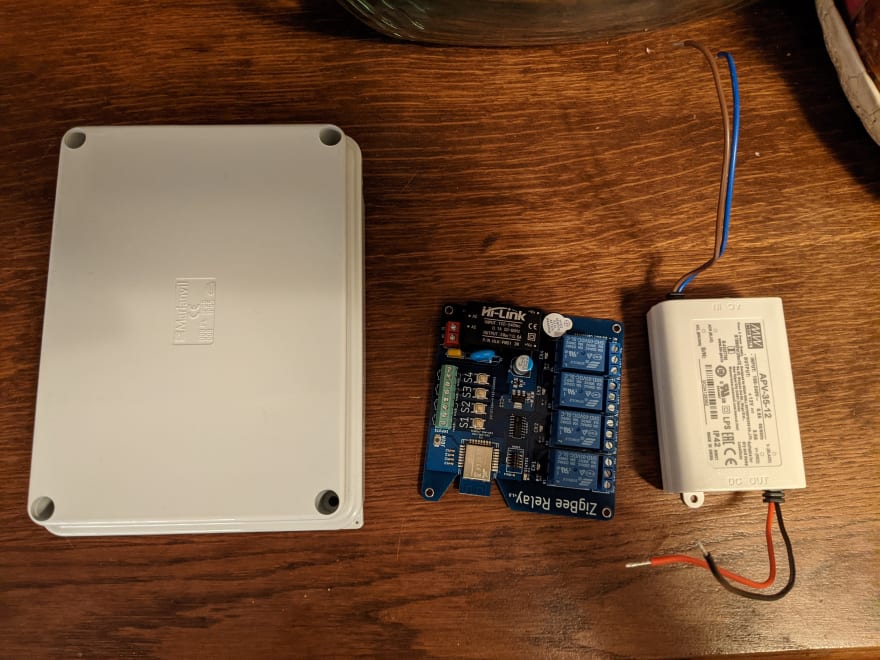
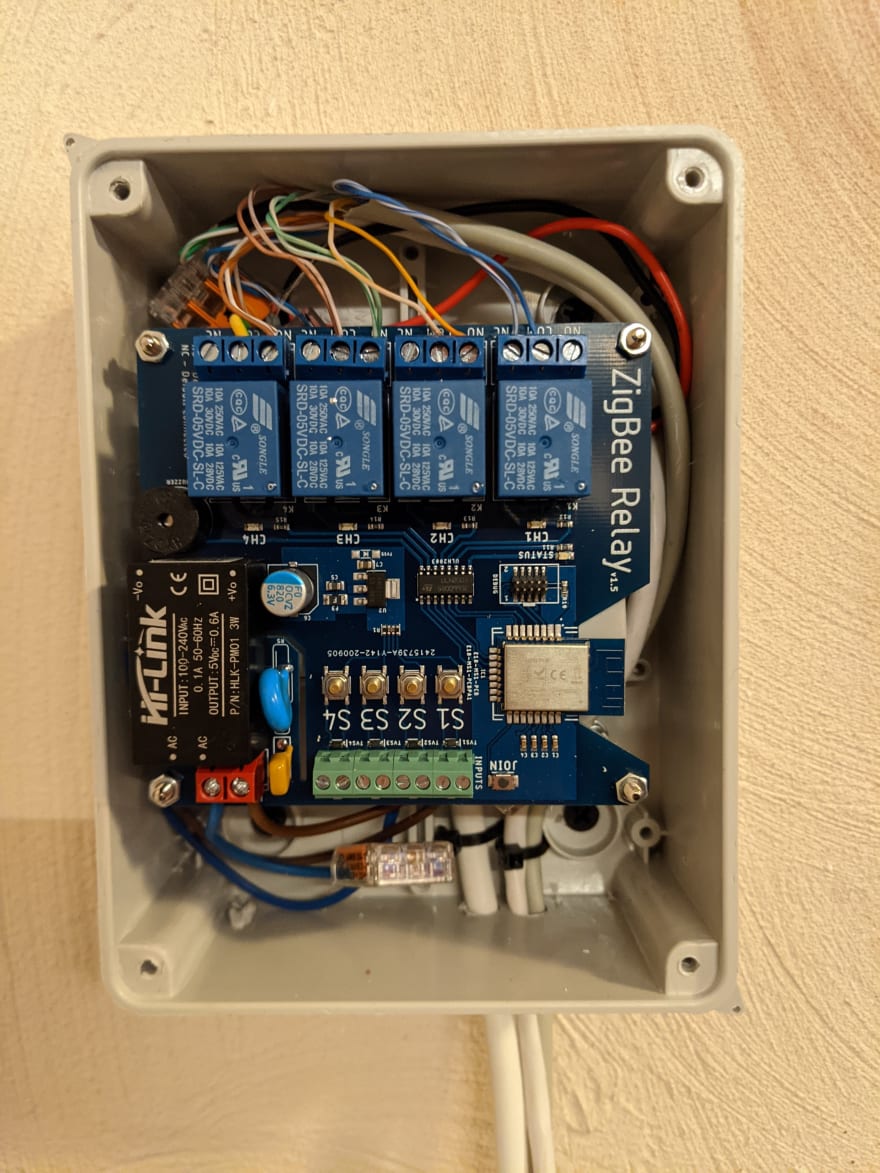
By the time the module arrived, I had realized I could use the same module to control the lock of another foot gate. I attached the Zigbee board into a box together with the 12V power supply for the electric lock for that gate. Here is a picture of the board, power supply for the other gate, and a generic box to accommodate it all:
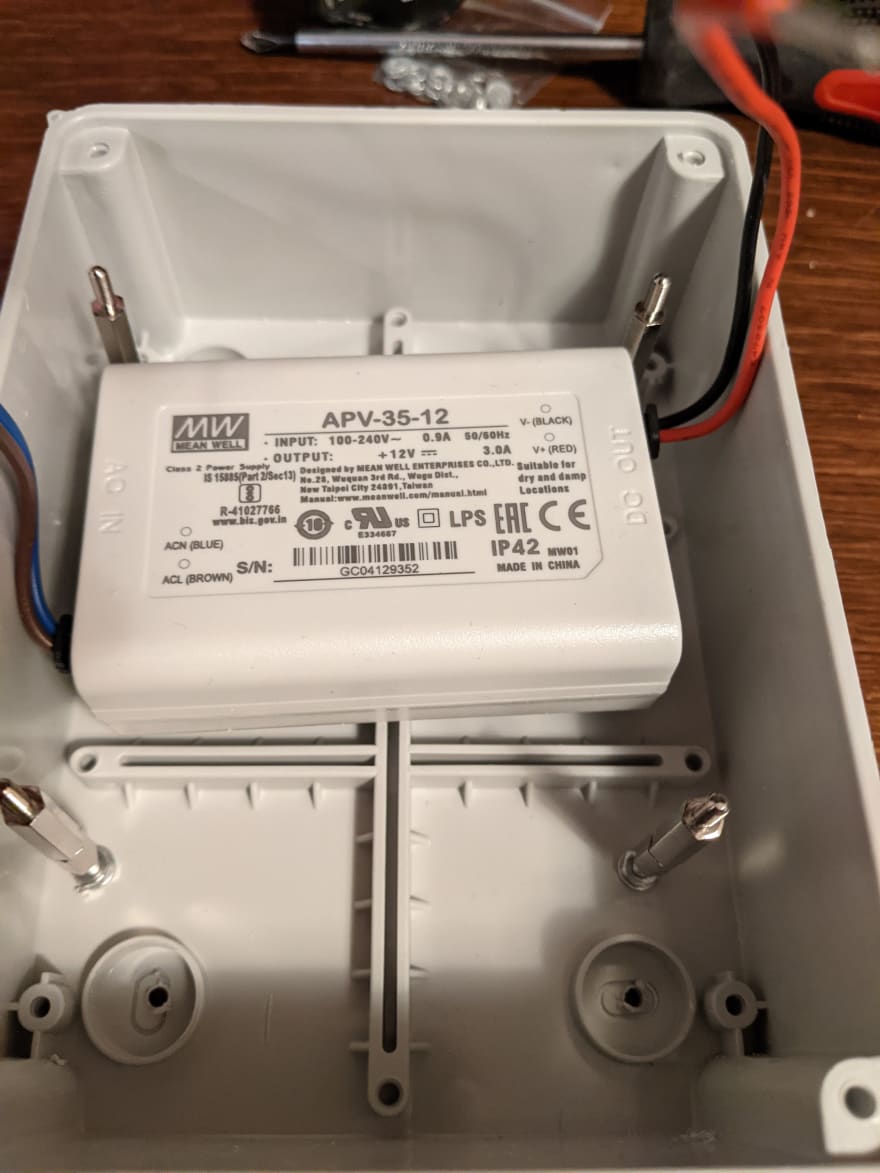
The 12V power supply had spots for mounting it which accidentally precisely matched with some holes at the bottom of the box when the power supply was slightly tilted. Used screws to keep it in place. To attach the Zigbee board on top of it, I used 4 raisers that match the holes in the corners of the board.

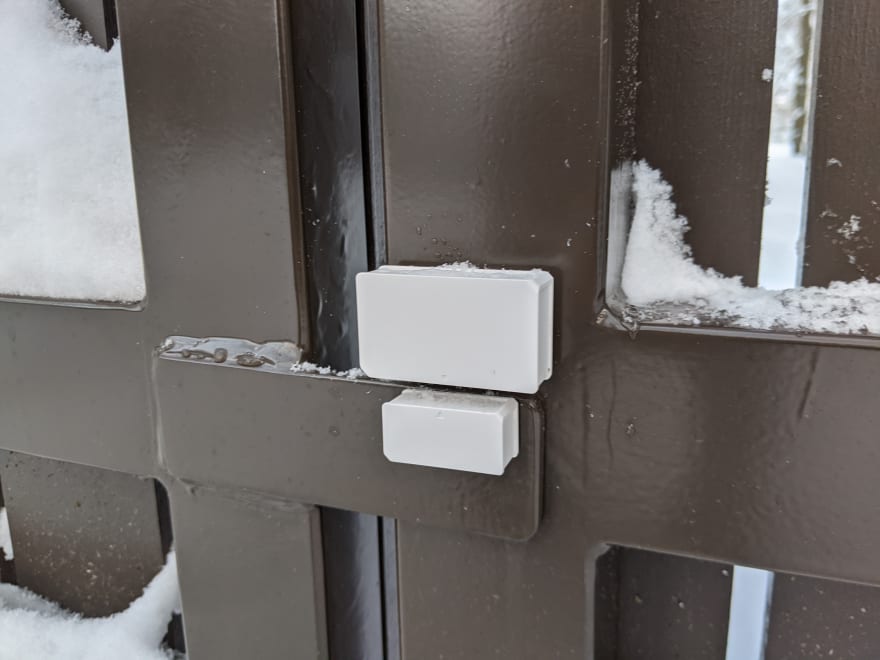
The button inputs the Sommer Twist 200E has either open or close the gate depending on the current state of the gate. For my Node-RED instance to know the state of the gate, I installed a SONOFF Zigbee contact sensor for my gate. It is a lovely winter outside here in Estonia right now, fortunately the sensor seems to not bother about heavy raining nor cold 🎉
The dummy controller
To close the gate, Sommer Twist 200E supports in general two modes:
- the gate will close only if the button is pressed while the gate is open;
- the gate will automatically close after 5 seconds the photosensor installed on the line of the gate sees something (i.e a car goes through the gate).
It is easy to use one of the provided modes, but there's no option to switch between them other than changing the states of microswitches on the controller. I do like the auto-close function, but I felt I cannot live with that only, because I sometimes want to keep the gate open - i.e while waiting for the guests to arrive.
At first, I switched on the mode 1 and tried to achieve the auto-close function with some delays and a Zigbee PIR sensor that I had already installed anyways next to the gate, but it turned out to be not precise enough. I could have closed the gate if the PIR sensor saw something and then did not see anything for a few minutes, but by that time, I would have driven already far from home. I did like the auto-close functionality the controller supports on its own in combination with its photosensor.
So, the next attempt was to turn on the auto-close mode and try to somehow make it keep the gate open when needed. I had many (crazy) ideas on how to achieve that, for instance:
- Let the gate automatically close, but reopen it right away if the state is set to "keep open"
- Cut the micro-switches and use relays to change the state of the switches on the fly
- Attach a servo motor with a blind to the photosensor that would keep something in front of it if I want to keep the gate open -- it wouldn't close if there's something on the way 🙈.
I was already close to trying out those crazy ideas, but luckily found a much easier and cleaner way to keep the gate open - I just cut the signal going to the photosensor with a relay. Almost installed another relay into the box of the gate controller, but realized I could use the CAT6 cable and the relay module I already had installed. Funnily, now that I did that, I have all the 4 relays hooked up -- two for operating the car gate inputs, one for unlocking the other gate and one for cutting the photosensor signal. Remember, I did not think there could be a way I'd need the module to have that many relays 😆
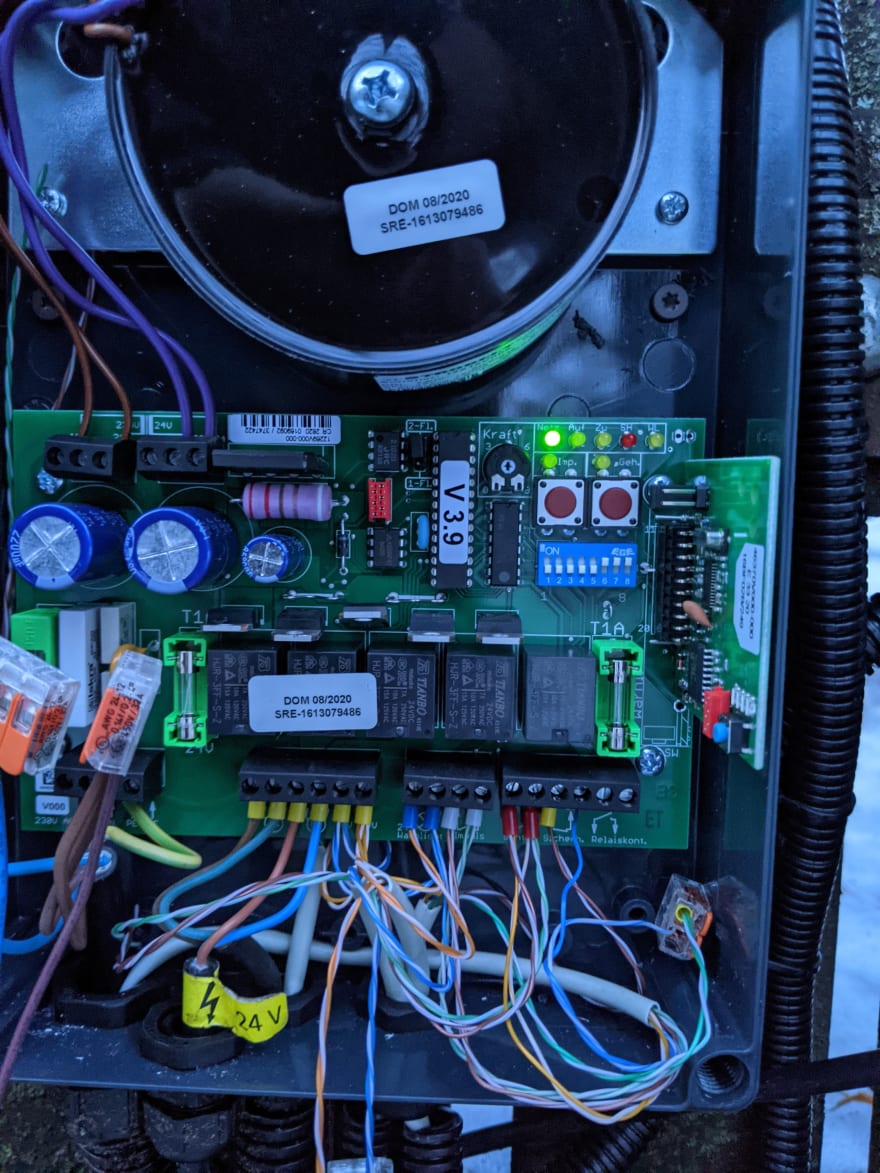
The connections in the gate controller box (the single blue line is used for routing the photosensor signal through the relay):
The relay box now with all 4 relays in use:
I like it a lot that the photosensor connection is cut using a "normally closed" pin of the relay -- another nice feature the 4-channel relay board has. It also has a 5th output attached to a buzzer on the board and 4 inputs on its own that could be used for triggering anything.
The benefits
Although, at first glance, connecting the gate to my home automation system does not seem to make it that much smarter, it actually brings many of the benefits that can be achieved with minimal effort:
- The gate is kept open if wanted
- The gate can be operated from my phone or from my dashboard
- The gate can be operated remotely
- The gate can be operated using voice commands
- The gate can automatically open when approaching or leaving home (haven't been able to successfully set it up using Tasker yet)
- Any other functionality you come up with can be added with ease 😄

Top comments (0)