Before you get stuck into this make sure you've checked out any previous parts to the series. Each part in this series follows on from the previous, so you may need to grab the code from the previous part if you haven't been following.
What the *&^%
Ok, so, err, where do we start! Webpack and Babel are big. Too big for me to cover in one post. To be honest I don't know everything about them and have only scratched the surface myself, so I'll only cover a minimal config to get people started. I'll leave it to you to read and experiment further. After all, the best way to learn is often to just throw yourself in the deep end!
Webpack
Webpack is a "bundler". In basic terms it bundles/merges source files together into a single source file. Additionally it can do things like optimize and tree shake your source code.
Babel
Babel is a JavaScript Compiler (or Transpiler). With a little configuration it can turn your source code into code that is compatible with your target browser(s) and alleviate the headache of having to write code that targets specific browsers.
Install
Firstly lets install Webpack:
npm install webpack webpack-cli --save-dev
This installs the webpack module and it's command line interface
Next we'll install Babel:
npm install @babel/core @babel/preset-env --save-dev
This installs babel and a package of presets for the compiler.
Finally we'll install the Babel Loader for Webpack and a Typescript plugin for Babel:
npm install babel-loader @babel/preset-typescript --save-dev
babel-loader is used by webpack to preprocess (via babel) our source code before bundling and @babel /preset-typescript is a typescript compiler plugin for babel
Config
We now need to configure both webpack and babel...
Webpack config
Create a file in the root folder called webpack.config.js and open the file, paste the following contents and save.
module.exports = [
  {
    mode: "development",
    entry: {
      "contact-main-form": "./src/contact-main-form",
    },
    output: {
      filename: "[name].js",
    },
    module: {
      rules: [
        {
          test: /.tsx?$/,
          exclude: /node_modules/,
          loader: "babel-loader",
        },
      ],
    },
    resolve: {
      extensions: [".ts"],
    },
    devtool: "source-map",
  },
  {
    mode: "production",
    entry: {
      "contact-main-form": "./src/contact-main-form",
    },
    output: {
      filename: "[name].min.js",
    },
    module: {
      rules: [
        {
          test: /.tsx?$/,
          exclude: /node_modules/,
          loader: "babel-loader",
        },
      ],
    },
    resolve: {
      extensions: [".ts"],
    },
    devtool: "source-map",
  },
];
The above sets up two configurations, one for development and one for production. The difference between the two is essentially the file name (production names files *.min.js) as by default the production mode optimizes the output.
Further reading on webpack configuration
Babel config
Create a file in the root folder called babel.config.json and open the file, paste the following contents and save.
{
  "presets": [
    [
      "@babel/preset-env",
      {
        "targets": {
          "ie": "11"
        }
      }
    ],
    "@babel/preset-typescript"
  ]
}
The above loads two babel presets. preset-env will ensure the outputted JavaScript is compatible with your target browser(s) via polyfills etc. preset-typescript will enable babel to compile our Typescript into JavaScript.
Now we have switched to webpack and babel we aren't using the original Typescript compiler tsc to compile our Typescript into JavaScript. I'd advise reading the following caveats to help understand the differences.
Further reading on babel configuration
Lets build!
Open a fresh terminal (Ctrl+Shift+') in VS Code and run the following command to build the code:
npx webpack
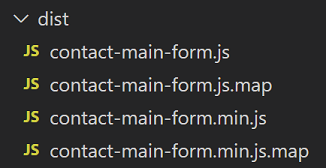
You should now have 4 files in your dist folder. 2 JavaScript (1 optimized) and a source map for each.
If you take a look at the JavaScript you'll notice the non optimized version is bloated with some webpack bootstrap stuff (ES module loading, etc.), and the optimized version is broken because it has omitted (via tree shaking) our class ContactMainForm.
We just need to make a couple of simple changes to ensure it's included in the optimized code. Update the contact-main-form.ts as below:
class ContactMainForm {
  public OnLoad(
    executionContext: Xrm.ExecutionContext<Form.contact.Main.Contact, any>
  ) {
    const formContext = executionContext.getFormContext() as Form.contact.Main.Contact;
    formContext.ui.setFormNotification(
      "Typescript locked and loaded!",
      "INFO",
      "ts-msg"
    );
    const parentCustomerAttribute = formContext.getAttribute(
      "parentcustomerid"
    );
    const parentCustomerValue = parentCustomerAttribute.getValue();
  }
}
(window as any).ContactMainForm = new ContactMainForm();
Now rebuild with npx webpack and our optimized code can be deployed and tested!
That's all folks!
So, hopefully this has helped kick start your use of Typescript, Webpack and Babel to develop Web Resources.
You can download a copy of the source code for this blog post here
In the next part we'll take a look at modules and debugging.
Thanks for reading.
Ollie

Top comments (0)