
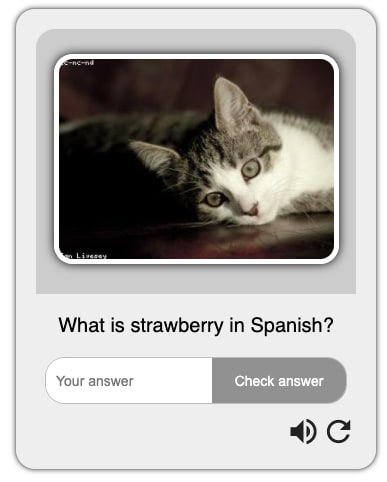
Recently I have been working on recreating a flash card as a web component. Here's a screenshot of the card (Click the image to try it out):

While this card is really well designed and has a decent UX, it's missing accessibility (a11y) and internationalization (i18n). To fix this we can recreate the card using LitElement, so that the flash card can be used anywhere.
Development Approach
The first decision I made was to use slots for passing in the question and answer. If you don't know what slots are check out my post about using slots.

To achieve this, I created an <answer-box> tag for handling the input and checking of the answer. Here's a snippet from the <answer-box> render function:
render() {
    return html`
      <div>
        <p id="question">
          <slot name="front" id="front"></slot>
          <slot name="back" id="back"></slot>
        </p>
    ...
As you can see all the user has to do is pass in the front and back of the card when creating a <flash-card>:
<flash-card>
  <p slot="front">What is strawberry in Spanish?</p>
  <p slot="back">fresa</p>
</flash-card>
Once the slots were working, I wanted to extend the functionality of the original design to be more accessible. For example, the original card has no audial component for hearing the answer, and it doesn't support multiple languages. When working with JavaScript in the browser we can make good use of two awesome classes for enhancing a11y and i18n.
SpeechSynthesisUtterance
SpeechSynthesisUtterance is an awesome built-in class for text-to-speech in the browser. First, I instantiate the class in the constructor with:
constructor() {
  ...
  this.speech = new SpeechSynthesisUtterance();
  this.speech.lang = navigator.language.substring(0, 2); // uses language of the browser
  ...
}
Here we are creating the class and setting the language of the synthetic voice to be the same as the browser's default language. Next, we need a function to run whenever the user clicks on the sound icon:
speakWords() {
    const side = this.back ? 'front' : 'back';
    const comparison = this.shadowRoot
      .querySelector(`[name="${side}"]`)
      .assignedNodes({ flatten: true })[0]
      .querySelector(`[name="${side}"]`)
      .assignedNodes({ flatten: true })[0].innerText;
    this.speech.text = comparison;
    window.speechSynthesis.speak(this.speech);
  }
The first two lines have to do with checking the data passed into the slot and determining what the correct answer is. Then on line 3 we set this.speech.text to the correct answer that was passed in. Finally, line 4 makes your browser speak the correct answer.
I18NMixin

I18NMixin is a "mixin" written by Bryan Ollendyke for managing internationalization (I18N) in Lit. To instantiate the mixin in my project I wrote:
import { I18NMixin } from '@lrnwebcomponents/i18n-manager/lib/I18NMixin.js';
...

export class AnswerBox extends I18NMixin() {
  ...
  constructor() {
    ...
    this.i18store = window.I18NManagerStore.requestAvailability();
    this.speech.lang = this.i18store.lang;
    ...
  }
  ...
}
After importing and extending the project, all I'm doing here is setting the manager to a variable so I can access it later. You might also recognize that I am setting the default voice from before to the language specified by our mixin. Now by simply adding these few lines I can start to translate parts of my web component. For instance, I need the placeholder text in the input and the text in the button to say "Your Answer" and "Check Answer". To do that I add:
constructor() {
  super()
  this.t = {
    yourAnswer: 'Your answer',
    checkAnswer: 'Check answer'
  };
  this.registerLocalization({
    context: this,
    localesPath: new URL('../locales/', import.meta.url).href,
      locales: ['es', 'fr', 'ja'],
  });
  ...
}
Here we are using the this.t variable provided from our mixin to establish the variables we want to be translatable. Then, I specify the path to the files and languages that we are supporting. Here's an example of the ./locales/answer-box.ja.json file:
{
    "yourAnswer": "あなたの答え",
    "checkAnswer": "答えをチェック"
}
As you can see we simply add a file to our ./locales folder with the format of component-name.2-letter-lang-code.json and directly translate our variables. Lastly, we add our this.t variables to our code:
render() {
  return html`
    ...
    <input
      id="answer"
      type="text"
      .placeholder="${this.t.yourAnswer}"
      @input="${this.inputChanged}"
      .value="${this.userAnswer}"
    />
    ...
    <button
      id="check"
      ?disabled="${this.userAnswer === ''}"
      @click="${this.checkUserAnswer}"
    >
      ${this.t.checkAnswer}
    </button>
    ...
  `
}
So wherever we use this.t above, it will translate the variables if we support the language specified. Obviously, our component only supports 4 so far, so we have a ways to go.
Final Thoughts
You might have noticed that I made a <flash-card> component, but only showed code from <answer-box>. That's because I just wanted to highlight two cool conventions for increasing i18n in web components. If you're interested in how the styling was done and how the whole component was put together check out our repo:
A Project EdTechJoker creation
See https://github.com/elmsln/edtechjoker/blob/master/fall-21/projects/p3-haxtheweb/README.md for requirements to complete this project.
Quickstart
To get started:
yarn install
yarn start
# requires node 10 & npm 6 or higher
Navigate to the HAX page to see it in context. Make sure to change rename-me in ALL parts of the repo to your project name.
Scripts
-
startruns your app for development, reloading on file changes -
start:buildruns your app after it has been built using the build command -
buildbuilds your app and outputs it in yourdistdirectory -
testruns your test suite with Web Test Runner -
lintruns the linter for your project -
formatfixes linting and formatting errors
Tooling configs
For most of the tools, the configuration is in the package.json to reduce the amount of files in your project.
If you customize the configuration a lot, you can consider moving them to individual files.

Top comments (0)