tldr;
Building our applications and turning them into Docker images is one of the best ways to deploy the application. We can make sure that the environment is the same on whatever machine it’s deployed to, and we can use Kubernetes or Docker to manage the deploy and make sure that it’s always running. There are a ton of images out there that you can use to build your application, but your situation may need a specific image that isn’t available, or to extend an image that someone else has made. This article will help you to set up a workflow with GitHub actions that will build and tag the Docker image and push it to the Docker Hub registry.
Creating the Repo
Let’s start by creating a new GitHub repo that will hold our code (in our case, really only a Dockerfile is needed) for building the image. Create the repo in GitHub, and name it whatever you want. Add one file in the root of the repo, called Dockerfile. If you’re following along with me, you’ll be building an image that has the Angular CLI baked in to it. If you need a different image, then change the following to match your needs. The contents of the Dockerfile should be:
# ./Dockerfile

FROM node:12-alpine as node-angular-cli

LABEL authors="Preston Lamb"

# Linux setup
# I got this from another, deprecated Angular CLI image.
# I trust that developer, so I continued to use this, but you
# can leave it out if you want.
RUN apk update \
  && apk add --update alpine-sdk \
  && apk del alpine-sdk \
  && rm -rf /tmp/* /var/cache/apk/* *.tar.gz ~/.npm \
  && npm cache verify \
  && sed -i -e "s/bin\/ash/bin\/sh/" /etc/passwd

# Angular CLI
RUN npm install -g @angular/cli@8
At the top of the Dockerfile, we declare the image that we’ll use as the base for this image. In this case, we’re using the Alpine Node image at version 12. We set the authors label, in this case I put my name, and then we run an update command. I left this in here after using another repo for inspiration. I trusted that developer knew what he was doing, so I left it in. But you can take it out if you want. Last, the Angular CLI is installed globally for the image. This is a fairly simple, straightforward image, so this is all we need. Your image may require more steps than this, so make sure to put all those here in this file.
After finishing this (and adding an optional README), we’ll push the code to our GitHub repo.
Creating the GitHub Action
We’re now ready to set up the GitHub action that will build, tag, and push the image to Docker Hub for us. In this case, I only wanted the new image to be built if a release was tagged. This would allow me to work in the repo and push to it without extra builds being made. The tag can also be used as the tag for the image in Docker Hub, which will allow for us to set it and forget it. We don’t have to worry about updating the tag name in the GitHub action each time want to build a new image.
So to get started with your GitHub action, click on the “Actions” tab on your repo’s page in GitHub:

You should now see a landing page that looks similar to this:
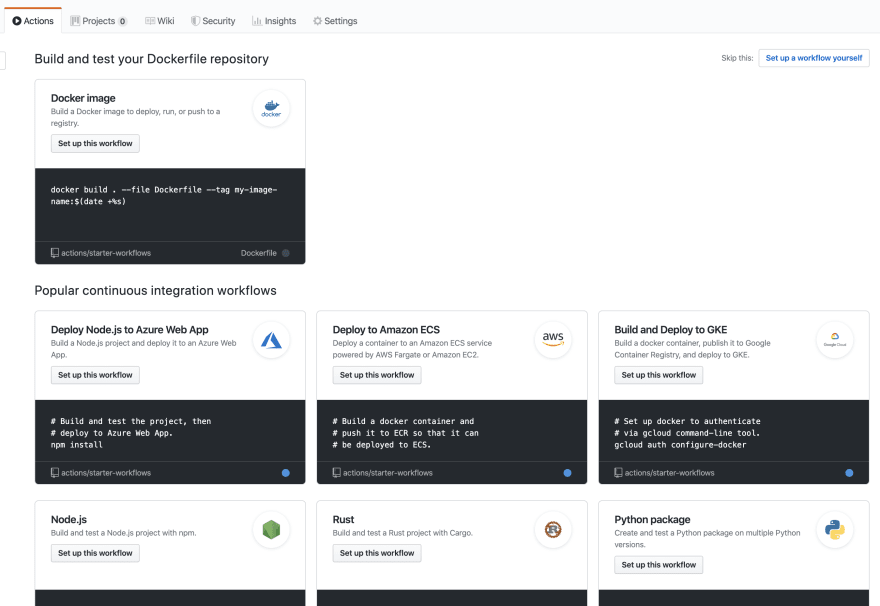
Yours may be slightly different; it seems that GitHub tries to analyze the repo some and guess what workflows and actions you may want. But in general, it will have a welcome message with some suggested actions. The top one in this example, for me, was a suggestion for building a Docker image. That’s what I needed, so I clicked on that one. By doing so, it took me to a new page where it created the folder for the workflows, and created the workflow file itself. You can now edit the file here in GitHub, or commit it to a branch and pull it down to your machine. Either way, add the following to the file:
# ./.github/workflows/dockerimage.yml

name: Docker Image CI

on:
    release:
        types: [published]

jobs:
    build:
        runs-on: ubuntu-latest

        steps:
            - uses: actions/checkout@v1
            - name: Login to DockerHub Registry
              run: echo ${{ secrets.DOCKERHUB_PASSWORD }} | docker login -u ${{ secrets.DOCKERHUB_USERNAME }} --password-stdin
            - name: Get the version
              id: vars
              run: echo ::set-output name=tag::$(echo ${GITHUB_REF:10})
            - name: Build the tagged Docker image
              run: docker build . --file Dockerfile --tag pjlamb12/angular-cli:$
            - name: Push the tagged Docker image
              run: docker push pjlamb12/angular-cli:$
            - name: Build the latest Docker image
              run: docker build . --file Dockerfile --tag pjlamb12/angular-cli:latest
            - name: Push the latest Docker image
              run: docker push pjlamb12/angular-cli:latest
Let’s break down this file a little bit. We start at the top with a name for the workflow. The pre selected action automatically added the name, but you can change it if you want. Next is where we determine when this workflow will run:
# ./.github/workflows/dockerimage.yml

on:
    release:
        types: [published]
This tells GitHub to run this workflow when a new release is published. AGain, this was the decision I made because I wanted to be able to tag a release with the desired image version name and have the image built and pushed.
The next section is a jobs section, where we’ll set up the actual work of the workflow. We’ll put the work that will be run in the build step, and tell it to use the latest Ubuntu image for the action to run in. We then define the steps:
# ./.github/workflows/dockerimage.yml

steps:
    - uses: actions/checkout@v1
The first step tells the action to extend another action that’s already been created; in this case, a checkout action that will checkout our code to use for the build. Next:
# ./.github/workflows/dockerimage.yml

- name: Login to DockerHub Registry
  run: echo ${{ secrets.DOCKERHUB_PASSWORD }} | docker login -u ${{ secrets.DOCKERHUB_USERNAME }} --password-stdin
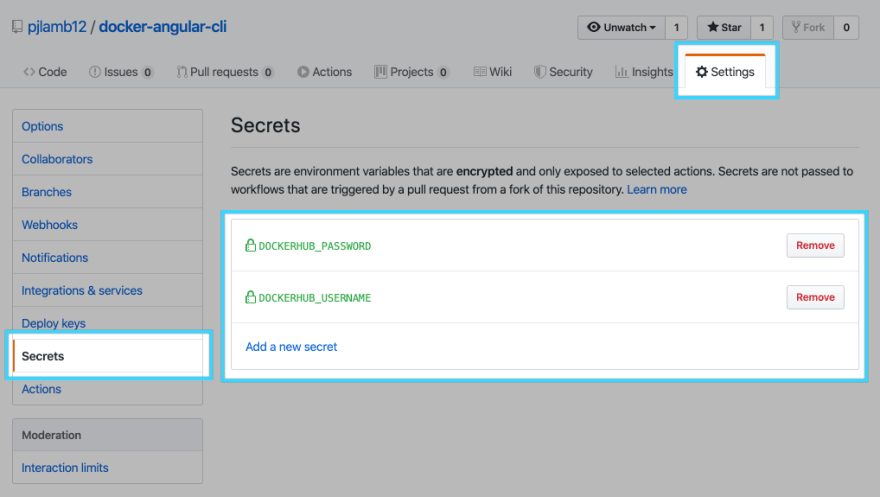
This step logs us in to the Docker Hub Registry. We output the password and then pipe that in to the docker login command. There is something new here, though, and that’s the secrets that we are using. GitHub has a section in the settings for each repository where you can set up secrets to be used for things like the GitHub Actions. It’s great, because otherwise there would be no way to log in to third party services like Docker Hub without putting your password or access key in to the repo, visible for everyone to see. To find the secrets, click on Settings at the top of the repo, then Secrets in the left nav list, and then add the secrets that you need, in this case our username and password for Docker Hub:
Once you’ve added the secrets there, they’ll be used when your workflow asks for them as we did above.
After logging in to Docker Hub, we need to get the version name for this image, and we do that by taking the name of the tag or release:
# ./.github/workflows/dockerimage.yml

- name: Get the version
    id: vars
    run: echo ::set-output name=tag::$(echo ${GITHUB_REF:10})
In this step, we’re using a ::set-output command to create a variable, tag, and set it’s value to a string. That string takes the GITHUB_REF and starts at the 11th character and goes to the end. The reason we start at the 11th variable is because in our case, the GITHUB_REF will be refs/tags/tag-name. Starting in the 11th character skips the refs/tags/ and will just use the tag-name. We’ll use that tag variable in just a minute.
The next step is to build, tag, and push the image with our recently created tag variable. In addition, we build and tag the image as latest and push that to the repo as well:
# ./.github/workflows/dockerimage.yml

- name: Build the tagged Docker image
  run: docker build . --file Dockerfile --tag pjlamb12/angular-cli:$
- name: Push the tagged Docker image
  run: docker push pjlamb12/angular-cli:$
- name: Build the latest Docker image
  run: docker build . --file Dockerfile --tag pjlamb12/angular-cli:latest
- name: Push the latest Docker image
  run: docker push pjlamb12/angular-cli:latest
This part is pretty straightforward. I’ll just point out that we access our tag variable with the steps.vars.outputs syntax seen above. The last part is the name of our variable. In this case, that is tag. We could also probably optimize this by building the image once, tagging it with our variable, pushing it, and then retagging and pushing the same image, but that’s okay; this gets the job done.
That’s it now! That’s all we have to do to set up our workflow! Not too bad, huh? In the next section we’ll tag a release, kicking off the build for us.
Tagging and Releasing
This last step is tagging a release in our GitHub repo. This will kick off a build for our workflow. To do this, click on the releases section of your repo, which is under the Code tab:

Click on the “Draft a new release” button. GitHub will walk you through the steps of creating the release, but you should choose a tag name and the desired commit to release. You can add a title and a description as well. Remember two things: the tag name you use here will be used as the tag name for your Docker image, and once you click the “Publish release” button, the workflow will be started. Once you’re ready, publish the release!
Viewing the Workflow Output
To view what happened in your workflow, and to debug if needed, go back to the Actions tab in your repo. Once you’ve created an action, that page will look like this:

On the left, you can see all the workflows you have. You can view them all, or a specific workflow. You can also see a table of builds, both successful and failed, and can click on one of those builds to see details. If your build doesn’t work, you can debug it here and make the necessary edits to get your build working.
In addition to the output of your workflow in the Actions tab, don’t forget to go to Docker Hub and view your image there as well!
Conclusion
GitHub Actions are powerful, and allow you to have a CI/CD workflow for your application or whatever you may be building. You can have it run on whatever repo actions you want. Maybe when a PR is created, you want the tests to run. Or maybe you want your application to be built and deployed to a server. Whatever your end result, you can use GitHub Actions to accomplish this. Hopefully this step-by-step review will help you create your first Action!

Top comments (0)