
With the widespread use of the internet for various applications, the need for secure user authentication has become increasingly important. While traditional methods such as email and password authentication and third-party authentication providers have been commonly used, the emergence of facial recognition technology has provided a new and innovative approach. In this article, we will explore how to incorporate facial recognition authentication into your web application using the popular JavaScript framework, Vue.js. Specifically, we will be utilizing Faceio’s facial recognition authentication and providing step-by-step instructions on how to integrate it into your Vue.js application. Whether you are a developer looking to enhance your web app’s security or simply interested in learning about the latest advancements in web authentication, this article is for you.
Reasons for implementing face authentication technology
Face authentication is gaining popularity because it provides a more convenient and safe way to authenticate users than conventional techniques like email and password authentication. visage authentication allows users to instantly verify their identity by simply presenting their visage to a camera. By removing the need for users to manually enter passwords or recall them, this can lower the risk of password-related security breaches. Face authentication is a trustworthy method of preventing fraud and identity theft because it is difficult to trick or imitate.
As shown by the application we are going to create using a Vue.js application with FaceIO’s facial recognition feature using the fio.js library, facial recognition technology is simple to integrate into web applications. This library manages the intricate details of facial recognition, making integration easy. Additionally, by removing the need for users to recall passwords, facial recognition can make their user experience more convenient. As is the case with FaceIO, an extra layer of verification, such as a PIN, can be added to further increase security. Users only need to enable the camera to scan their faces for authentication when using facial recognition.
Enabling face authentication by building a registration application with Faceio and Vue.Js
Step 1
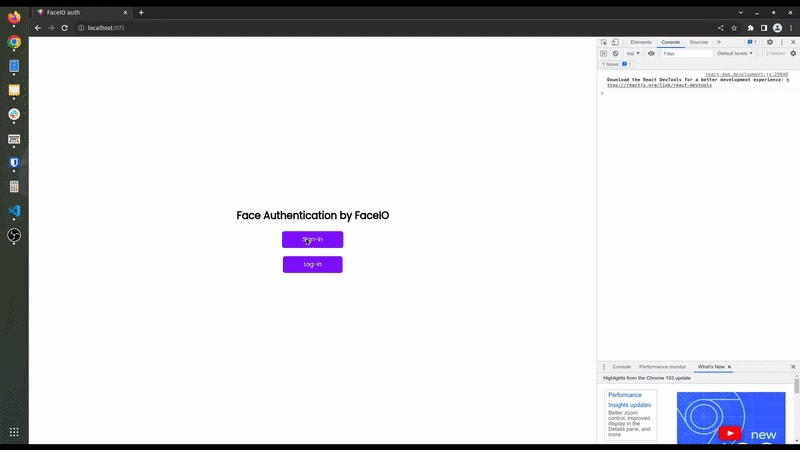
Certainly, let’s proceed with developing your simple application. The user interface will consist of three buttons: one for registering, one for signing in, and one for logging out. The application’s functionality is straightforward — the user must register first, then sign in, and after doing so, the logout button will become visible while the other two buttons will disappear. This is the desired outcome for the completed project. First, let's create a Vue.Js face-recognition project. Make sure that you have installed Node.Js and NPM, and that the Vue CLI is installed globally then create a new Vue.js project;
vue create faceRecognition
Step 2
Sure, the next step is to add fio.js to our project. To do this, you can navigate to the HTML file and add a div element with the ID “faceio-modal” and the fio.js Content Delivery Network (CDN) at the end of the body.
<div class="faceio-modal"></div>
<script src="https://cdn.faceio.net/fio.js"></script>
<script type="text/javascript">
 const faceio = new faceIO('Your app id goes here')
 window.faceio=faceio
</script>
Another approach to accomplishing this is by assigning the faceIO object to the window.faceio variable and creating an instance in the Vue.js JavaScript code while storing the app ID in a .env file.
Moving on, to update the App.vue file, you can replace the HelloWorld component with an AuthenticationComponent and include the CSS code below. As a result, the App.vue component will have a new appearance that reflects these changes.
<template>
<div class='app'>
  <AuthenticationComponent />
 </div>
</template>

<script>
import AuthenticationComponent from './components/Authentication.vue'

export default {
  name: 'App',
  components: {
    AuthenticationComponent
  }
}
</script>

<style>
body{
  display:flex;
  justify-content:center;
  align-items:center;
  height:100vh
}

</style>
Step 3
Alright, let’s proceed with updating the Authentication.vue file, which was previously the HelloWorld component. Firstly, we will clear the template and add three buttons — one for login, one for registration, and one for logout. Additionally, we need to create a user state and initialize its value to an empty string.
Using the v-if attribute, we can ensure that the login and registration buttons are visible only when the user is not logged in, while the logout button is visible only when the user is logged in. We will also associate each button with its respective click event, which we will define shortly. To style the UI, I have added some basic CSS. The resulting template will look something like this:
<template>
  <div class="Authentication">
    <h1>Face recognition with FaceIO</h1>
    <div class='container'>
    <div v-on:click='login' class='btn' v-if="user === ''">Sign in</div>
    <div class='btn' v-on:click='register' v-if="user === ''">Register</div>
    <div class='btn' v-on:click='logout'  v-if="user != ''">Log out</div>
    </div>
  </div>
</template>

<style scoped>
.container{
  width:90%;
  margin:20px auto;
  display:flex;
  justify-content:space-around;
  align-items:center;
  padding:1em;
}
.btn{
  border:1px solid black;
  border-radius:5px;
  padding:1em 2em;
}
.btn:hover{
  background:#000;
  color:#fff
}
</style>
Step 4
Sure, moving on to the JavaScript part, the first step is to create a state variable to keep track of the users. This can be achieved as shown below:
data(){
   return {
    user:''
   }
  },
Step 5
Certainly, the next step is to create the login, register, and logout functions:
The logout function is straightforward, as it simply sets the user state variable to an empty string. On the other hand, for the register function, we can use the method provided by fio.js, which can be accessed from the window object. This function requires a payload object that contains data that will be returned when the same user logs in again. The code for this function is relatively simple and is shown below.
 register(){
  window.faceio.enroll({
    "locale": "auto",
    "payload": {
        "whoami": 123456,
        "email": "john.doe@example.com"
        }
    }).then(userInfo => {
        // User Successfully Enrolled!
        alert(
            `User Successfully Enrolled! Details:
           Unique Facial ID: ${userInfo.facialId}
           Enrollment Date: ${userInfo.timestamp}
           Gender: ${userInfo.details.gender}
           Age Approximation: ${userInfo.details.age}`
        );
       console.log(userInfo);
       // handle success, save the facial ID (userInfo.facialId), redirect to the dashboard...
    }).catch(errCode => {
       // Something went wrong during enrollment, log the failure
       console.log(errCode);
    })
   },
  logout(){
   this.user=''
   }
Step 6
Great! You can find the documentation for the fio.js library here.
Moving on to the login function, fio.js also provides a method for user login that returns the data passed as an argument to the enroll function when the user registers. Here’s how it works:
 login(){
    window.faceio.authenticate({
        "locale": "auto" // Default user locale
    }).then(userData => {
        console.log("Success, user identified")
        console.log("Linked facial Id: " + userData.facialId)
        console.log("Payload: " + JSON.stringify(userData.payload)) // {"whoami": 123456, "email": "john.doe@example.com"} from the enroll() example above
        this.user=userData.payload.whoami
    }).catch(errCode => {
        console.log(errCode)
    })
   }
Conclusion
In conclusion, facial recognition authentication technology is becoming increasingly popular due to its convenience and safety in verifying user identities. Integrating this technology into web applications is also becoming simpler with the use of libraries such as fio.js. With FaceIO, an extra layer of security, such as a PIN, can be added to increase security, and the technology is compliant with privacy laws, ensuring the safety of user data. In this article, we have provided step-by-step instructions on how to incorporate FaceIO’s facial recognition feature into a Vue.js web application. By following the steps outlined in this article, developers can implement facial recognition authentication into their own web applications, enhancing the user experience and increasing security.
Thanks for taking the time to read this article

Top comments (0)