
In a recent project I utilized a backend api that had 11 models each having some sort of association with each other. Most of these associations were nested so while they were not directly associated they still should have some sort of relation to that object. I noticed midway through development that I was making lots of requests to my back end and running tons of sorts which made my code super busy and convoluted. Needless to say, it was not fun to code. I reached out to my Flatiron community where I was guided to this great tool called a serializer. Once I learned how to implement them in my project it soon became my most powerful tool!
In this blog I am going to run through the basics of setting up a rails project and implementing the serializer. For this example I am not using the –api flag but it should work for that as well. I will also include how I make my basic rails app behave like a backend api should. Here we go!
First create a rails app:
rails new serializer-test
Now lets setup the gemfile so our rails app behaves like an api. In your Gemfile.rb add this:
gem 'jbuilder', '~> 2.7'
While we are here add this gem for serializers:
gem 'active_model_serializers'
run:
bundle
Now open up the project. For this example I am going to use the popular tv show “The Office” and build the project to model Dunder Mifflin and it’s employees. I had three models: Corporation, Department, and Employee. For the sake of brevity I will not go into generating routes and database tables but that is of course the next step.
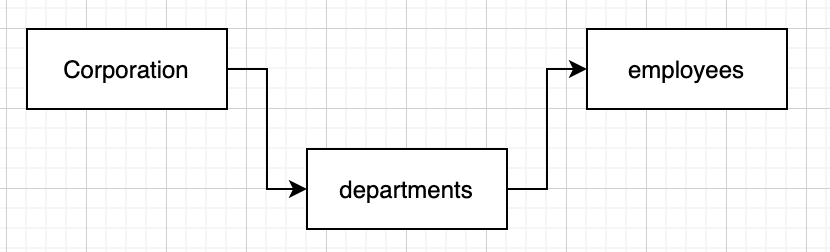
Here are the model relationships along with a visual to aid:
Corporation - has_many :departments
has_many :employees, through: :departments
Department – belongs_to :corporation
has_many :employees
Employee – belongs_to :departments
So the purpose of this blog is to be able to make just a single request to corporations which will return its departments and all of its employees. Like this:
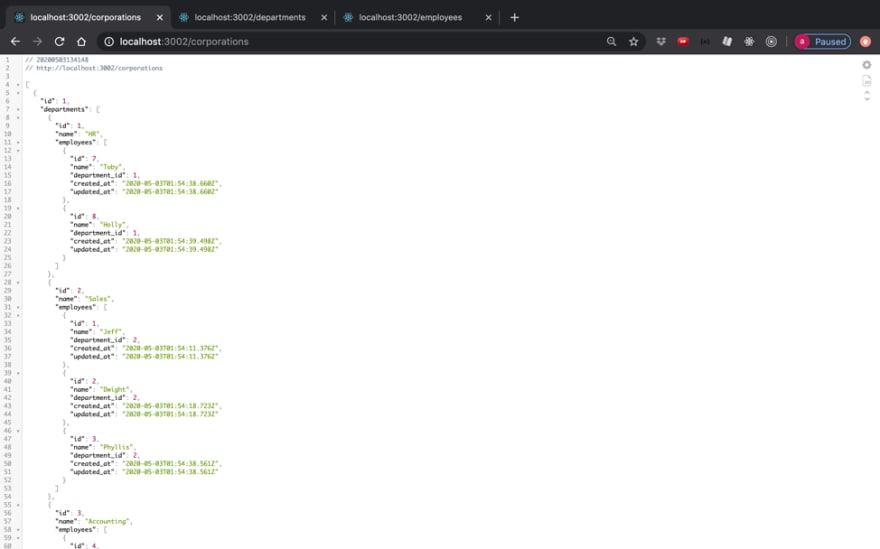
As you can see, I have seeded some data in here so that we have something to work with. Here it is for the sake of transparency:
Corporation.create(name: 'Dunder Mifflin')

Department.create(name: 'HR', corporation_id: Corporation.first.id)

Department.create(name: 'Sales', corporation_id: Corporation.first.id)

Department.create(name: 'Accounting', corporation_id: Corporation.first.id)

Employee.create(name: 'Jeff', department_id: Department.all[1].id)

Employee.create(name: 'Dwight', department_id: Department.all[1].id)

Employee.create(name: 'Phyllis', department_id: Department.all[1].id)

Employee.create(name: 'Oscar', department_id: Department.all[2].id)

Employee.create(name: 'Kevin', department_id: Department.all[2].id)

Employee.create(name: 'Angela', department_id: Department.all[2].id)

Employee.create(name: 'Toby', department_id: Department.all[0].id)

Employee.create(name: 'Holly', department_id: Department.all[0].id)
Now run your server
rails s -p 3002 (you can use what ever port number you want or just use the default)
Open up your browser and head over to your api. Here are mine:
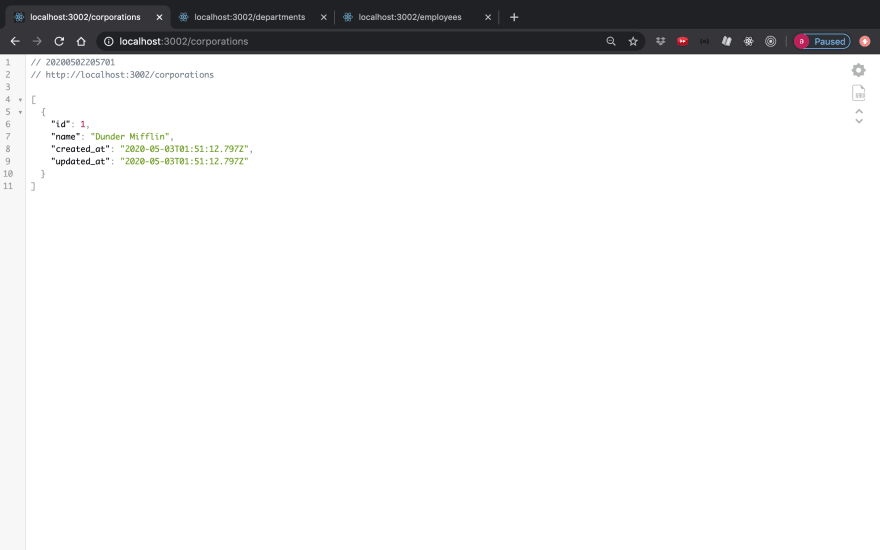
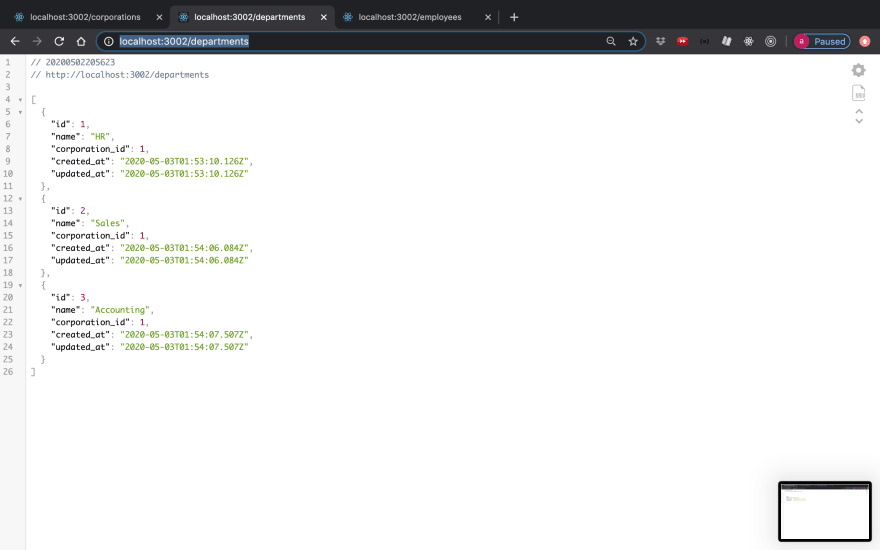

As of now we would have to make three separate requests in order to access all of this info, but we want to narrow that down to just one. Now we can add include statements in our controller and get a similar effect but that gets messy. Serializers are much neater, easier to use, and easier to read. Now we will begin implementing the serializers.
To create a serializer you can use rails generator. Run:
rails g serializer your-model-name
Make sure that when you run the generator command that the name matches your model name. By doing this you will implicitly call the serializer from the controller.
Once you have created your serializer revisit your api. If the serializer name matches the model name you should get back something like this:

Woah what happened to all of my data?! Panic mode! Don’t worry the serializer by default only displays the Id for every instance. We simply have to go write in the other attributes and models we want to include. Lets go! If your api doesn’t look like this scroll back through my blog and tinker until it does. Don’t move on until you’ve gotten this far.
Now lets add some attributes to these serializers. Head to your serializers folder following the path: app/serializers/serializer-name
Open it up and you should see this:
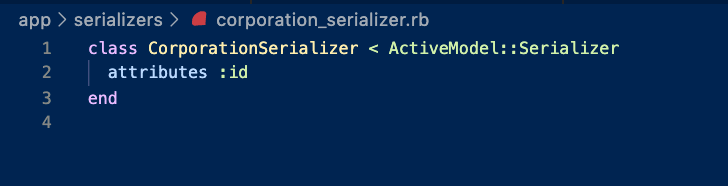
Add the attributes you want to see. For me it looks like this:
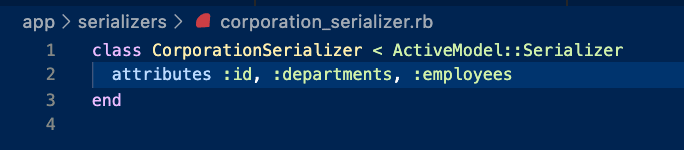
Now if I head to the url again I see my new data! You might need to restart your server.
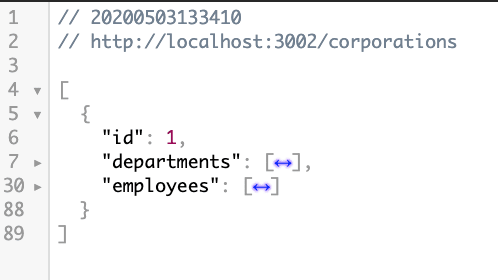
There they are! Let’s open it all up
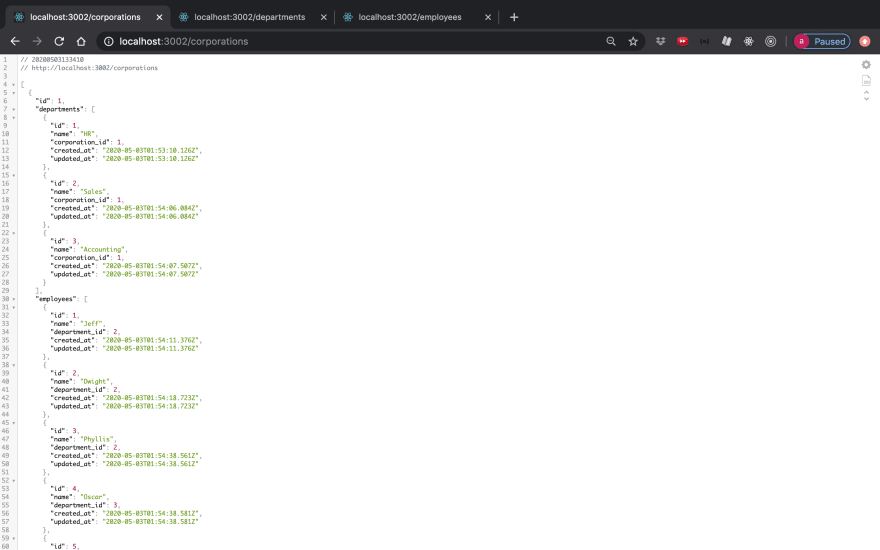
There it all is! I can now access all of a corporation’s employees without having to make a ton a fetch requests and run filters and sorts. Now let’s go just one step further. Let’s say you want a department’s employees. Well in this case you would have to run a filter to match the department ids with the employee ids and we are trying to eliminate all that unnecessary logic. We need to turn one of those actions into a function and define specifically what we want to include. Like this:
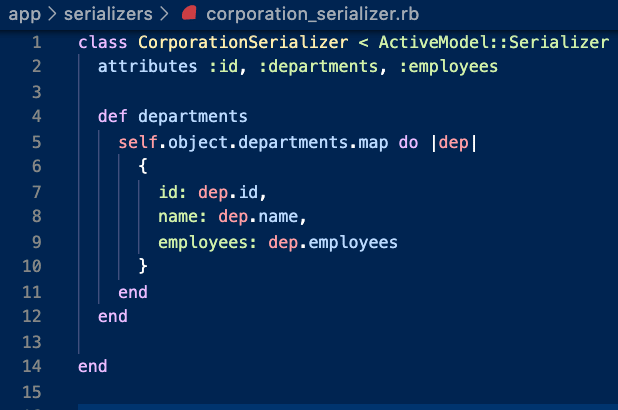
Now if we visit the api again we see it all there:

That’s it! Now, all we have to do on our front end is make a single request to corporations and we have access to all of the data that is associated with that model. Serializers a very powerful tool and I hope this blog has helped you understand what they are and how they are used. Comment if you have any questions or notice that I left something out. Thank you for reading.

Top comments (0)