
The closer your test or demo data is to the real world the better you can test the application for UX, improve, and catch corner cases during development. In this article, I'll show you how to use Vaadin's example data generator to create demo data for a simple SQL database. The article shows how to build a complete app combining Spring Boot, JPA, Project Lombok, Vaadin, and MariaDB.
You can also watch a video version of this article:
Setting Up a Project
In this article, I use a Vaadin Flow project generated using an online tool called Vaadin Start. However, you can use Vaadin's example data generator in any Java project with or without Vaadin.
Adding the Required Dependencies
To use the Vaadin example data generator, add the following dependency to the pom.xml file:
<dependency>
    <groupId>com.vaadin</groupId>
    <artifactId>exampledata</artifactId>
    <version>4.0.0</version>
</dependency>
If you are following this article from scratch, add the Spring Data, MariaDB JDBC driver, and Project Lombok dependencies as well:
<dependency>
    <groupId>org.springframework.boot</groupId>
    <artifactId>spring-boot-starter-data-jpa</artifactId>
</dependency>
<dependency>
    <groupId>org.mariadb.jdbc</groupId>
    <artifactId>mariadb-java-client</artifactId>
    <scope>runtime</scope>
</dependency>
<dependency>
    <groupId>org.projectlombok</groupId>
    <artifactId>lombok</artifactId>
    <optional>true</optional>
</dependency>
Implementing a Simple Backend
Let's say we want to implement a view to show a list of books. We need to configure a database connection, create a Java class that represents a book (as a JPA Entity), create a class (or interface) to access the database using JPA, and implement a service class to encapsulate database technology details.
Configuring the Database Connection
With Spring Boot, you can configure the database connection in the application.properties file by adding the following:
spring.datasource.url=jdbc:mariadb://localhost:3306/book_demo
spring.datasource.username=root
spring.datasource.password=password
spring.jpa.hibernate.ddl-auto=create
The last line is needed only if you want to drop and recreate the database schema every time the application is started. There are other options that could be more convenient during development depending on the stage you are in your project.
Remember to set the database connection parameters to point to your database instance.
Implementing a JPA Entity
Implementing a JPA Entity gets easier with Project Lombok. Here's a possible implementation:
package com.example.application.backend;

import lombok.Data;
import lombok.EqualsAndHashCode;

import javax.persistence.*;
import java.time.LocalDate;

@Data
@EqualsAndHashCode(onlyExplicitlyIncluded = true)
@Entity
public class Book {

    @EqualsAndHashCode.Include
    @Id
    @GeneratedValue(strategy = GenerationType.IDENTITY)
    private Integer id;

    @Lob
    private String imageData;

    private String title;

    private String author;

    private LocalDate publishDate;

    private Integer pages;

}
This class is persistence-ready which means that JPA will be able to map instances of this class to a MariaDB database table (or any other database that provides a JDBC driver). Important here is to notice that we want the id column to be automatically generated for us if we pass a null value. Lombok's @Data annotation adds getters and setters, and @EqualsAndHashCode... I'm sure you can guess what it does. What's important is that we are indicating Lombok to use only the id property for the equals(Object) and hashCode() methods. So, two books are the same if they have the same id values regardless of whether the other properties have different values or not. Having these two methods implemented is needed for the correct functioning of JPA.
Implementing a Repository cClass
We need a way to access the database. We could use the JDBC API to connect to the MariaDB database, run SQL queries, and manually set the returned values in instances of Book. However, JPA mission is to provide this functionality and it is augmented by Spring Data. Accessing the database is so easy, that we only need to declare an interface:
package com.example.application.backend;

import org.springframework.data.jpa.repository.JpaRepository;
import org.springframework.stereotype.Repository;

@Repository
public interface BookRepository extends JpaRepository<Book, Integer> {
}
There's no need to implement this interface at all. Spring Data will provide objects that implement the interface when needed. If you inspect the methods available in the interface, you'll find many useful ones to create, read, update, delete Book instances. You can also add methods to the interface without implementing them and Spring Data will use a naming convention to create the implementation for you.
Implementing a Service Class
The BookRepository interface doesn't hide the fact that we are using JPA as a persistence mechanism. To improve code maintainability, we can introduce a new class that uses the repository and provides the methods that the UI needs. This class could also add any additional business logic required by the application:
package com.example.application.backend;

import org.springframework.stereotype.Service;

import java.util.List;

@Service
public class BookService {

    private final BookRepository repository;

    public BookService(BookRepository repository) {
        this.repository = repository;
    }

    public List<Book> findAll() {
        return repository.findAll();
    }

}
The constructor of this service class accepts an object of type BookRepository. Since the class is also marked with @Service, Spring will create a new instance of the repository and pass it to the constructor when you, in turn, have a constructor in a different class (for example, another service, or the UI when implemented in Java) that accepts a BookService object. Spring creates all the instances for you using a pattern called Inversion of Control so you never use the new Java keyword to create these instances and give Spring the chance to pass objects via the constructors using a pattern called Dependency Injection. There are many online resources to learn more about this.
Using Vaadin's Example Data Generator
A good point to generate demo data is at application startup. To run a Java method when the application starts, we can create a Spring bean of type CommandLineRunner in any configuration class, for example, we can add the following method to the Application class:
@Bean
public CommandLineRunner createDemoDataIfNeeded(BookRepository repository) {
    return args -> {
        ... logic here ...
    };
}
Spring will inject the required BookRepository object before executing the method.
Configuring the Generator
Vaadin's example data generator is accessed through the ExampleDataGenerator class. Here's the code we can add inside the lambda expression of the previous code snippet:
if (repository.count() == 0) {
    var generator = new ExampleDataGenerator<>(Book.class, LocalDateTime.now());
    generator.setData(Book::setImageData, DataType.BOOK_IMAGE_URL);
    generator.setData(Book::setTitle, DataType.BOOK_TITLE);
    generator.setData(Book::setAuthor, DataType.FULL_NAME);
    generator.setData(Book::setPublishDate, DataType.DATE_LAST_10_YEARS);
    generator.setData(Book::setPages, new ChanceIntegerType("integer", "{min: 20, max: 1000}"));

    List<Book> books = generator.create(100, new Random().nextInt());
}
This checks that there are no books in the database since we don't want to mess up with data if it already exists.
The generator is configured by using the setData(BiConsumer, DataType) method which accepts a method reference to a setter in the Book class and a specific data type. There are many data types available. Make sure to inspect the values in the DataType class to get an idea. You'll find for example data types for creating book titles, people's names, dates, times, cities, countries, phone numbers, addresses, food names, words, sentences, numbers, booleans, and others.
Creating and Saving the Example Data
Call the create(int, int) method to create Book instances:
List<Book> books = generator.create(100, new Random().nextInt());
The first parameter is the number of instances to create (100 books in the previous example), and the second is the seed used by the internal random generator. The method returns a list of objects that we can persist using the repository instance:
repository.saveAll(books);
Measuring Data Generation and Saving Time
It's useful to show a message in the log when the application is generating data, a process that can take time depending on the kind and amount of data to create. It's also useful to show a message when the data generation process is completed, possibly, showing the time it took. Here's a complete implementation of the createDemoDataIfNeeded(BookRepository) method that does exactly that:
@SpringBootApplication
@Theme(value = "demo")
@PWA(name = "Demo", shortName = "Demo", offlineResources = {"images/logo.png"})
@NpmPackage(value = "line-awesome", version = "1.3.0")
@Log4j2
public class Application extends SpringBootServletInitializer implements AppShellConfigurator {

    public static void main(String[] args) {
        SpringApplication.run(Application.class, args);
    }

    @Bean
    public CommandLineRunner createDemoDataIfNeeded(BookRepository repository) {
        return args -> {
            if (repository.count() == 0) {
                log.info("Generating demo data...");
                var generator = new ExampleDataGenerator<>(Book.class, LocalDateTime.now());
                generator.setData(Book::setImageData, DataType.BOOK_IMAGE_URL);
                generator.setData(Book::setTitle, DataType.BOOK_TITLE);
                generator.setData(Book::setAuthor, DataType.FULL_NAME);
                generator.setData(Book::setPublishDate, DataType.DATE_LAST_10_YEARS);
                generator.setData(Book::setPages, new ChanceIntegerType("integer", "{min: 20, max: 1000}"));

                var stopWatch = new StopWatch();
                stopWatch.start();
                List<Book> books = generator.create(100, new Random().nextInt());
                repository.saveAll(books);
                stopWatch.stop();
                log.info("Demo data generated in " + stopWatch.getTime() + "ms.");
            }
        };
    }

}
This uses Apache Commons (StopWatch) for timing and Lombok (@Log4j2) for logging.
Implementing a Web View in Java
You can check that the data is indeed in the database by connecting to the MariaDB instance and running the following query:
select * from book;
However, to make it more interesting we can add a web view using Vaadin and explore the data in the browser:
package com.example.application.ui;

import com.example.application.backend.Book;
import com.example.application.backend.BookService;
import com.vaadin.flow.component.dialog.Dialog;
import com.vaadin.flow.component.grid.Grid;
import com.vaadin.flow.component.html.Image;
import com.vaadin.flow.component.orderedlayout.VerticalLayout;
import com.vaadin.flow.router.Route;

@Route("")
public class BooksView extends VerticalLayout {

    public BooksView(BookService service) {
        var grid = new Grid<Book>();
        grid.setSizeFull();
        grid.addComponentColumn(this::getThumbnail);
        grid.addColumn(Book::getTitle).setHeader("Title");
        grid.addColumn(Book::getAuthor).setHeader("Author");
        grid.addColumn(Book::getPublishDate).setHeader("Publish date");
        grid.addColumn(Book::getPages).setHeader("Pages");

        grid.setItems(service.findAll());

        add(grid);
        setSizeFull();
    }

    private Image getThumbnail(Book book) {
        var image = new Image(book.getImageData(), book.getTitle() + " cover");
        image.setHeight("70px");
        image.addClickListener(event -> showCover(book));
        return image;
    }

    private void showCover(Book book) {
        var image = new Image(book.getImageData(), "Cover");
        image.setSizeFull();

        var dialog = new Dialog(image);
        dialog.setHeight("90%");
        dialog.open();
    }
}
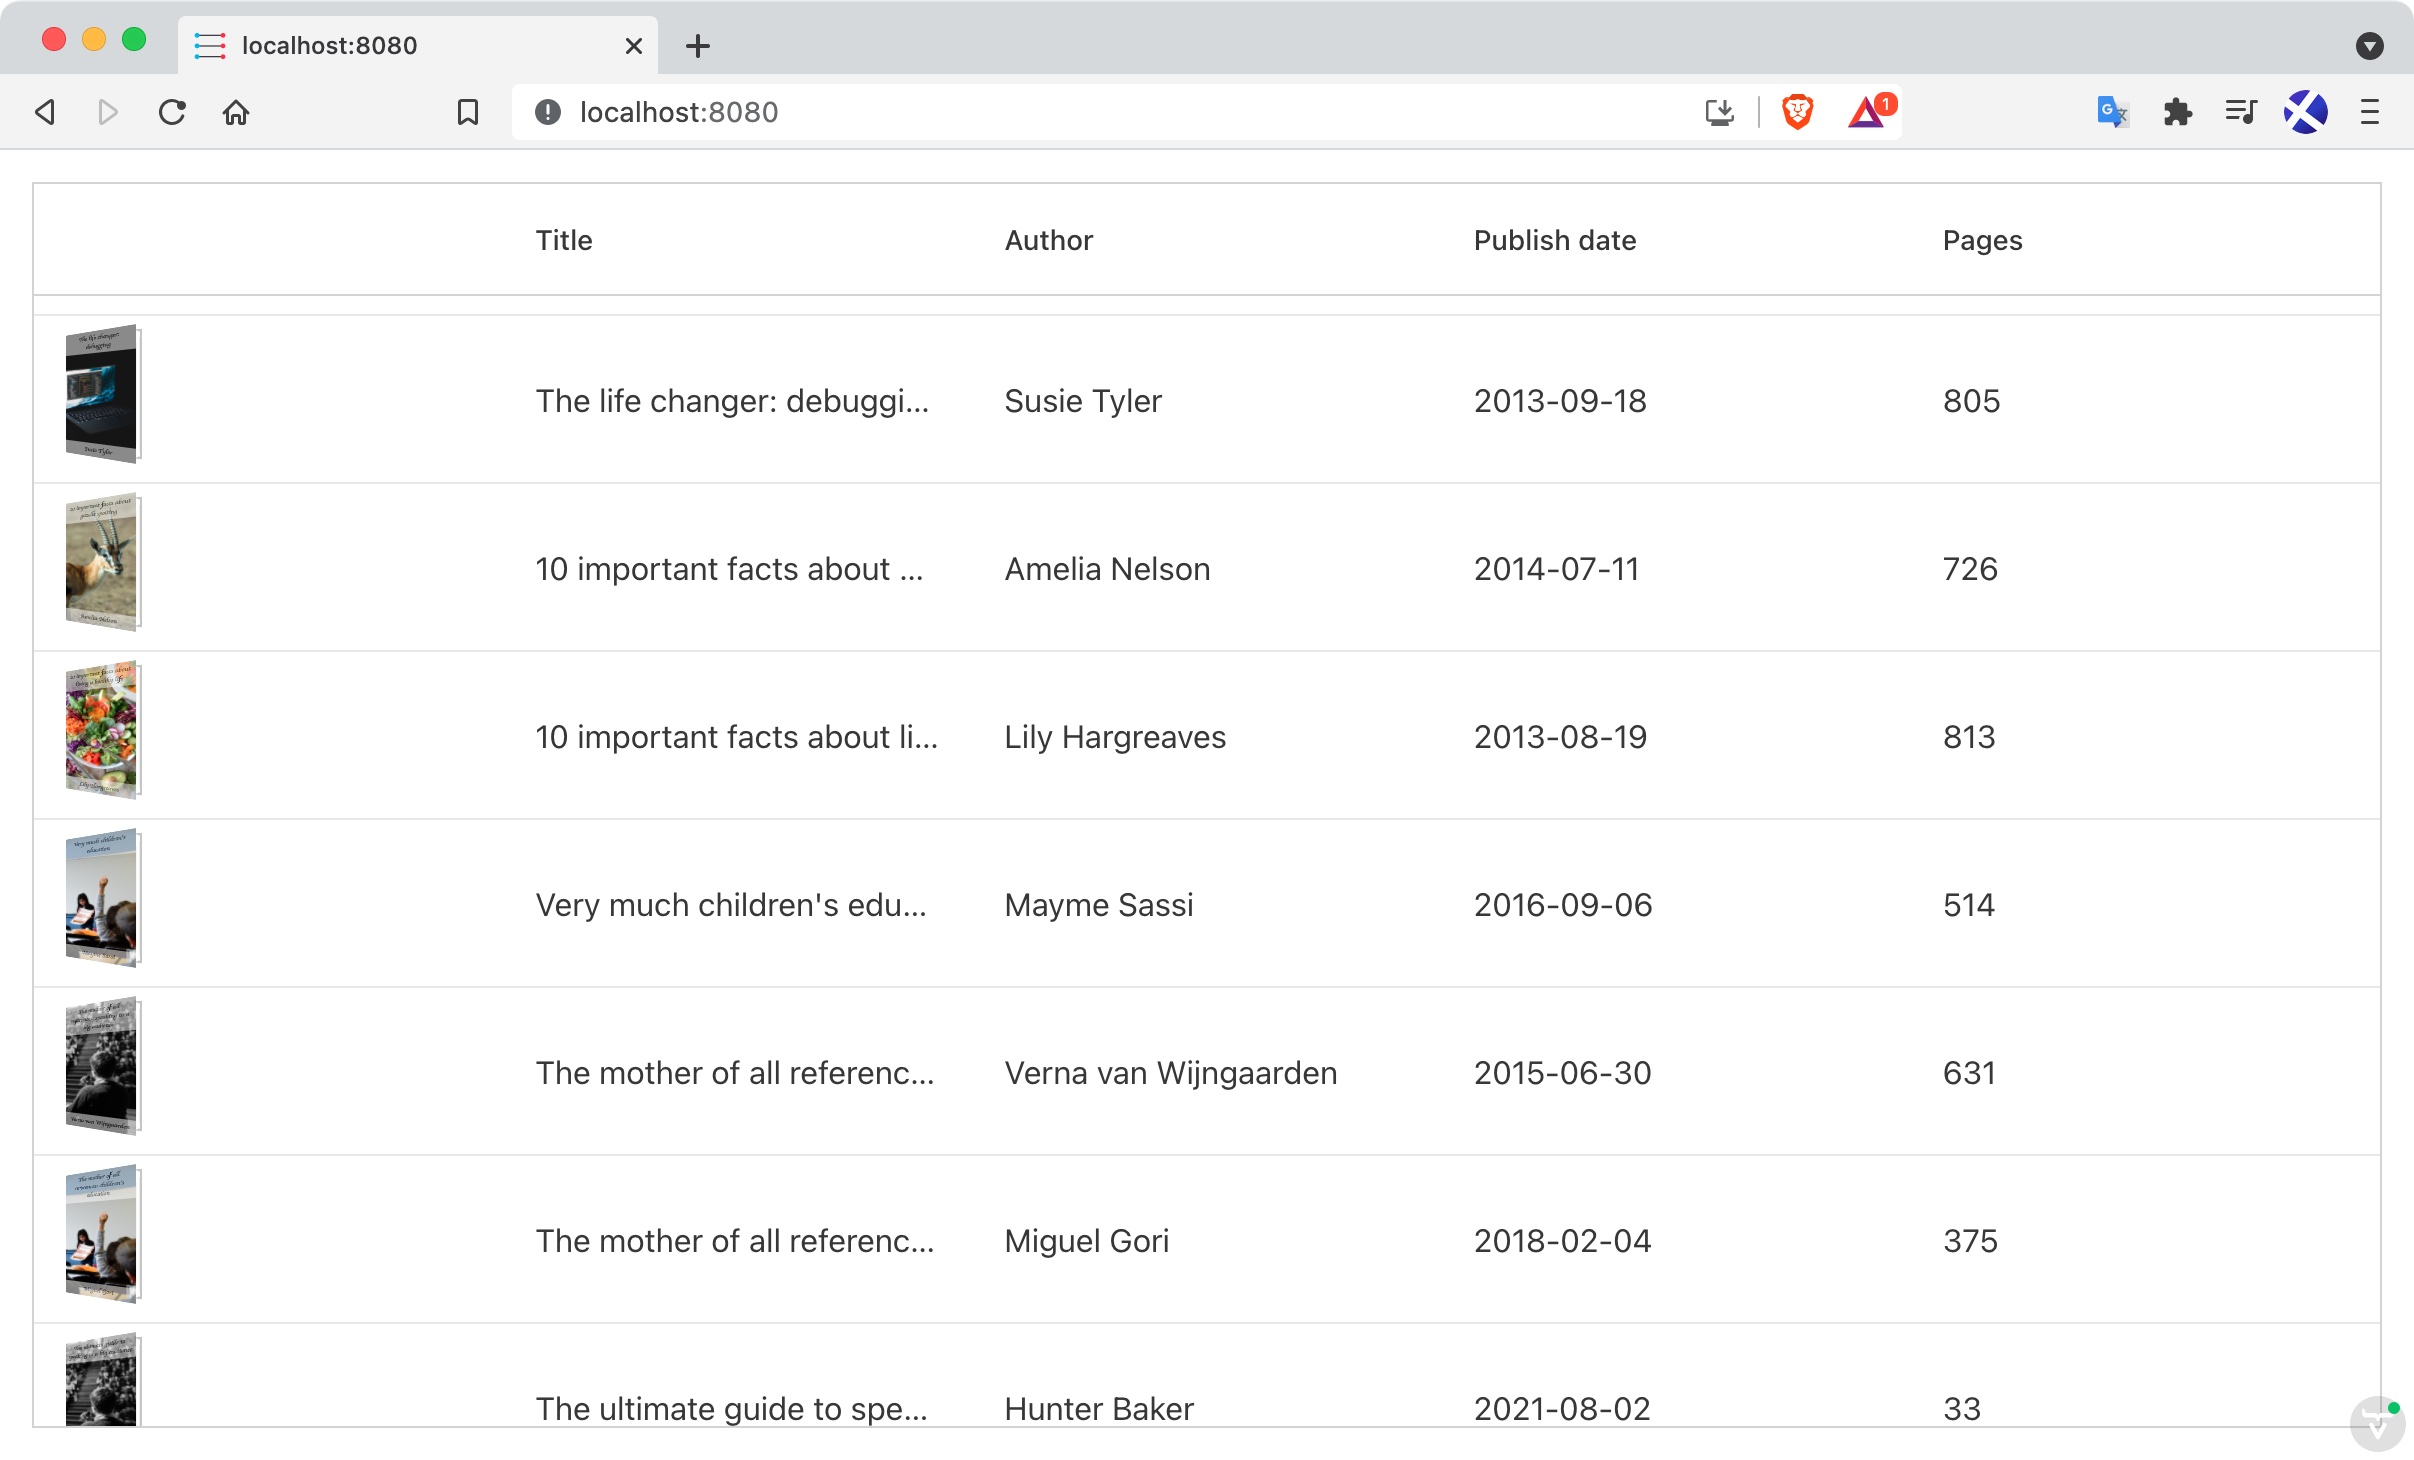
This class uses Vaadin's API to add a view mapped to the context root via @Route(""). The constructor creates a Grid UI component and configures the columns connecting each one to a property in the Book class using the corresponding getters. There's a special column that shows a thumbnail image that, when clicked, opens a dialog to show the book's cover as a larger image.
To start the application, run:
mvn spring-boot:run
```
Alternatively, you can simply run the standard entry point `main(String[])` method in the `Application` class. Once the application is compiled and started (a process that could take longer if it's the first time you are building it), you can access it in the browser at [http://localhost:8080](http://localhost:8080/). Here's a screenshot:

Top comments (0)