I've always been interested in how things work under the hood, and since my journey in software development started in 2012 on Windows Phone 7, I have a soft spot for mobile Windows devices.
This also includes HoloLens, which from a development perspective feels very similar to Windows Phone.
To set expectations, this blog post will:
- Show you how to install the HoloLens 2 emulator
- Explain which tools are needed to open its virtual hard disk
- Show you how to explore the system files on said disk
So let's get started, shall we?
Prerequisites
- Windows 10 Pro, version 1909 or later
- Windows Insider ADK, version 2004
Installation
You can download the emulator from this page. Depending on the speed of your internet connection, this might take a while. Same goes for the ADK. Grab a cup of your favorite hot beverage in the meantime. :)
Minor caveats concerning the ADK download
So, at the time of writing I was having a hard time getting hold of the ADK for Windows 10 version 2004. The Windows Insider ADK download page already got updated for a future Windows build, whereas the official (non-preview) download page wasn't yet updated to include that version.
I didn't want to try older/newer versions because I already knew that the 2004 one was working, so I had to resort to some hacks to get it:
- Go to the Windows Insider ADK page and log in.

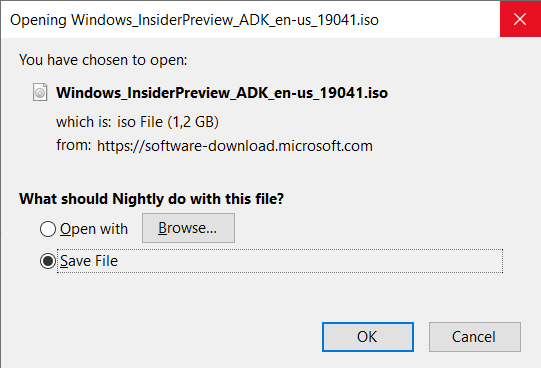
- Right-click the download button and select "Inspect Element". You should see some HTML and the
<button>element selected.- I'm using Firefox here, not sure how this option is called in other browsers

- I'm using Firefox here, not sure how this option is called in other browsers
- Change the version number in the file name to 19041 and press the download button. You should get a download prompt now.
In the ADK installer, make sure to select Imaging and Configuration Designer.
Emulator files
After the emulator is installed, you'll likely find it in your Windows SDK installation folder; for me that is C:\Program Files (x86)\Windows Kits\10\Emulation\HoloLens.
There is a folder for each installed version; at the moment I have 10.0.18362.1042 on my machine, though there's already some newer ones.
When you open that folder, you'll notice a pretty big (~6GB) file called Flash.vhdx. This is a virtual hard disk file that contains the emulator's Windows installation. Our goal is to explore the contents of this disk image.
Aside: HoloLens 1 emulator
The HoloLens 1 emulator used the older VHD format for its disk image file. You could just double-click it in explorer and Windows would happily mount it, allowing you to look at the contents without needing any kind of extra tools. Unfortunately, when we try doing that with our HoloLens 2 .vhdx, explorer greets us with an error message:

This is a minor roadblock, but there are ways to get around it.
Mounting the HoloLens 2 disk image
To get Windows to recognize and let us explore our disk image, we will use a tool called WPImage, which is part of the ADK.
Assuming you didn't change the install directory of the ADK, it should be located in C:\Program Files (x86)\Windows Kits\10. Inside there, look for a folder called tools. The tools folder should have a bin\i386 subdirectory and inside there should be a program called wpimage.exe. Open up an elevated PowerShell in that directory.
Then run the command .\wpimage.exe mount <path to Flash.vhdx>. If everything works out, you'll likely get output similar to this:
ETW Log Path: ...
OS Version: Microsoft Windows NT 10.0.18363.0
Mounting a VHD/X image.
OpenDiskInternal: Mounted virtual disk at phys \\?\PhysicalDrive2
OpenVirtualHardDisk: Waiting for partition MAINOS arrival notification.
MountStoragePool: Name (OSPool), Version (ScVersionWindowsRedstone5), Number of Spaces (1), Staged (true)
MountStoragePool: Attached EFIESPDisk to \\.\PhysicalDrive3
MountStoragePool: Attached MainOSDisk to \\.\PhysicalDrive4
MountStoragePool: Attached BSPDisk to \\.\PhysicalDrive5
MountStoragePool: Attached PreInstalledDisk to \\.\PhysicalDrive6
MountStoragePool: Attached OSDataDisk to \\.\PhysicalDrive7
MountStoragePool: Attached DataDisk to \\.\PhysicalDrive8
MountStoragePool: Attached VIRT_EFIESPDisk to \\.\PhysicalDrive9

        To dismount, run "wpimage.exe dismount -physicaldrive \\.\PhysicalDrive2"
There's a bunch of information to unpack here. We can see that there are multiple disks mounted; these correspond to partitions of the HoloLens 2 emulator.
Quick terminology:
- EFIESP -> EFI system partition
- MainOS -> Most OS files reside here, e.g. the Windows folder
- BSP -> Board support package. In a "real" HoloLens 2 system image, this means hardware drivers.
I'm interested in the Windows folder right now, so let's explore MainOS first.
Exploring a mounted disk
Now that the disk is mounted, we want it to be nicely visible through explorer.
To accomplish that, open Disk Management and look for the MainOS disk.

Then, right-click it and select "Change drive letter and paths". After that, click Add and Mount in the following empty NTFS folder. You can select any folder you want; I created an empty folder at C:\MainOS.
And that's it!
Now you can explore the OS files, which is pretty cool.
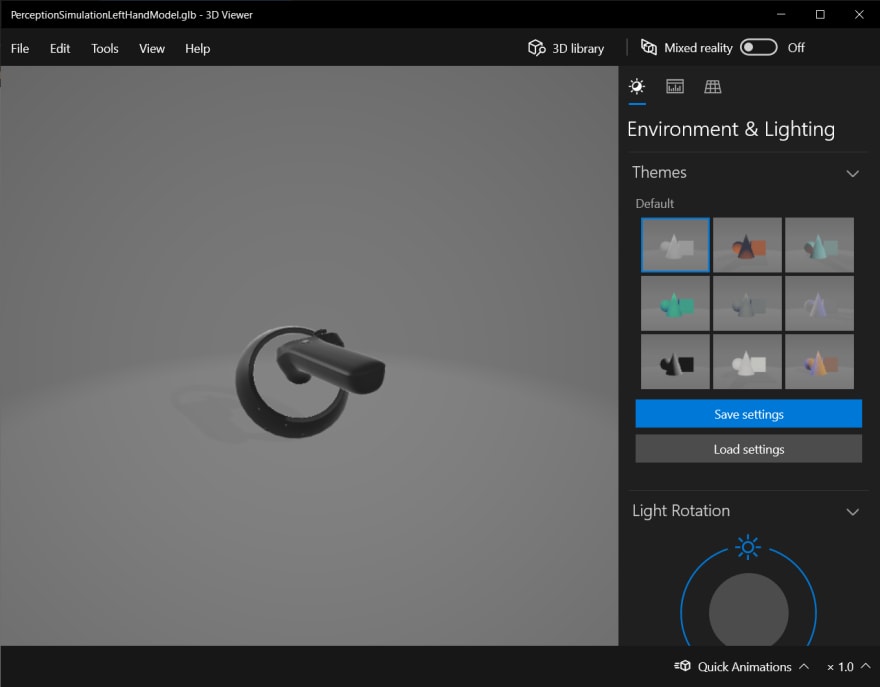
Bonus
The HoloLens 2 emulator system image features the GLTF models of Windows Mixed Reality controllers. You'll find them at MainOS\Windows\system32\PerceptionSimulationLeftHandModel.glb.

Top comments (0)