
Let’s pretend I have a lazy kid that responds really well to financial incentives. In this tutorial, we will build a React Todo App that sends a cryptocurrency payment whenever a Task is marked Complete from the Todo list. When we’re done, the app should look like this:
We can build the app above by following these steps:
- Clone the todo-react app
- Generate a wallet address
- Send crypto whenever a Task is Completed
Step 1: Clone the todo-react app
Fire up your Terminal, head over to GitHub, find a good Todo app (I picked this one), and clone it to your machine.
git clone https://github.com/tastejs/todomvc.git
Change directory into the react-todo example.
cd todomvc/examples/react
Install all dependencies.
npm install
Start a web server for local development.
python -m SimpleHTTPServer
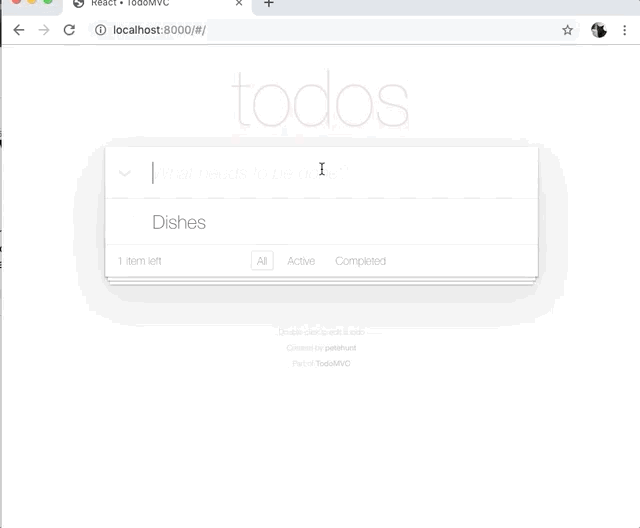
Open your browser to localhost:8000 and you should see the app.
Step 2: Generate a wallet address
In order to send crypto whenever a Task is Completed, we need an address to send it to. But first, we need to pick a cryptocurrency. In this tutorial, we will use Burstcoin due to its ease of use and well-documented libraries.
For this app to work, both the sender (me) and the recipient (my unmotivated child) will need a wallet address. The sender’s wallet will also need to have some Burst in it to send.
Download a Burst wallet or use an online wallet to generate some wallet addresses, and fill one of them with Burst. Burst is listed at several exchanges. Be sure to keep note of your passphrases.
In this example, we will use the TestNet running at http://testnet.getburst.net:6876 to create our accounts so we don’t have to spend any real money. If you need some Test Burst, please reach out on Discord and someone will send you some.
Step 3: Send crypto whenever a Task is Completed
This is the meat of the tutorial, but it can be broken down into the following steps:
Install @burstjs/core and @burstjs/crypto
In index.html, add these two script tags right before </body> to bring in @burstjs/core and @burstjs/crypto as b$ and b$crypto, respectively.
<script src='https://cdn.jsdelivr.net/npm/@burstjs/core/dist/burstjs.min.js'></script>
<script src='https://cdn.jsdelivr.net/npm/@burstjs/crypto/dist/burstjs.crypto.min.js'></script>
Add a sendBurst function to app.jsx
sendBurst: function() {

    const api = b$.composeApi({
        nodeHost: "http://testnet.getburst.net:6876",
        apiRootUrl: "/burst"
    });

    const recipientAddress = 'BURST-WQJC-854G-2LQT-8T8EA';

    const senderPassphrase = 'password123'; // BURST-9CVF-6DTE-ST5Q-GTDYA

    const keys = b$crypto.generateMasterKeys(senderPassphrase);

    return api.transaction.sendMoney({
        // NOTE: amountNQT is actually in burst
        amountNQT: '1',
        feeNQT: '0.08',
        deadline: 24 * 60, // 24 hours
        type: 1
        }, keys.publicKey, keys.signPrivateKey, recipientAddress);

},
Let’s walk through what this code is doing, line by line.
First, we create a function called sendBurst.
sendBurst: function() {
Then, we tell BurstJS which Burst API node we want to talk to. After all, we have to submit the transaction to the blockchain somehow. In this case, we are sending Burst to the TestNet running on getburst.net.
const api = b$.composeApi({
    nodeHost: "http://testnet.getburst.net:6876",
    apiRootUrl: "/burst"
});
Next, we create a variable to store the address of our recipient (in this example, my ungrateful child).
const recipientAddress = 'BURST-WQJC-854G-2LQT-8T8EA';
Then we create a variable to store the passphrase to my wallet (this is your 12-word passphrase). Note: this is for demonstration purposes only - don't put passphrases in source code!
const senderPassphrase = 'password123'; // BURST-9CVF-6DTE-ST5Q-GTDYA
Next, we generate some account keys from my passphrase.
const keys = b$crypto.generateMasterKeys(senderPassphrase);
Finally, we call the sendMoney function from the BurstJS transaction API.
return api.transaction.sendMoney({
    // NOTE: amountNQT is actually in burst
    amountNQT: '1',
    feeNQT: '0.08',
    deadline: 24 * 60, // 24 hours
    type: 1
    }, keys.publicKey, keys.signPrivateKey, recipientAddress);
Note: BurstJS signs transactions locally before broadcasting the signed transactions to the network. This means your private key is never sent over the wire.
Then we close the function. That’s it for the sendBurst function.
Update the toggle function
toggle: function (todoToToggle) {
    if (!todoToToggle.completed) {
        this.sendBurst().then((response) => {
            console.log(response);
            this.props.model.toggle(todoToToggle);
        });
    } else {
        this.props.model.toggle(todoToToggle);
    }
},
In this code, we first check that the user has marked a Task as completed, as we don’t want to send payment if the user is un-checking a previously completed task.
if (!todoToToggle.completed) {
If the task is being marked as completed, we call this.sendBurst() with a .then() handler to update the item if the Burst was sent successfully.
this.sendBurst().then((response) => {
    console.log(response);
    this.props.model.toggle(todoToToggle);
});
With that, you should be able to send Burst anytime you mark a Task as Complete.
Conclusion
In a few simple steps, we just cloned a todo app, and added the ability for it to send a crypto transaction whenever a Task is marked Complete.
In the real world, we’d show the user some success message, and a failure message in the event of failure. That’s it, have fun and happy hacking!
View the source code on GitHub: https://github.com/blankey1337/react-crypto-todo
View the transaction from this demo: http://explorer.testnet.burst.devtrue.net/tx/2321852862536159906
🍻 Buy the dev a beer
@blankey1337 BURST-HT4V-8H5E-ESS5-223SB

Top comments (0)