Intro
I recently started working a little bit with the Gatsby framework for my React projects and have loved it. It is minimal, easy to use, and can be very flexible through its library of different plugins. We are going to make a very basic home page for our Gatsby site using the default Gatsby Starter project and add a little styling with javascript.
Getting Started
First things first, we need to get the Gatsby project up and running. If this is your first time using Gatsby then you will need to install Gatsby-cli by running
npm install -g gatsby-cli
You must have Node v10+ installed already on your machine for this to work. We are going to be using a bare-bones Gatsby starter for our project. In the terminal, type
gatsby new my-gatsby-project https://github.com/gatsbyjs/gatsby-starter-default
This will begin building the Gatsby default starter project for us to work with. Once it is finished building, cd into the project directory and open up the project in your text editor of choice.
We can clean up the project to remove some of default code that we won't be needing. We can delete the gatsby-browser.js, gatsby-node.js, and gatsby-ssr.js files from the root directory since we won't be using them. You can also open up the src/index.js and delete everything that is between the layout components so that your new index.js will look like this.
import React from "react"
import Layout from "../components/layout"


const IndexPage = () => (
  <Layout>

  </Layout>
)

export default IndexPage
The default starter is nice because it comes pre-loaded with a header and layout component that we can use to build out a pretty easy landing page. Navigate to the gatsby-config.js file and take a look. This is a basic configuration for your page. Under plugins, the first line should read
gatsby-plugin-react-helmet
This plugin allows you to provide meta data for your site such as title, description and more. Under siteMetaData at the top, go ahead and change the title and description values to what you want your site title/description to be.
title: `Gatsby.js is the Coolest`,
    description: `Kick off your next, great Gatsby project with this default starter. This barebones starter ships with the main Gatsby configuration files you might need.`
If you want to know more about the other plugins you can checkout the Gatsby Plugin Docs for more info.
Go ahead and start up the development server by typing
in the terminal
gatsby develop
Gatsby is now hosting the development version of the project on localhost:8000 so open up your browser and put that in the url window. You should see the default page pop up with your new title in the purple header. This purple header comes as the default with this starter template. If you want to change some of the styling on it you can alter the header.js component to your liking.

Think of the index.js page as your home page. This is where anyone navigating to your site will land.
Now let's add some text to our page style it up a bit. Gatsby is a React framework so JSX will work just fine. Inside the <Layout> component in the index.js go ahead and add the following code.
const IndexPage = () => (
  <Layout>
    <h1>Welcome to my Gastby Project Home Page</h1>
    <p>
    Lorem Ipsum is simply dummy text of the printing and typesetting industry.
    Lorem Ipsum has been the industrys standard dummy text ever since the 1500s,
    when an unknown printer took a galley of type and scrambled it to make a type specimen book.
    It has survived not only five centuries, but also the leap into electronic typesetting,
    remaining essentially unchanged. It was popularised in the 1960s with the release of Letraset
    sheets containing Lorem Ipsum passages, and more recently with desktop publishing software
    like Aldus PageMaker including versions of Lorem Ipsum.
    </p>
  </Layout>
)
Now we have a heading and some text that we can play around with. Styling can be done using traditional css if you like or you can use css in javascript through the style attribute directly on the JSX tags.
const IndexPage = () => (
  <Layout>
    <h1 style={{fontSize: 72, color: "blue", textDecoration: "underline"}}>Welcome to my Gastby Project Home Page</h1>
    <p style={{fontStyle: "italic"}}>
    Lorem Ipsum is simply dummy text of the printing and typesetting industry.
    Lorem Ipsum has been the industrys standard dummy text ever since the 1500s,
    when an unknown printer took a galley of type and scrambled it to make a type specimen book.
    It has survived not only five centuries, but also the leap into electronic typesetting,
    remaining essentially unchanged. It was popularised in the 1960s with the release of Letraset
    sheets containing Lorem Ipsum passages, and more recently with desktop publishing software
    like Aldus PageMaker including versions of Lorem Ipsum.
    </p>
  </Layout>
)
Applying the styling gives us this new look 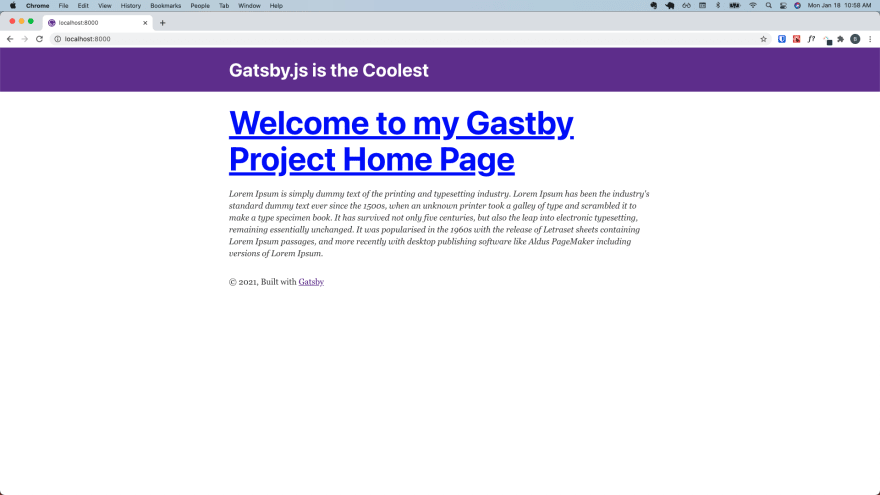
Play around with adding different JSX elements and styling them to create an awesome home page. This is only the beginning of what you can do with Gatsby. Coming soon I will dive into creating multiple pages within your app and how to handle routing between them. Stay Tuned.

Top comments (0)