
Setting up a development machine can be a tedious process. I once worked in a company where it was an achievement to complete the setting up of the development environment, for the custom shop system we were working on, in under two days (to be fair though, this was before Vagrant and Docker became a thing). And why’s that?
Building software products relies heavily on things like your favorite editor or IDE to be productive, it depends on installed dependencies like databases, shell programs or servers to actually run and update your software. Is this still a necessity or could we ditch all of that and rely completely on cloud services today?
I recently gave a talk about the Frontend stack 2018 and had a look at how far you can get without placing a single file on your computer. As it turned out; you really can create websites, make them editable and later deploy them (I’m a big fan of the recent static site generators) from any computer using powerful online services today.
CodeSandbox – the new online editor in town
A while back, I noticed CodeSandbox being increasingly used for React prototyping, when people started sharing sandboxes on Twitter with specific React patterns or best practices. "Do we need another online editor?" was my immediate response.

Earlier this year, I wrote an article on how to use render props in React and decided to give CodeSandbox a try. It doesn’t feel like my local editor (I’m using VSCode) – but it’s pretty close.
In CodeSandbox you can start by forking one of the 500,000 (!) available user sandboxes, or choose to start from scratch using starter templates for React, Vue, Angular, and other frameworks. Looking at all the user-created sandboxes, you’ll see that the editor is used primarily for quick prototyping in the React ecosystem today. However, this doesn’t mean that you can’t use it to build something more complex inside or outside the React ecosystem.
Getting started with JavaScript development entirely in the cloud
Getting started with a new JavaScript-based project using a modern framework was very tedious, and far and away from being beginner friendly in the past. The folks working on React discovered that this had to change and came up with create-react-app. This project helps you to bootstrap and start a new React project in a few minutes by taking all the configuration away and providing all the needed defaults (#zeroconfig all the things 🎉).
create-react-app is the base for CodeSandbox to create new React projects. For Preact, Vue and other frameworks similar CLI tools are available, and there’s even a "vanilla" starter template without heavy framework dependencies that uses Parcel (a new zero-config bundler – it’s fantastic, trust me!) under the hood to give you all the freedom you need.
When you decide to go the React route and initialize a new project, you’ll get a codebase that is ready to dive into React development.

Crucial editor features that let you forget that you’re "just" in an online editor
cmd/ctrl+p to quickly access files and commands
There are a few things that I can not live without while doing web development – first, CMD+p and CMD+Shift+p. These two shortcuts let you jump to any file or execute any command available via a quick and easy-to-use fuzzy search. Programming is very often about productivity, and these two shortcuts help you to achieve anything without leaving the keyboard.
Dependency handling and automatic installation
But now you’re in a cloud environment, right? How does it work to install dependencies then? CodeSandbox provides a dialog which lets you choose dependencies from npm easily. When you install packages with this dialog, the package.json will be automatically updated. Sweet!
Prettier included by default
When developing in CodeSandbox, Prettier is enabled by default, is configurable, and also runs very smoothly!
Hot reloading in a separate window
Looking at the screenshot above, the editor provides you with an in-browser preview. The cool thing is that you can open the preview in a separate window, which is perfect for two monitor setups like mine. This way, the code is on one monitor and I can see the changes in near-realtime on the other one.
Autocompletion for projects shipping with TypeScript type definitions
When I discovered that VSCode picks up type definition included in npm packages, I finally decided to go for TypeScript. As a JavaScript developer, I’m very used to working without great autocompletion but seeing my editor picking up TypeScript definitions is excellent. To see that CodeSandbox does the same is nice!

GitHub integration makes CodeSandbox a real tool to work with
The last feature that got me was GitHub integration, which lets you create a project in CodeSandbox, push it to GitHub, and then make commits from CodeSandbox directly to GitHub. Very cool stuff!

The only feature missing
Split-view mode for viewing multiple files at once is the only thing missing to make it my everyday application for development. Let’s hope that it’ll come soon! 🤞🏻
Contentful – the content infrastructure for any project
With CodeSandbox you can quickly create your next JavaScript project and push it to GitHub. Very often when you do website development, the projects are built for people that are not that comfortable with writing code, though.
Take a quick, one-pager portfolio site for a friend as an example. How would you realize this project saving the effort of updating content with a pull request but also without setting up a complete content management system yourself? You can use Contentful’s content infrastructure for that.

With Contentful you can define your needed data models in minutes and get the data back using JSON APIs. For the above example, you need an entity with individual fields for an image, a headline, and a paragraph respectively. This flexibility is where Contentful shines – create a content type portfolio and define the three needed fields without any need to set up a server or something similar.
Your non-techy friend can now make content changes to the JavaScript app you’re building without editing JSON files or React code.

Later, you can use the provided JavaScript SDK to get the Contentful data edited by your friend.
import React from "react";
import ReactDOM from "react-dom";
import { createClient } from "contentful";
import "./styles.css";
// create the SDK client with the needed credentials
// which you can get in the web app
const client = createClient({
space: "...",
accessToken: "..."
});
function Portfolio() { /* … */ }
class App extends React.Component {
constructor() {
super();
this.state = { isLoading: true, portfolio: null };
// fetch the entry of your portfolio entry type
client
.getEntries({
content_type: "portfolio"
})
.then(({ items }) => {
this.setState({ isLoading: false, portfolio: items[0] });
});
}
render() {
return this.state.isLoading ? (
<div>Loading</div>
) : (
<div className="App">
<Portfolio {...this.state.portfolio.fields} />
</div>
);
}
}
~~~{% endraw %}
[When you look at the code above](https://codesandbox.io/s/5wxvp413zl), one of my favorite things is that you can connect content entries with your frontend component quite easily ({% raw %}`<Portfolio {...this.state.portfolio.fields} />`). This connection makes Contentful [a perfect fit for component-driven applications and sites](https://www.contentful.com/blog/2017/10/11/love-letter-to-component-ready-cms/?utm_campaign=deploy-cloud-codesandbox&utm_medium=referral&utm_source=devto&utm_content=deploy-cloud-codesandbox&utm_term=).
### Netlify – the few-clicks static deployment tool
Now, you have the code editable and connected to Github in CodeSandbox, and you can edit the content that powers the application via Contentful. The last step is to deploy this application somewhere.
[Netlify](https://www.netlify.com/) is a relatively new service out there that specializes in static deployments. The cool thing about Netlify is that they also allow you to define build scripts - they’re your CI service and host, so to say.
To deploy a site to Netlify you can start by importing a specific GitHub repository:
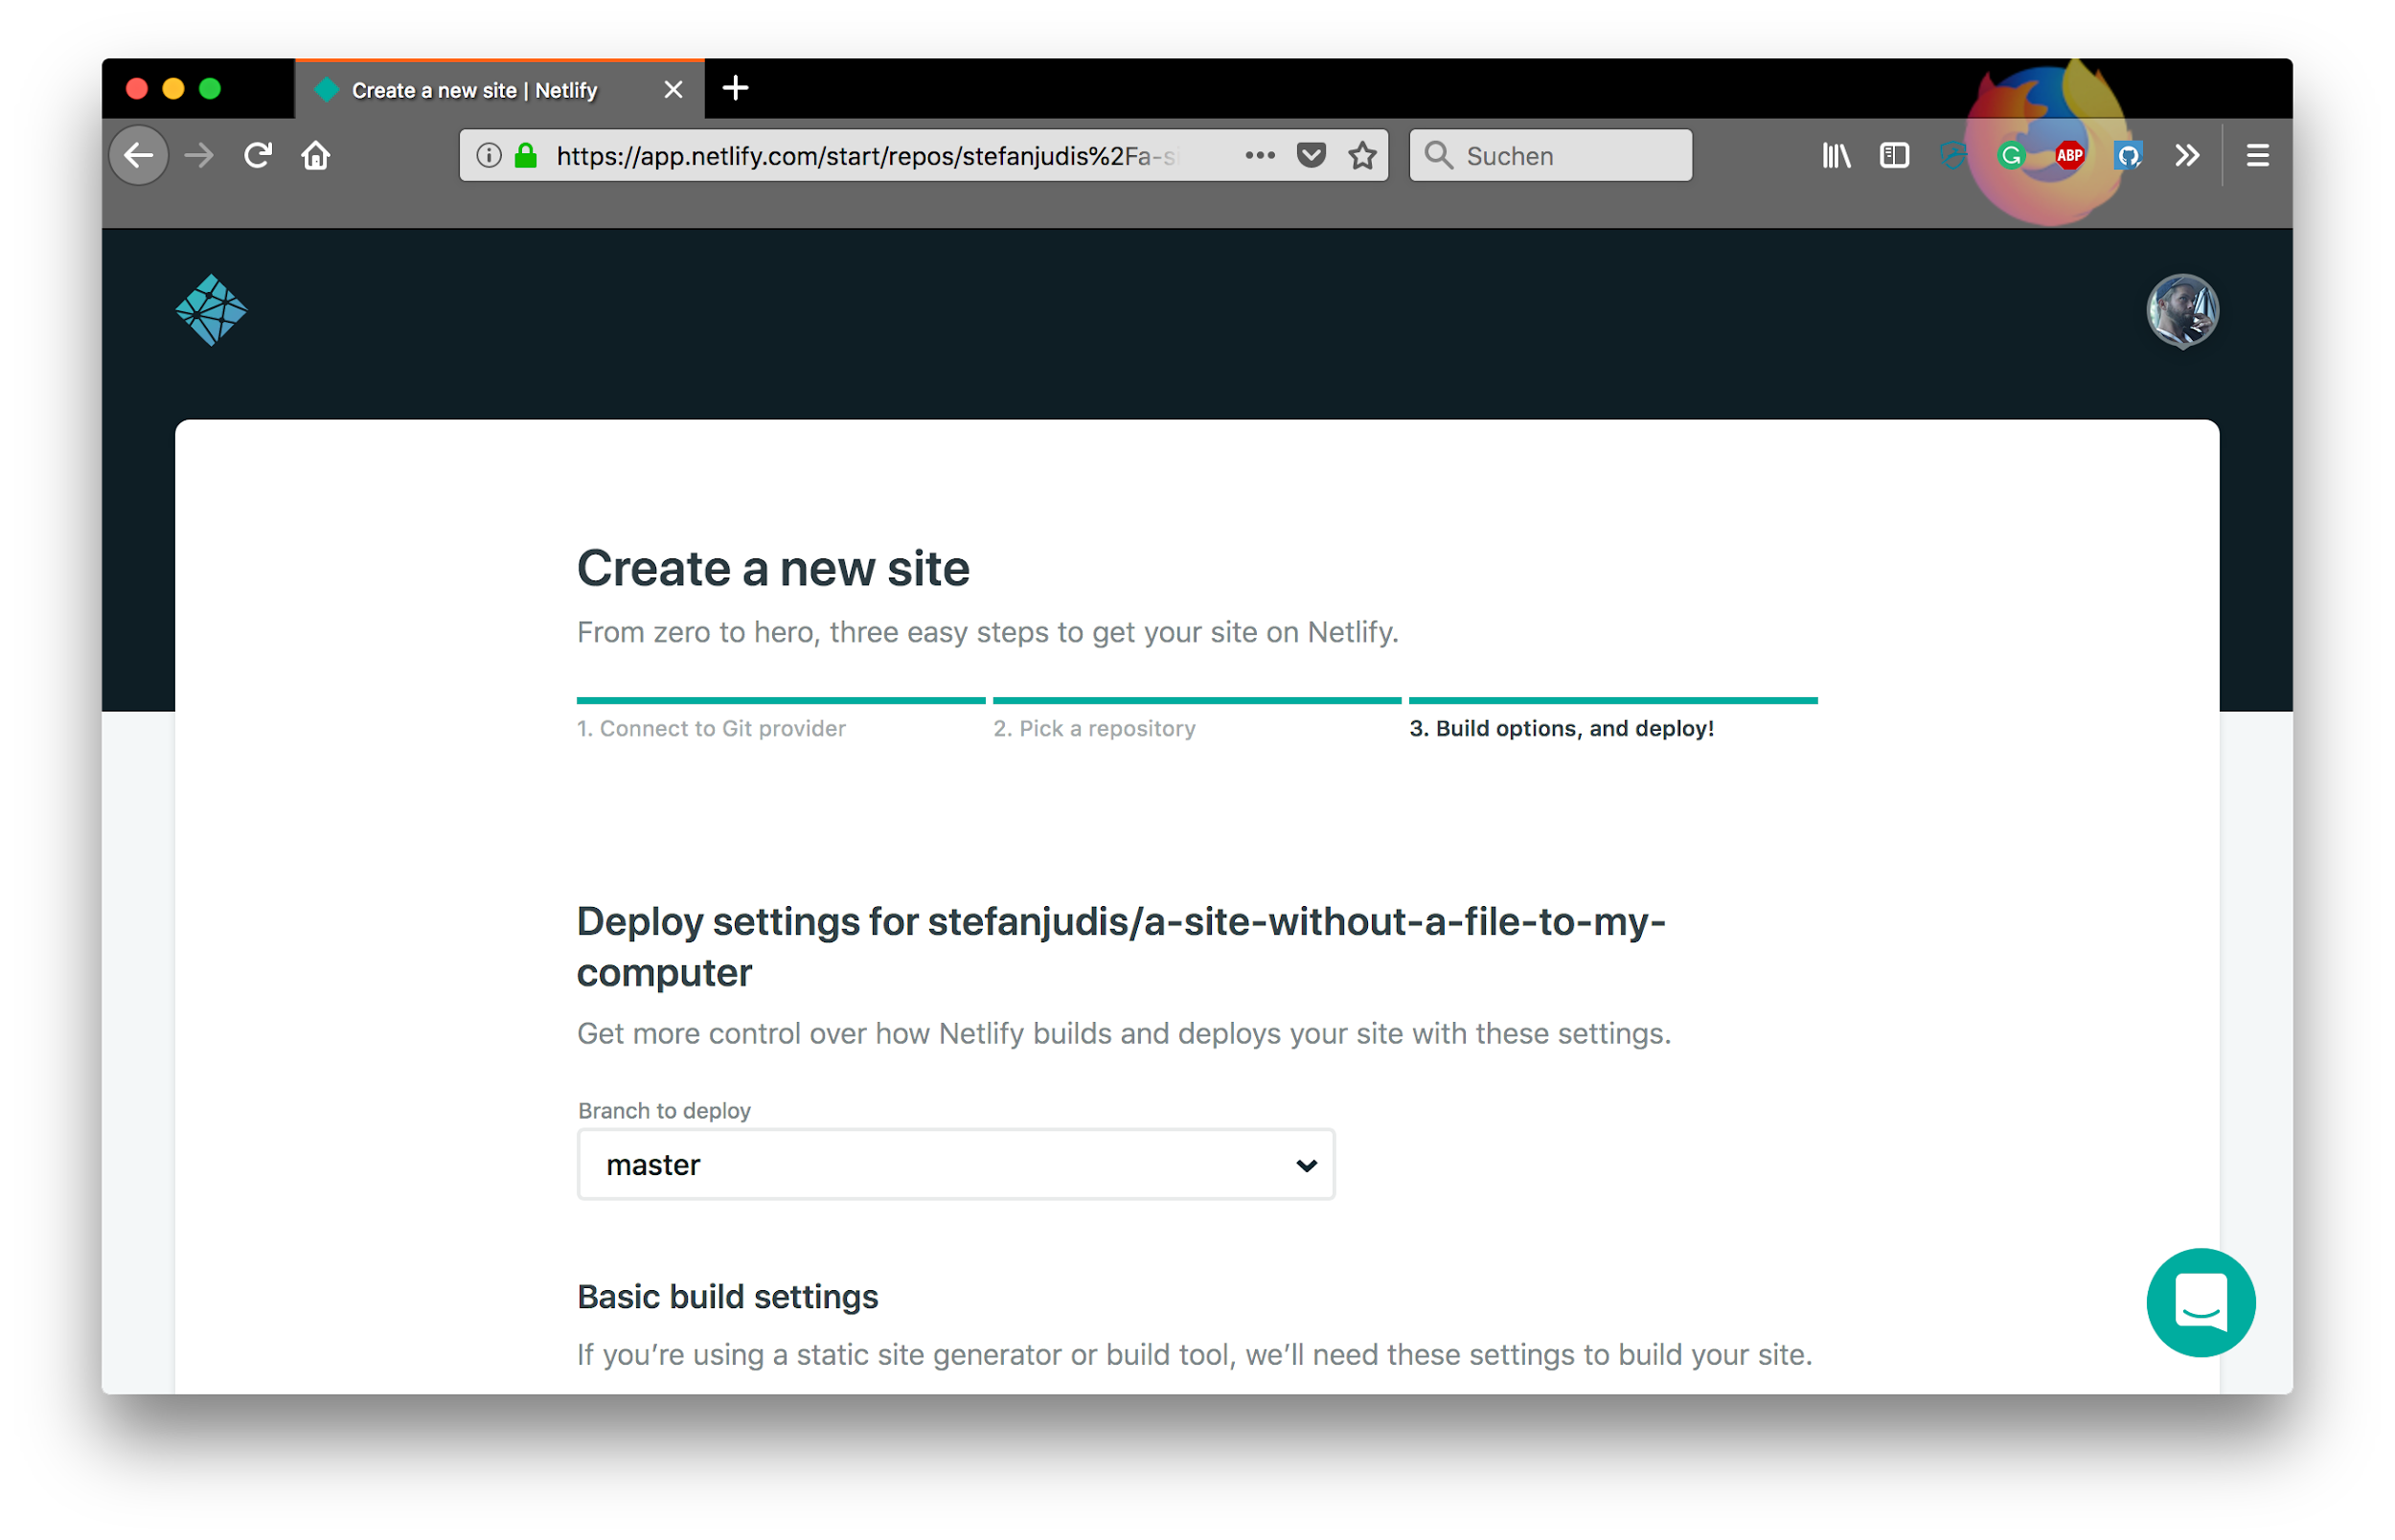
Your next steps are to define a build command and public directory in which the static files will be present. In the case of *create-react-app*, the build command is {% raw %}`npm run build`{% endraw %} and the published directory will be {% raw %}`build`{% endraw %}. After submitting these two configurations, your first deploy will get up and running, and you’ll get a unique subdomain on netlify.com.
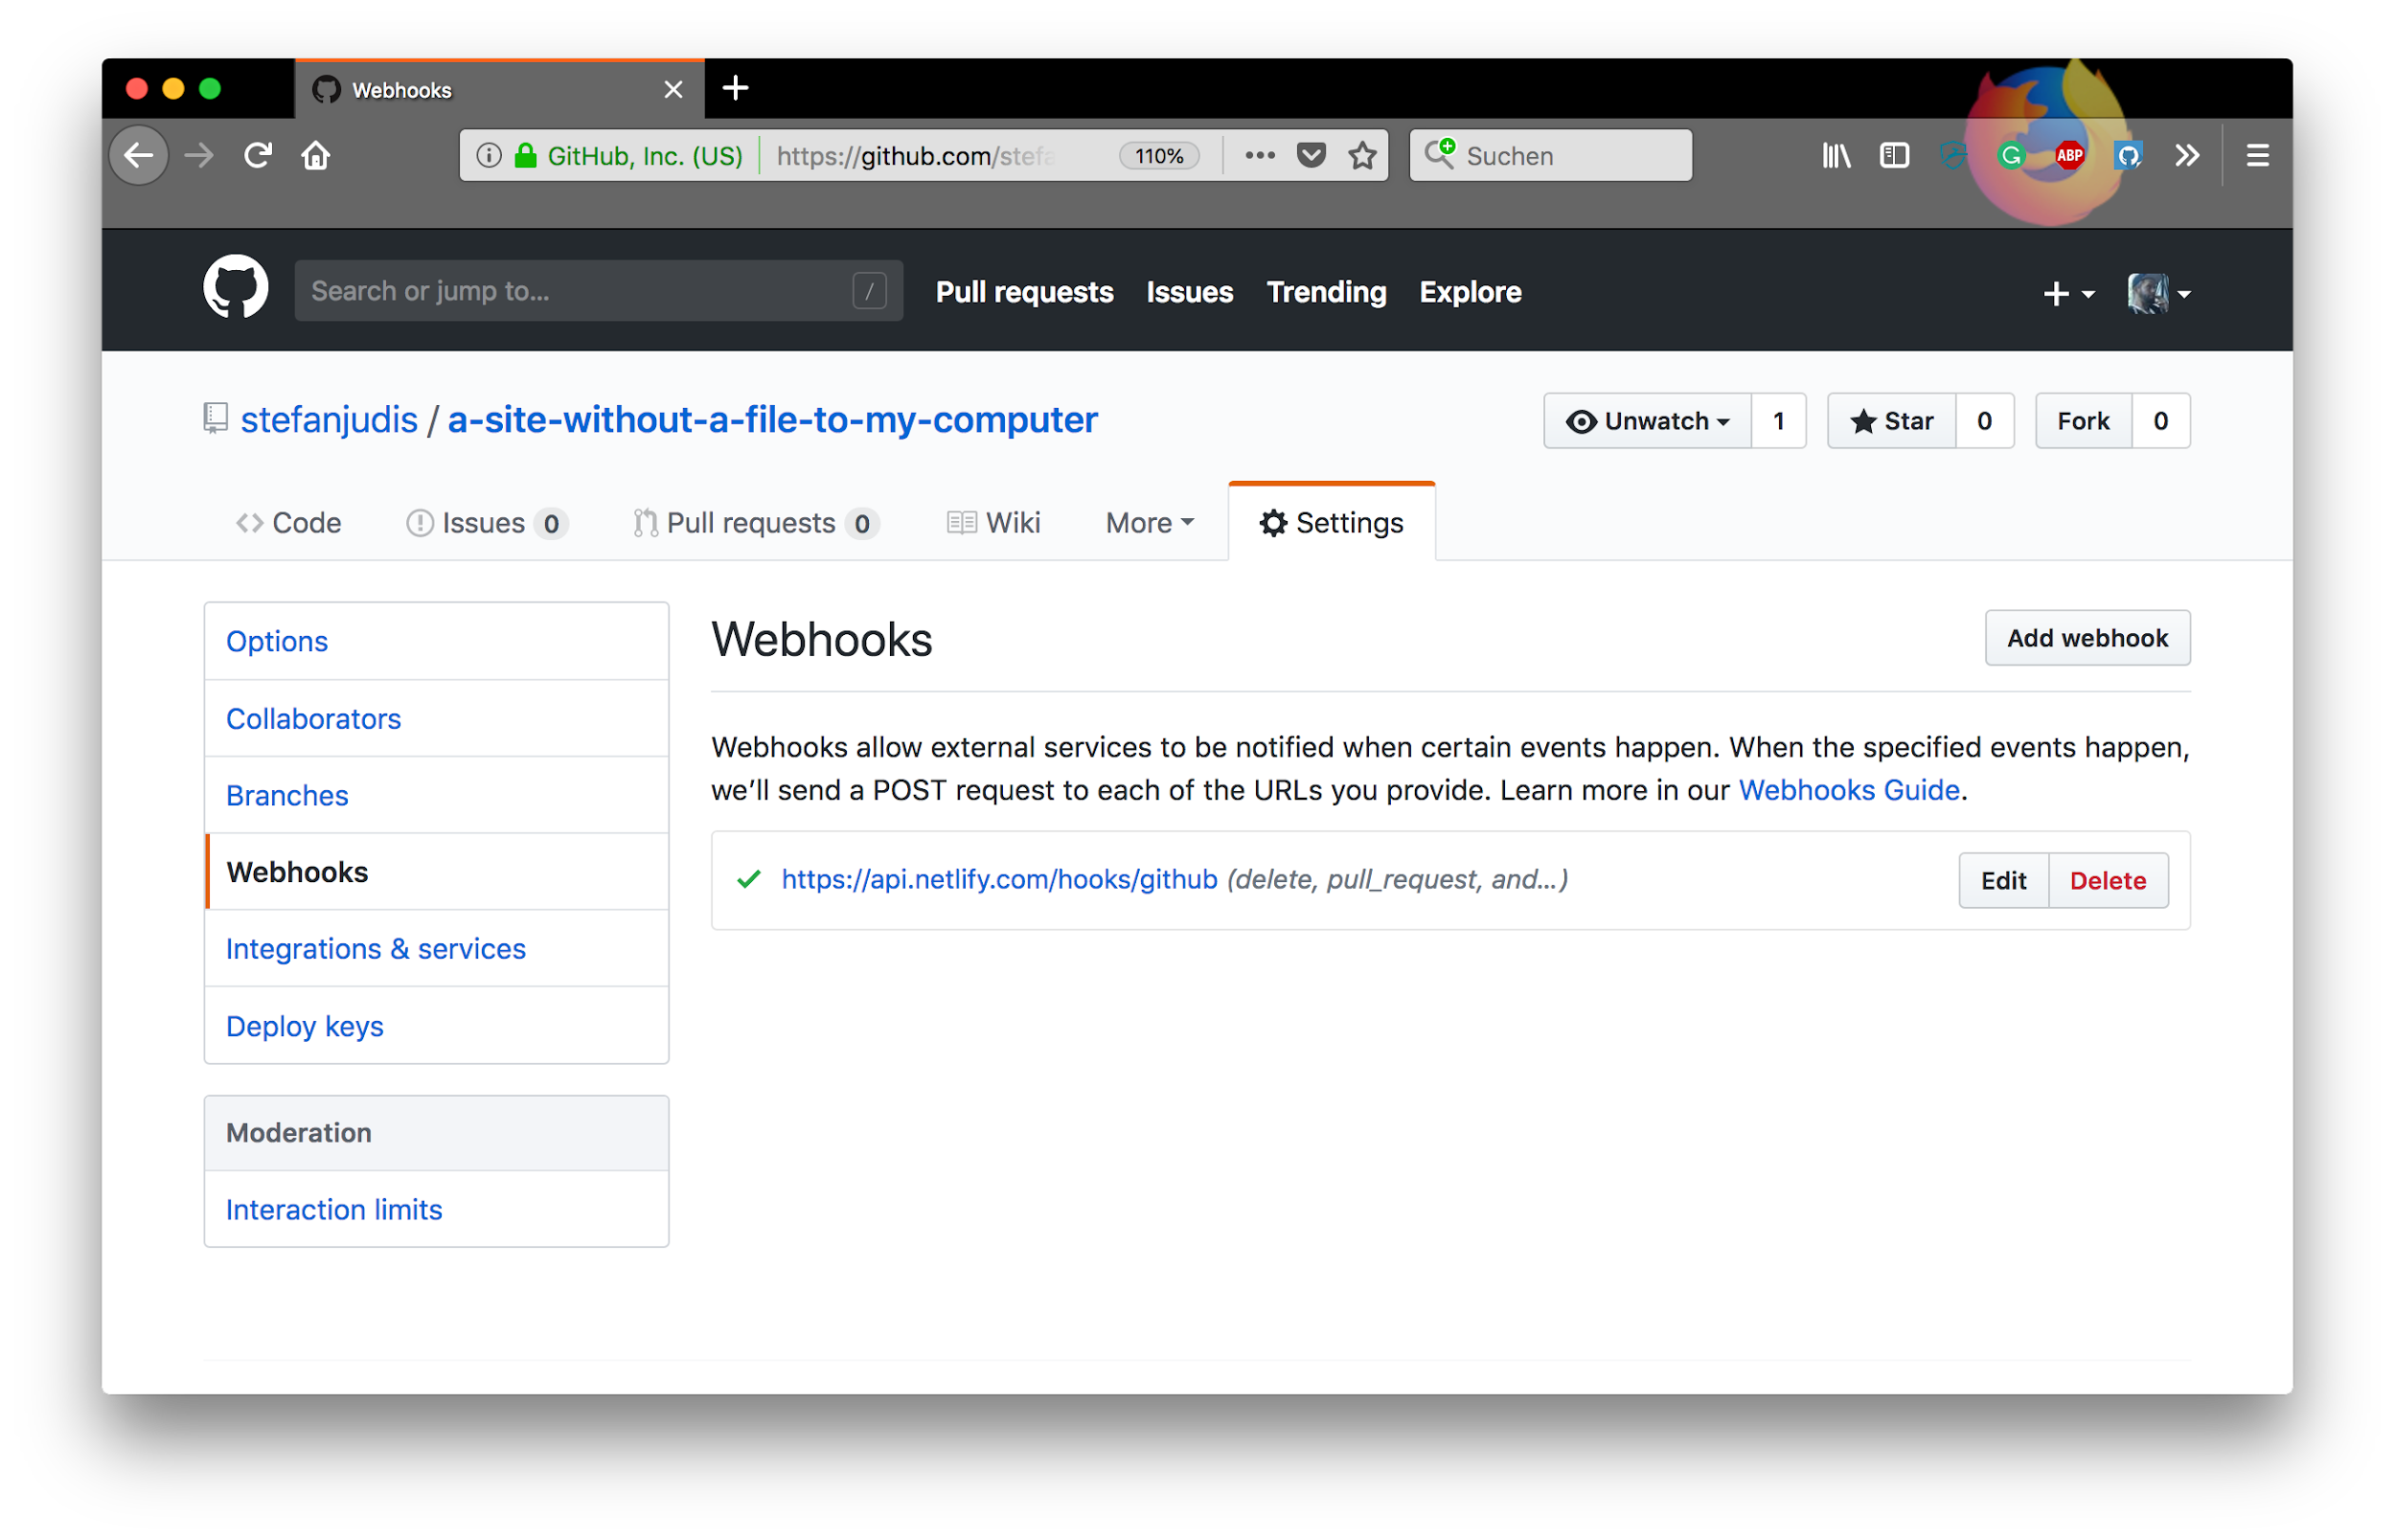
One less obvious thing after importing a GitHub repository in Netlify is that this process also defines webhooks on GitHub. Now every time you push new code to GitHub, Netlify will automatically redeploy your site. Magic? Magic!
### Usage of webhooks to connect all the pieces
For this portfolio demo site, there is no additional webhook configuration needed because the React application fetches that data right from the browser. Client-side only applications have the significant downside that they show a loading spinner initially until they fetched all needed API data though. A more performant way to do it is to statically pre-render React on the server and then do something that is called [hydration](https://reactjs.org/docs/react-dom.html#hydrate) when the client-side React code kicks in.
The static pre-render approach means that you would have to rerender the generated HTML files and deploy them whenever your friend updates her portfolio data in Contentful, too. An additional webhook notifying Netlify has to be configured in Contentful in that case.

With a little bit more of webhook configuration, you can then set up a complete deployment pipeline without any local installation and configuration shipping static sites without loading spinners.
### Use the power of web services to not reinvent the wheel
In conclusion, I’m amazed how much the web development field has changed. [Serverless technologies change the way we work](https://www.contentful.com/blog/2018/04/05/graphql-and-serverless-where-cloud-computing-is-heading/?utm_campaign=deploy-cloud-codesandbox&utm_medium=referral&utm_source=devto&utm_content=deploy-cloud-codesandbox&utm_term=) and we no longer have to worry about all the tiny pieces that might be needed in a project. For running Node.js projects we can use [Zeit](https://zeit.co/), for authentication [Auth0](https://auth0.com/), and for a performant search experience [Algolia](https://www.algolia.com/).
Webhooks and serverless functions give me the possibility to connect all these services and write quick connectors in the cloud in an easy and speedy manner. That’s very exciting because I can now focus on building things rather than setting things up and... **I can even create and deploy websites on my friend's computer while we’re sitting on his balcony.**

Top comments (0)