
tl;dr If you want to get started developing a new library for Q#, check out this template repo I made to get you going with the right structure, project files, and build automation with GitHub actions.
I have been really excited to start working on a new project with some colleagues building a new library for Q#, and wanted to share with you our journey so far!
The team will probably post more about the content of what the library is doing (implementing memory for a quantum computer), but here I want to focus on the infrastructure that we needed to get from an empty repo to a built and hosted NuGet package for a Q# library via GitHub Packages.
Libraries in general are a great way to extend languages without having to expand the base language thus increasing the maintenance and scope of the language.
Q# has a bunch of official libraries already provided already in the Microsoft/QuantumLibraries repo.
Part of our goal with this project is to show how leverage the existing Q# libraries and runtime and extend them to add new features and content.
This is certainly not a complete guide, and I'll highlight some improvements I plan to make in the future as we go!
Step 0: Setup your repo
This is probably a step that most of you can skip, but I wanted to add a few notes/reminders of things that are good to setup on a new git repo for a project like this.
Don't forget to:
- Add a licence file (otherwise people won't be able to use your library!)
- If you want to learn more about your options, check out this licence selection assistant from GitHub.
- Add a
.gitignorefile for Q#, you can just use the same.gitignorewe did for our qRAM library. - Add a
README.mdso that there is a nice description of your project to folks visiting your repo 💖- There are some good references out there for writing a good README, like this post from Akash Nimare , this one from Divyansh Tripathi, and this one by Danny Guo.
- Add a
CODE_OF_CONDUCT.mdto your repo, check out GitHub's documentation for adding a code of conduct to your repo.
Also for running Q# code you will want to install the QDK, or setup a Docker container to do your work in.
Step 1: Create your Directory Structure
After looking at the microsoft/QuantumLibraries repo for a bit, I worked out how I wanted to structure the code in our repo.
There are three main directories that we needed, one for the source of the library, one for the samples demonstrating the library, and one for tests.
The samples directory will have a bunch of subdirectories (eventually) for each qRAM implementation we want to demo, as well as some samples showing how to do resource estimation for the various implementations.
│   .gitignore
│   LICENSE
│   README.md
│   CODE_OF_CONDUCT.md
│
├───samples
│
├───src
│
└───tests
You can make these folders/directories however you want, you will just need three folders in your base or root project folder called src, tests, and samples.
NOTE: There is nothing magical about these names, it just happens to be what my team and I decided so if you have other naming conventions, go ahead and change them!
Just make sure then as you are reading the rest of this post to make the right replacements for your names in the commands and files I show below 👍
Step 2: Create the Q# projects
Now that you have the folder structure, its time to create the Q# project files that will allow you and the later automation to build your library.
These project files are kinda like Makefiles and use the C# infrastructure (MsBuild) to actually control the Q# compilation.
Library source
Navigate to the src folder and run the following command:
dotnet new classlib -lang Q#
This will create two files in the src/ directory: Library.qs and src.csproj.
You can see the contents below.
Library.qs
namespace src {

    open Microsoft.Quantum.Canon;
    open Microsoft.Quantum.Intrinsic;


    operation HelloQ () : Unit {
        Message("Hello quantum world!");
    }
}
NOTE: You can change the namespace name to better reflect what your library is about!
The Q# API design documentation has some good guidance on how to make good namespace names, e.g.: Organization.Product.DomainArea.
src.csproj
<Project Sdk="Microsoft.Quantum.Sdk/0.11.2004.2825">

  <PropertyGroup>
    <TargetFramework>netstandard2.1</TargetFramework>
  </PropertyGroup>

</Project>
You can see that the src.csproj file has a reference to the version of the QDK that it was created with as well as what .NET framework it is being built for.
You can test that this template was created correctly by running:
> dotnet build
Microsoft (R) Build Engine version 16.4.0+e901037fe for .NET Core
Copyright (C) Microsoft Corporation. All rights reserved.

  Restore completed in 284.96 ms for C:\Users\skais\qsharp-library-template\src\src.csproj.
  Restore completed in 29.64 ms for C:\Users\skais\qsharp-library-template\src\src.csproj.

  ____________________________________________

  Q#: Success! (0 errors, 0 warnings)

  src -> C:\Users\skais\qsharp-library-template\src\bin\Debug\netstandard2.1\src.dll

Build succeeded.
    0 Warning(s)
    0 Error(s)

Time Elapsed 00:00:12.79
Generally you will not need to do much with the project files here in Q# other than to make sure to add references to other projects and packages you might take as dependencies for your project.
Speaking of, let's try that now by starting our tests project.
Testing
Navigate to the tests/ folder and run the following command:
dotnet new xunit -lang Q#
This should create two new files in the tests/ directory, Tests.qs and tests.csproj
Tests.qs
namespace tests {

    open Microsoft.Quantum.Canon;
    open Microsoft.Quantum.Diagnostics;
    open Microsoft.Quantum.Intrinsic;


    @Test("QuantumSimulator")
    operation AllocateQubit () : Unit {

        using (q = Qubit()) {
            Assert([PauliZ], [q], Zero, "Newly allocated qubit must be in |0> state.");
        }

        Message("Test passed.");
    }
}
tests.csproj
<Project Sdk="Microsoft.Quantum.Sdk/0.11.2004.2825">

  <PropertyGroup>
    <TargetFramework>netcoreapp3.1</TargetFramework>
    <IsPackable>false</IsPackable>
  </PropertyGroup>

  <ItemGroup>
    <PackageReference Include="Microsoft.Quantum.Xunit" Version="0.11.2004.2825" />
    <PackageReference Include="Microsoft.NET.Test.Sdk" Version="16.4.0" />
    <PackageReference Include="xunit" Version="2.4.1" />
    <PackageReference Include="xunit.runner.visualstudio" Version="2.4.1" />
    <DotNetCliToolReference Include="dotnet-xunit" Version="2.3.1" />
  </ItemGroup>

</Project>
Now the project file here is almost good to go, but it needs to know about our library project in the src/ folder.
Let's add that now by running this command in the tests/ directory.
dotnet add reference ..\src\src.csproj
That should add the following <ItemGroup> to your tests.csproj file:
  <ItemGroup>
    <ProjectReference Include="..\src\src.csproj" />
  </ItemGroup>
Now when you go to run the tests you write for your library the compiler knows where to find your actual library code!
You can test that this tests project is setup correctly by running dotnet test.
> dotnet test
Test run for C:\Users\skais\foo\tests\bin\Debug\netcoreapp3.1\tests.dll(.NETCoreApp,Version=v3.1)
Microsoft (R) Test Execution Command Line Tool Version 16.3.0
Copyright (c) Microsoft Corporation.  All rights reserved.

Starting test execution, please wait...

A total of 1 test files matched the specified pattern.


Test Run Successful.
Total tests: 1
     Passed: 1
 Total time: 1.7436 Seconds
Samples
The last directory we need to setup is samples/.
Navigate back to the project root and into the samples/ folder.
Now, I plan to have multiple samples for my project so I'll make one more folder in samples/ called sample1.
Navigate into the sample1 folder and run the following command:
dotnet new console -lang Q#
This should create two files, Program.qs and sample1.csproj.
Program.qs
namespace sample1 {

    open Microsoft.Quantum.Canon;
    open Microsoft.Quantum.Intrinsic;


    @EntryPoint()
    operation HelloQ() : Unit {
        Message("Hello quantum world!");
    }
}
NOTE: You can change the namespace name to better reflect what your sample is about!
sample1.csproj
<Project Sdk="Microsoft.Quantum.Sdk/0.11.2004.2825">

  <PropertyGroup>
    <OutputType>Exe</OutputType>
    <TargetFramework>netcoreapp3.1</TargetFramework>
  </PropertyGroup>

</Project>
Again, you will want to run dotnet add reference to make sure the sample also knows about your library.
dotnet add reference ..\..\src\src.csproj
This will add the same ProjectReference to your sample1.csproj file.
You can check that this sample was created correctly by running the following:
> dotnet run
Hello quantum world!
Step 3: Setup the GitHub Actions to build and publish a package
Now that you have your repo structure setup, it's time to hook up the GitHub automation that will automatically do some maintenance on the repo.
We will setup two automation workflows for this repo, one that will make sure tests pass on code that is committed to master, and the other will build and publish a NuGet package when a new commit is made to master.
Both of these workflows are examples of GitHub Actions, learn more about this feature of GitHub repos here.
Automating test builds
We can use yaml files to configure these workflows, and to make sure that GitHub finds these files let's make the following folders at the root of your project: .github/workflows/
In the workflows folder create a file called test.yml with the following contents.
# This is a workflow that will run `dotnet test` on your tests directory.

name: Run Tests

# Controls when the action will run. Triggers the workflow on push or pull request
# events but only for the master branch.
on:
  pull_request:
    branches: [ master ]

# A workflow run is made up of one or more jobs that can run sequentially or in parallel
jobs:
  # This workflow contains a single job called "build"
  build:
    # The type of runner that the job will run on
    runs-on: ubuntu-latest

    # Steps represent a sequence of tasks that will be executed as part of the job
    steps:
    # Checks-out your repository under $GITHUB_WORKSPACE, so your job can access it
    - uses: actions/checkout@v2

    # Runs a set of commands using the runners shell
    - name: .NET tests
      run: dotnet test
      working-directory: tests
This action will fire whenever you make a pull request on the master branch.
In the PR window you will see the feedback from the tests (passing/not passing).

You may want to modify this flow to fire on other branches or conditions, check out all the possible triggers for GitHub actions.
If you want to see all of the actions that have been run on your repo you can look at the actions tab:

The above screen cap is from the qRAM library's actions page.
You can see the details of a particular action run here:

Now that you are sure your code is building and ready to merge it into master, let's take a look at the workflow that will package our library!
Automating packaging
In the same workflows/ folder, create a file called publish.yml with the following contents:
name: Build and publish NuGet package to GitHub packages

on:
  push:
    branches: [ master ]

jobs:
  build:
    runs-on: windows-latest

    steps:
    # Same checkout action as before, but adding an authentication token to
    # help push the package to the GPR.
    - uses: actions/checkout@v2
    # NUGET_AUTH_TOKEN trick from https://stackoverflow.com/questions/57889719/how-to-push-nuget-package-in-github-actions
    - name: "Setup .NET Core @ Latest"
      uses: actions/setup-dotnet@v1
      with:
        dotnet-version: '3.1.x'
        source-url: https://nuget.pkg.github.com/qsharp-community/index.json
      env:
        NUGET_AUTH_TOKEN: ${{secrets.GITHUB_TOKEN}}

    # The command `dotnet pack` will build your project and then pack it up in
    # a NuGet package. The `-c` switch to indicate the build configuration
    # here "Release" and `-o` indicates where it will put the output. We just
    # make a new directory called `drop` at the project root and will get the
    # built package from there later.
    - name: .NET pack
      run: dotnet pack -c Release -o ../drop /p:Version="0.1.$Env:GITHUB_RUN_NUMBER"
      shell: pwsh
      working-directory: src

    # The command `dotnet nuget push` takes the package we made in the previous
    # step in the `drop` directory and pushes it to the GitHub Package Registry.
    - name: Push to GitHub Packages
      run: dotnet nuget push (Join-Path "drop" "*.nupkg")
      shell: pwsh
The line you will have to change for your repo is the source-url: https://nuget.pkg.github.com/qsharp-community/index.json line.
Change the qsharp-community to the repo owner of the repo you are working in.
For more information on this configuration see the docs.
FIXME: So the numbering of the packages here is still not perfect, and is keyed off of theGITHUB_RUN_NUMBERof the action.
In order to be SemVer 2.0 compliant, it needs to start over when the minor or major version is incremented but I haven't figured out a good way to do this yet. 😆
Next steps: Templates and NuGet.org
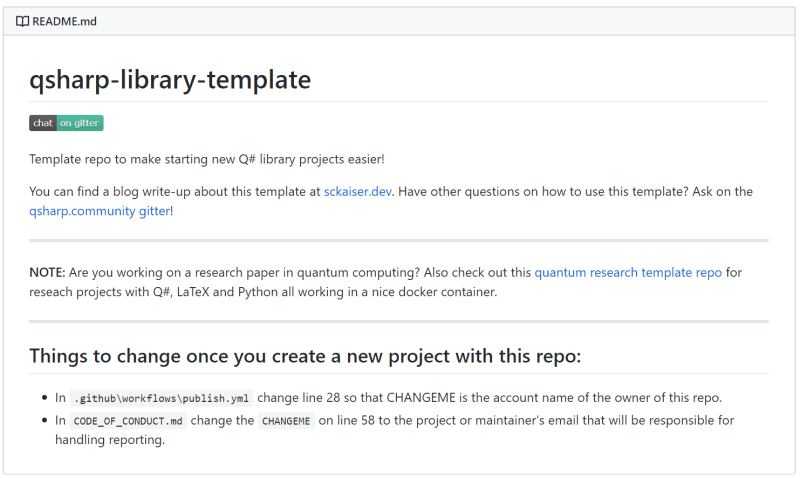
So if you made it here and haven't made your repo yet, I saved you some time by making a template repo on GitHub.
I will keep it up to date while we continue with the qRAM project and when I figure out how to increment versions numbers better, I'll push the fix there too.
Also when the qRAM library is ready to go to version 1.0 and publish it on NuGet.org, I will add another workflow to the template repo to publish your library there too!
Hopefully you found this post helpful, and are ready to start making your own library for Q# today! 💖

Latest comments (0)