This app is going to be revolutionary…
This is going to be the next Facebook…
It’s like Instapaper meets Kickstarter and a little bit like Quora but without the questions…
As a developer, if you had a dollar for every time you heard statements like these… well, then you wouldn’t need to actually create anything because you would already be minted.
We are in an age where everyone, including you, believes they have the next billion dollar idea. As much as we would love to develop anything and everything, the sheer amount of resources needed to build a web application is immense. You would need a server, database, hosting provider, SSL certificates, etc. With your limited income, how could you even begin to create the “next big thing” without burning a hole in your pocket?

This is part 1 of a 3 part series that delves into a possible solution to ensure you don’t spend a dime building your app at least until you have a plethora of users.
There are a number of ways to achieve the above statement but we have chosen to use Ember as our frontend framework and Firebase as our backend solution. We have found that this proposed solution is an extremely simple yet effective way of developing your web application.
Ember is a mature, opinionated, full-featured, Javascript framework that makes it easy to build large scale applications. It considers itself “A framework for ambitious web developers.”
Firebase is a comprehensive development platform that gives you the tools to develop high-quality apps, grow your user base, and earn more money. It covers the essentials so you can monetize your business and focus on your users.
Let’s start by diving into three concepts that will be the basis for transforming your idea into an awesome web app.
Free Tiers
Firebase started out as just a real-time database but has grown to be much more now.
You are now provided with two different types of databases, authentication, file storage, hosting, a global CDN, and SSL right out the box all with a very generous free tier.
With Firebase Hosting we leverage Google’s globally distributed edge points of presence to accelerate content delivery. The sheer scale of Google data centres allows your app to scale efficiently under the stress of a large number of users.

SSR (Server-Side Rendering)
We will ensure that even though we are building a single page application each page can be rendered server-side as this will be crucial for the next step.
We will use Ember Fastboot and Firebase Functions, a wrapper around serverless functions, to fully render the initial page and rehydrate as soon as the Javascript file is parsed.
With SSR we get multiple benefits without losing the speed and dynamicity of a SPA (Single Page Application).
SEO
Graceful Degradation
First Meaningful Paint

Browser Caching
You want to minimize round trips to the server for speed, efficiency, but most of all, cost!
Firebase has a limit for its free tier both on the data transferred and the number of functions called per month. We can cut down our chances of hitting these limits by ensuring we call the server only once unless a resource has been modified.
Browser caching along with SSR speeds up your app massively by cutting down the time to First Meaningful Paint.
This guide will help you easily accomplish the stated concepts above.
Note: You will be retrieving preconfigured files from Github Gists rather than modify these files yourself.
Soooo let’s get developing!
Prerequisites
Install NodeJS and NPM
Go to the Firebase Console
Create a firebase project called zero-cost-web-app
Note: Project ID will be used as the subdomain for your app later

Tools
Install global packages
# npm install -g ember-cli
# npm install -g firebase-tools
Web App
Setup a new Ember app
# ember new zero-cost-web-app
# cd zero-cost-web-app
# ember install ember-cli-fastboot
# ember install ember-fetch
Add a set of commands needed to build & deploy the application
Builds the Ember app
Runs a local server
Deploys to Firebase Hosting
# curl https://gist.githubusercontent.com/devotox/94e56ee31adff980d148506f2368a0d1/raw/7de88b9b4dbb448e3c3103d993af594196800a1f/package.json -o package.json
Add Fastboot host whitelist to environment config
# curl https://gist.githubusercontent.com/devotox/94e56ee31adff980d148506f2368a0d1/raw/23de6376bb2f6bb5d839d93796c105f52dee4ab0/config%2520%257C%2520environment.js -o config/environment.js
Add option to include the welcome page in production
# curl https://gist.githubusercontent.com/devotox/94e56ee31adff980d148506f2368a0d1/raw/63e94551c6cc6dda827b4dd1cd83d37b5d9ffd2b/ember-cli-build.js -o ember-cli-build.js
Ensure the right package versions are installed
# npm install
Firebase
Setup Firebase project
# firebase login
# firebase init
Follow prompts to set up a new project
- Select each option by using the space bar, navigating to the next option with the down arrow. Then press enter after all options selected

- When you get to the next set of questions. Press enter to choose each default option
Add Firebase config for SSR and caching
# curl [https://gist.githubusercontent.com/devotox/94e56ee31adff980d148506f2368a0d1/raw/d3a7fd29af85fcc25c3fedff1d2729058d4154f9/firebase.json](https://gist.githubusercontent.com/devotox/94e56ee31adff980d148506f2368a0d1/raw/d3a7fd29af85fcc25c3fedff1d2729058d4154f9/firebase.json) -o firebase.json
Remove index file that may have been created on firebase init
- We don’t need this as the Ember app will provide us with its own index file
# rm -rf public/index.html
Firebase Functions
Setup Firebase Functions
# cd functions/
# npm install fastboot
# npm install fetch
# npm install ember-fetch
Update index file to export SSR cloud function
# curl https://gist.githubusercontent.com/devotox/94e56ee31adff980d148506f2368a0d1/raw/e446fd671489a5bafb86373c3ccef7da8d4d3b20/functions%2520%257C%2520index.js -o index.js
Return to the root directory
- Since we are in the functions subdirectory. We need to go back to the root of the project to run the next commands
# cd ..
Start Application
# npm run build:firebase
# firebase serve
Launch app in your default browser
# open [http://localhost:5000](http://localhost:5000)
Deploy
Compile and build the application (production ready)
Build cloud functions
Zip it all up and upload the artefact to Firebase
# npm run deploy:firebase
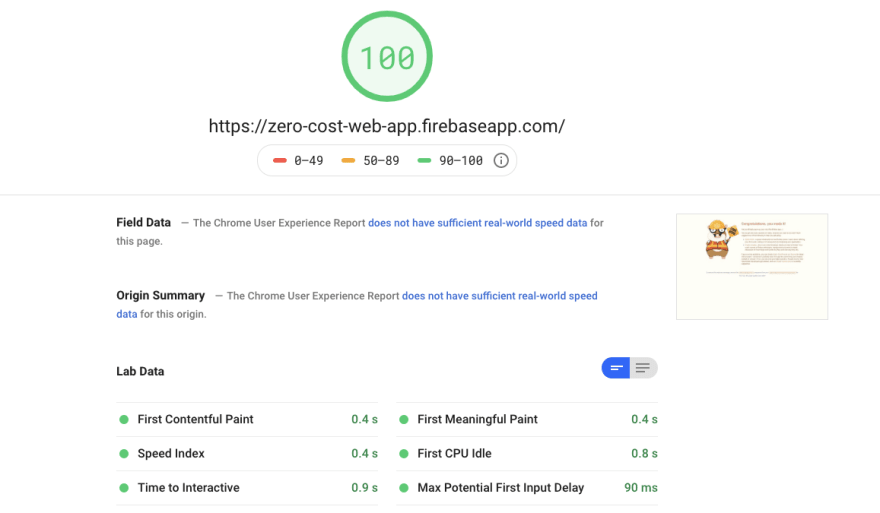
Go to URL provided in your terminal
The Project ID you noted down earlier will be used as the subdomain.
URL should look something like:
https://<project-id>.firebaseapp.com

Expectations
Open the developer tools and click on the network tab
Find the index page URL:
https://<project-id>.firebaseapp.comYou should notice that the full HTML is rendered for the page without the need for javascript to be executed.
You should also notice that after the first hit most of the assets should now be retrieved from
memory cache

Wrap Up
With the massive reach of Google servers as your content delivery network and extensive use of caching, you now have the ability to build fast, efficient, scalable, and ambitious web applications without going bankrupt before the money starts rollin’ in.
Now go forth and conquer the web app landscape!
In part 2 of this series, we will delve deeper into how to turbocharge your app by converting it into a PWA (Progressive Web App) and adding service workers allowing you to run your app offline!
What We Built
Further Reading
Firebase: Used as our hosting & SSL provider
Firebase Functions: Allows us to have SSR without a server
Ember: Javascript framework used to create our SPA
Ember CLI: Command line utility that builds the application
Ember Fastboot: Adds server-side rendering to the application

Top comments (0)