
In this article, you will learn how to use IHP Backend's react API to build a chat application like WhatsApp or Signal, deploying it to production along the way - all within 10 minutes!
IHP Backend is a new Backend-as-a-Service offering by digitally induced! React apps built using its toolkit are realtime by default, meaning it's easier to build an app that reacts to data updates everywhere all the time than it is to keep data out-of-date!
Preparation
I assume a basic understanding of relational databases and React (including hooks) throughout this article. I also assume you have a GitHub account and know how to commit and push using git. You should also have a recent version of node and npm installed.
Minute 1: Sign up for IHP Backend
Go to https://ihpbackend.digitallyinduced.com/NewSession, choosing "Continue with GitHub". After going through all the required steps, you will be greeted by your project overview:

Minute 2: Create the project
Click on the + New Project button and enter a name for your project (for example, "Realtime Chat"), and click on Create Project when you're happy with it.
You'll be greeted by the Onboarding:
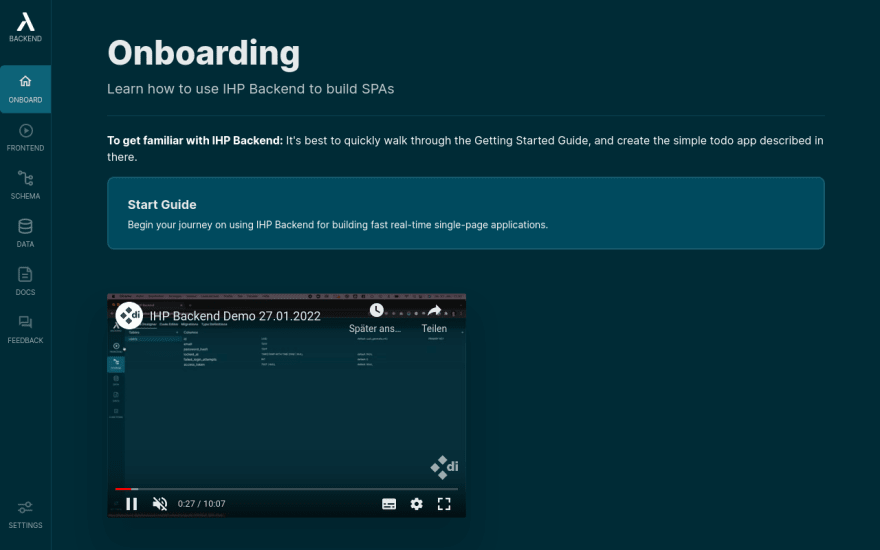
Feel free to use the Onboarding later to build a to-do app, but we will continue differently.
Click on Frontend in the left navigation bar. We'll use this tab to generate a boilerplate frontend.
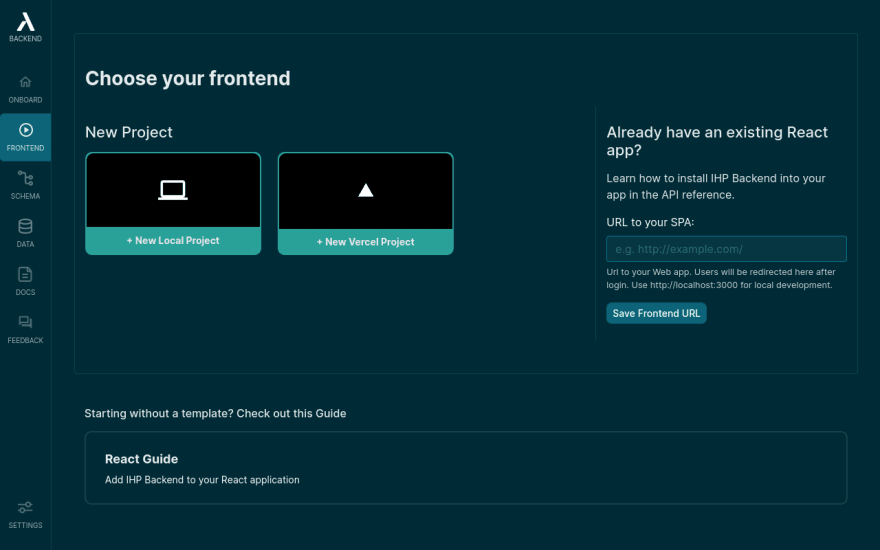
Click on + New Vercel Project. Vercel is a platform to deploy frontend frameworks and static sites. We'll use it to get our frontend deployed quickly and easily.
The following screen will greet you:

Choose the TypeScript React Starter template from among the choices, but feel free to take a quick look at the other options. Don't be surprised that a new tab will open for Vercel.

Choose GitHub as a provider, also on the following screen. Enter your project's name (it doesn't have to match exactly) as a repository name:
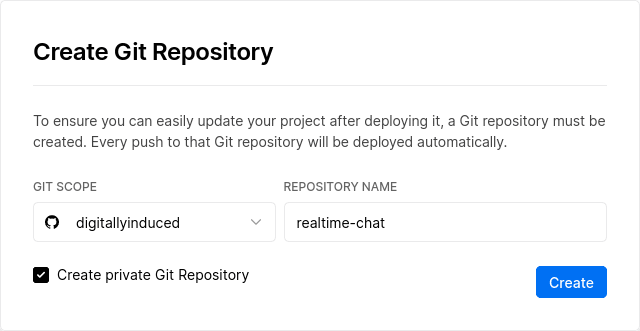
Finally, click on Create to actually create your project. It'll take a short while, after which you will be prompted to configure your project:
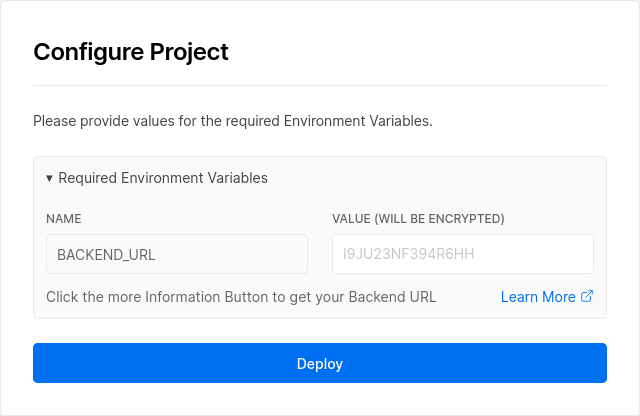
By clicking on the Learn More link, a new tab will open, showing you the value to enter into the input box. This will be the URL at which the backend of the chat app is accessible. Simply click on the displayed link to copy it and enter it on Vercel.
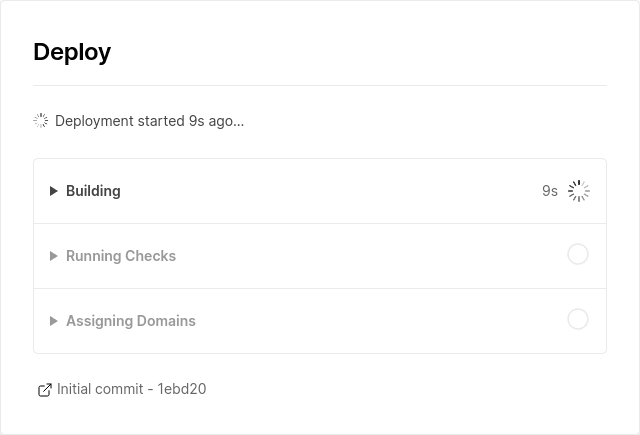
Then click the Deploy button. It will take a few seconds, after which your project is already online, and you will be redirected back to IHP Backend!
Let's check that everything is working so far by clicking the Frontend button in the left sidebar. It should redirect you to the login for your new chat app. Create a new account here, then continue below.
Minute 3-4: Modifying the schema
We could already create users because every new IHP Backend project automatically comes with authentication built-in. You can see some of that implementation by checking out the users table in the schema designer. To do that, click on Schema in the left navigation bar on IHP Backend. You should see a screen like this:
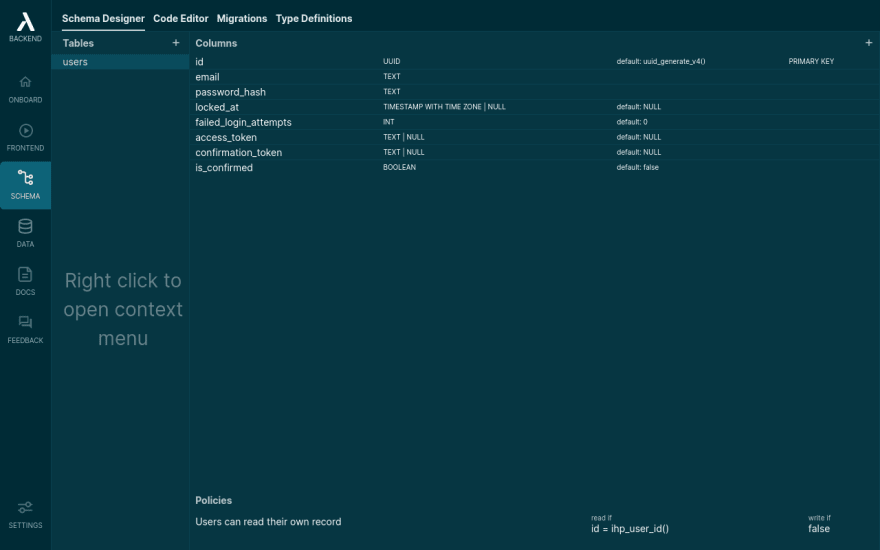
As you can see, a users table is already set up. Users, by default, have a few columns that are relevant for IHP Backend that we don't need to care about. For us, only the email is interesting since we can use it to show to users later to choose with whom to chat.
At the bottom, you can also see a section titled Policies. IHP Backend uses PostgreSQL under the hood. Policies are a way to allow users to access and modify the rows of tables only if some conditions are met. By default you can see that users can read if: id = ihp_user_id() and write if: false. That means users can only see their own user record, and no user can edit any record.
For simplicity, we'll allow all users to view the records of all users to have an easier time listing all the options to who we can send messages. To do so, right-click on the policy and select Edit Policy. A modal will open, allowing you to edit the policy. Change the content of the Visible if box to true.
This is a terrible idea for an actual production app. We're simply doing this for simplicity and to get something running asap.
A little popover will appear after you save:

When making changes to the schema, those changes do not immediately apply to the underlying database. Instead, IHP Backend uses Migrations to allow you to customize how the data in the schema should be converted.
For now, we'll just ignore the popover and make a few more changes to the schema.
If we want to allow users to chat with one another, we need to save the messages they send. To do that, we'll create a new table. Click on the little + next to the Tables header on the left, and a modal will open, prompting you for a name. Let's call this table messages:

Click on Create Table.
You can notice a few things now. First, there's a little icon next to the messages table in the list on the left:
![]()
This icon tells us that we haven't created any policies for this table yet, which will make it inaccessible to our frontend for security reasons. We'll fix that in a bit.
You should also notice three large buttons in the list of columns. Right now, our messages only have an id, but they should get some more columns to save who sent them, who they were sent to, when they were sent, and what content they contain. IHP Backend suggests a few columns that are commonly used. Two of those we want: created_at and user_id. We'll use created_at to sort the messages later, and user_id is a good choice for saving who sent the message.

If you click on those two suggestions, you will notice a few things happen.
First, the columns are added to the table as expected. Additionally, at the bottom, you will see a policy has been created. That's because IHP Backend assumes that once you link something to a user, only that user should have access to it. That's a very reasonable default and dangerous to forget! We will only have to make a slight adjustment in our case in a bit.
Second, below the policies, you can see a few indices created. IHP Backend assumes that queries based on the user_id and created_at columns are common, so it creates indices for those too. I suggest keeping them for our project, but if IHP Backend generates something you don't need for your project, you can delete it without issue.
The goal is to generate the correct thing for 90% of cases and allow you to adjust everything for the other 10% of cases.
We still require one more column: a recipient_id, so we know to whom a message was sent!
Click on the little + icon in the top-right to create that column. A modal will open, allowing you to configure a new column for the table.
Let's set the name to recipient_id. You'll notice IHP Backend notices that a UUID is expected here and selects the correct type for the column for us. We'll only have to change the default value. There's no sensible default since we always want to set the recipient_id ourselves. Simply change the dropdown’s value from uuid_generate_v4() to no default.

You can now click on Create Column.
We now have to add a foreign key constraint to that column, as IHP Backend did not recognize that recipient_id should reference the users table. To do so, right-click the newly created column and click on Add Foreign Key Constraint. A modal should open:

The defaults are precisely like we want, so we can click on Add Constraint. You can see that it worked because it says' FOREIGN KEY: users' on the right side of the column's details.

Now that we know when messages are created and who sent them to whom, we can add the last required column, which will contain the message's contents: content.
Click on the little + in the top-right again, calling the new column content, keeping the default type of Text and no default. After clicking on Create Column, your messages table should look like this:
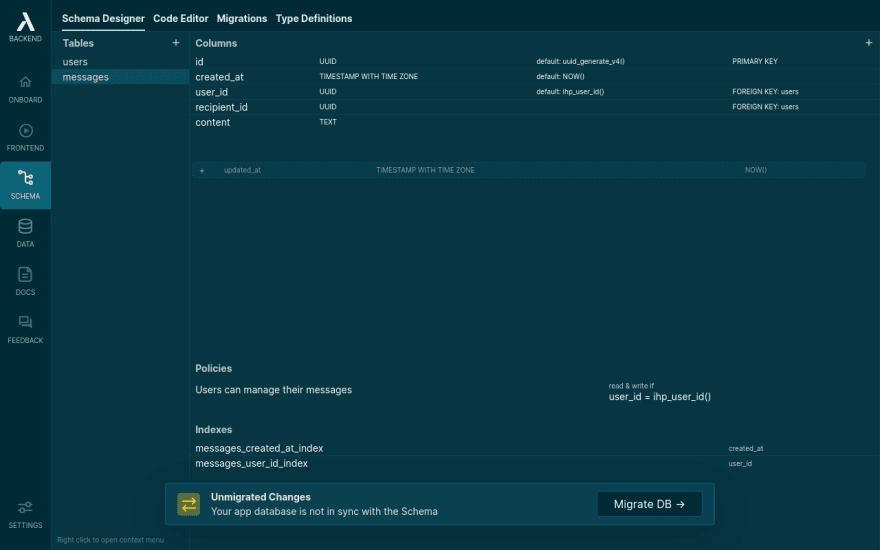
There's only one more step missing before migrating the database to our new schema. We have to edit the messages policy. Right now, users are only able to read messages they sent themselves, but they also should be able to read messages they receive. Therefore, right-click the Users can manage their messages policy at the bottom, choosing Edit Policy in the context menu.
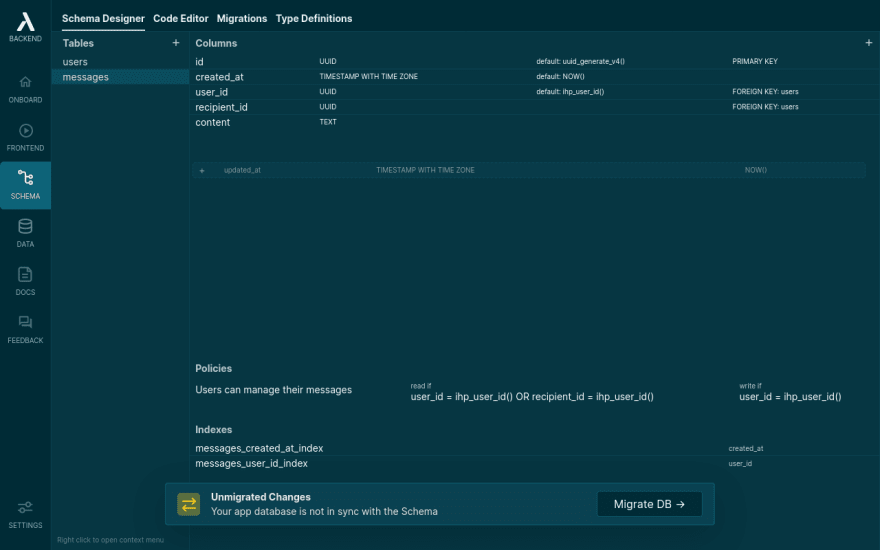
Change the Visible if part of the policy from user_id = ihp_user_id() to user_id = ihp_user_id() OR recipient_id = ihp_user_id(), which will allow users to read all rows where either the user_id or the recipient_id is equal to their user record’s id.
After clicking on Update Policy, your table should look like this:
We can finally apply these changes to the database by clicking on the Migrate DB button at the bottom of the screen. IHP Backend will automatically generate a new migration. Migrations are nothing more than the SQL statements required to get the current database schema to match the schema with our edits. If we had production data already, we might have to be careful in converting from one state of the database to the next to correctly convert the data, which would mean manually adjusting the generated migration. Since we don't have any important data yet, though (only the user we created when signing up to our app), we can safely save and run the generated migration by clicking on the Run Migration button:
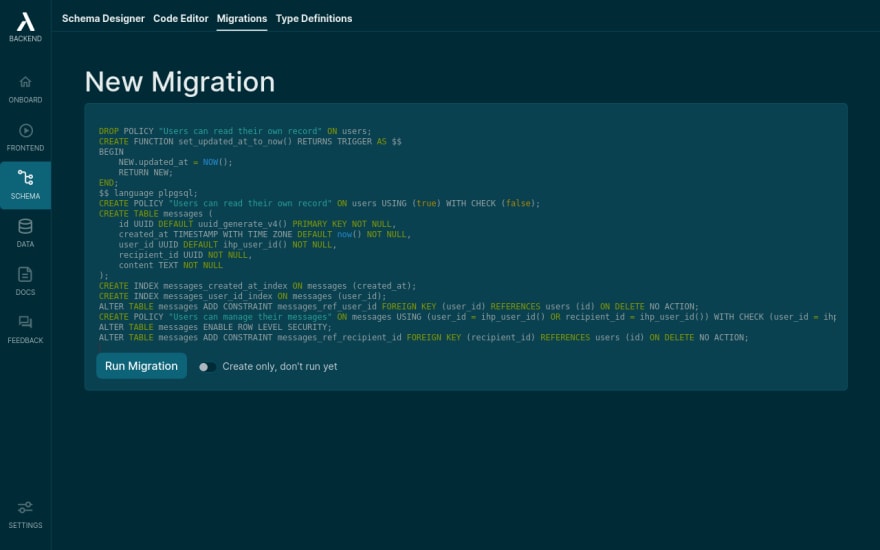
After clicking the button, the migration will run, which should take at most a few seconds, after which you will see a list of past migrations, currently only containing the one we just created. A little green arrow at the right indicates that IHP Backend executed the migration successfully:

By clicking on Schema Designer in the top navigation, you can see that the Unmigrated Changes message is now gone, indicating that the database matches what we see in the Schema Designer.
Minute 4: Cloning the Frontend locally
Now that we've finished our backend, we can take care of our frontend. The first step will be to clone our generated frontend repository so that we can work with it locally:
git clone https://github.com/YOURUSERNAME/REPOSITORYNAME.git
cd REPOSITORYNAME
When you open the project with your favorite code editor, for example, VSCode, you will see the following folder structure:

We will primarily be working within the app.tsx file, containing all the react code. If you were to create a production-ready app, you would, of course, set up the project to your liking, but for simplicity's sake, we will stay in a single file for this article.
Before we go and write code, we'll want to get a development server running and connected to our backend to verify that everything works as expected before deploying it.
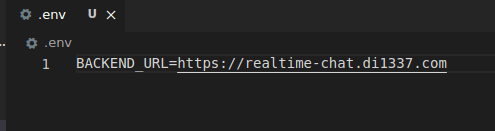
We must first tell the frontend where it can access our backend by setting the BACKEND_URL environment variable. The easiest way to do that is to create a file called .env in the project directory and add a line like this:
BACKEND_URL=https://REPLACE_ME
You can get the value for the right of the equals sign from IHP Backend itself - it's the same value we entered when we created the project on Vercel. You can find it by clicking on Docs in the left navigation. You will see a section in the right sidebar, as in the screenshot below. Simply click on the URL to copy it.

So in my case, the final .env file would look like this:
Next, let's test that everything's working as expected by first installing all dependencies and then starting the development server:
npm install
npm run dev
If you now open localhost:3000, you will be redirected to a login form, where you can log in using the details you used when creating an account on your own site earlier - or you can create a new user, of course.
Once logged in, you should see a mostly empty screen, apart from a slightly darkened bar at the top with your email. If you click on your email, you get the option to log out again.

The last thing we'll do before we implement our frontend is to install the project-specific types, so we can use our editor's autocompletion and don't get any type errors in our editor.
Open the Schema Designer on IHP Backend, and click on Type Definitions in the top navigation. By clicking on the npm install ... command for TypeScript, and running that locally in our project's directory, we should be all set!
- clone
- add BACKEND_URL env variable
- install types
Minute 5: Listing users to chat with
A chat app without the option for users to chat with others is pretty useless. To chat with someone else, we first need to choose with whom to chat. For simplicity, we'll simply list all users that signed up for our app - so everyone can send messages to everyone else.
Open the app.tsx file. There's a bit of code in there already, giving us a basic structure. Feel free to take a look to understand what's going on. Most imports are added only for convenience; they aren't actually used yet.
For listing the users, let’s create a component called Users to list all users we can chat with. To do so, create a new function in app.tsx called Users. I’ll add the function after the AppNavbar component. For now, I’ll simply return an empty div from it:
function Users() {
    return <div>
    </div>
}
Let's render that component by adding it below the <AppNavbar/> line in the App component (between lines 15 and 16). The App component should now look like this:
function App() {
    // With `useQuery()` you can access your database:
    //
    //     const todos = useQuery(query('todos').orderBy('createdAt'));

    return <IHPBackend requireLogin>
        <div className="container">
            <AppNavbar/>
            <Users/>
        </div>
    </IHPBackend>
}
Let's get all users from the backend by modifying the Users component. Inside it, add a new variable called users, setting its value to the result of the useQuery hook from IHP Backend:
const users = useQuery();
The useQuery hook allows us to fetch information from the backend, which will automatically refresh in realtime whenever the data on the backend changes. Your editor might give you a type error right now, as useQuery expects a query as an argument, so it knows what to fetch. Let's pass it a simple query to fetch all users:
const users = useQuery(query('users'));
You might have noticed that you got autocompletion for every part of this, which is one benefit of using typescript and installing the types provided by IHP Backend.
The users variable now contains the list of all users or null if the fetch isn't completed. Let's deal with that second case first, by adding a simple if statement to return a "Loading..." message to display:
if (users === null) {
    return <div>Loading...</div>
}
Otherwise, we’ll render the users as a list like this:
return <div>
    {users.map(user => <div key={user.id}>
        <button className="btn btn-link">
            {user.email}
        </button>
    </div>)}
</div>
Currently, the Users component looks like this:
function Users() {
    const users = useQuery(query('users'));
    if (users === null) {
        return <div>Loading...</div>
    }
    return <div>
        {users.map(user => <div key={user.id}>
            <button className="btn btn-link">
                {user.email}
            </button>
        </div>)}
    </div>
}
If you open the local app in your browser, you might see a short "Loading..." message appear, quickly replaced by an entry for every user you created so far - which is probably just yourself.

Before we continue, let's create a few users to chat with, so it's not quite as evident that we're only talking to ourselves. Log out and create 2-3 new user accounts, so the list is a bit more populated:
You might be redirected to the deployed version of your app after creating accounts. If that happens, simply go back to
[localhost:3000](http://localhost:3000)to create the next account or log in there.

With a few more users available to chat, we can now hide ourselves from the list by adding a simple filter to the query.
Let’s change the line that defines the users variable to the following:
const users = useQuery(query('users').whereNot('id', getCurrentUserId()));
If you check the list now, the user you logged in as should not appear in the list anymore.
We modified the query('users') part using .whereNot('id', getCurrentUserId()). getCurrentUserId is a function imported from ihp-backend which will return the current user id as long as you are logged in. whereNot allows you to filter the data in the database by only including rows where the column passed as a first argument ("id") does not equal the second argument. So effectively, we query for all users where the "id" does not match the currently logged-in user's id, resulting in all users except the one we logged in as.
Now that we have a list of users to chat with, let's quickly allow selecting them. We'll add a simple state variable to the App component to keep track of the user we've currently selected:
// add this import so we can make TypeScript happy
import type { User } from 'ihp-backend';

// add this to the App component
const [selectedChat, setSelectedChat] = useState<User | null>(null);
Let’s add a onUserSelect prop to the Users component which is called by an onClick handler on the button tag:
function Users({ onUserSelect }: { onUserSelect: (user: User) => any }) {
    ...
            <button
                className="btn btn-link"
                onClick={() => onUserSelect(user)}
            >
    ...
Now we can pass the setSelectedProp function to the Users component with that prop:
// replace this line in the App component
<Users/>
// with this one
<Users onUserSelect={setSelectedChat}/>
Now the App component keeps track of the user we're chatting with!
Minute 6: Allow sending messages to users
Next, let's create the Chat component, which we'll eventually use to chat with another user; for now, we'll just use it to display the currently selected user.
Create a Chat function component that accepts a user prop of type User and renders a simple div containing the user’s email:
function Chat({ user }: { user: User }) {
    return <div>
        {user.email}
    </div>
}
Let’s render that component from our App component by adding it below the Users component if the selectedChat isn’t null, and pass the selectedChat to it:
function App() {
    const [selectedChat, setSelectedChat] = useState<User | null>(null);

    return <IHPBackend requireLogin>
        <div className="container">
            <AppNavbar/>
            <Users onUserSelect={setSelectedChat}/>
            {selectedChat === null ? null : <Chat user={selectedChat}/>}
        </div>
    </IHPBackend>
}
When clicking on the different users, the email below the list should now change in the browser.
Let’s change the markup a bit to render the Chat component on the right side next to the Users:
function App() {
    const [selectedChat, setSelectedChat] = useState<User | null>(null);

    return <IHPBackend requireLogin>
        <div className="container">
            <AppNavbar/>
            <div className='row'>
                <div className='col'>
                    <Users onUserSelect={setSelectedChat}/>
                </div>
                <div className='col'>
                    {selectedChat === null ? null : <Chat user={selectedChat}/>}
                </div>
            </div>
        </div>
    </IHPBackend>
}
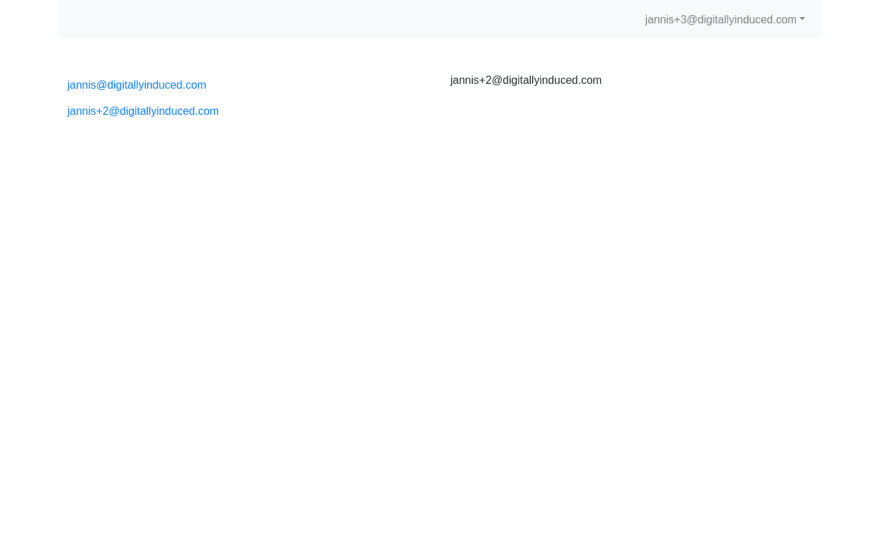
Things should now look something like this:
Now that we have a Chat component with access to the user we've selected, we can finally create the necessary code to send messages to that user.
Let’s add a form element inside the Chat component with a simple input and a submit button, which we can use to send messages:
function Chat({ user }: { user: User }) {
    return <div>
        {user.email}
        <form className="input-group mt-4">
            <input
                type="text"
                className="form-control"
                placeholder="Type a message..."
                aria-describedby="send-button"
                autoFocus
            />
            <button type='submit' className="btn btn-primary">Send</button>
        </form>
    </div>
}
I have added a bit of simple markup to make it look prettier.
To make this work, we'll need to handle the submit event of the form - we can do that by creating a handleSend function within the Chat component that we pass to the onSubmit attribute of the form element:
// add this before the return in Chat:
function handleSend(event: FormEvent<HTMLFormElement>) {
      event.preventDefault();
      const input = event.currentTarget.elements.namedItem('message') as HTMLInputElement;
      // this is where the magic happens:
      createRecord('messages', {
          recipientId: user.id,
          content: input.value,
      });
      input.value = '';
  }
The important call here is the one to createRecord. IHP Backend provides this function. The first argument tells IHP Backend to create a new record in the messages table, and the second argument contains all the required fields we need to set for the record to be complete (it'll use the default values if we don't override them). Since IHP Backend uses the currently logged-in user's id as user_id by default (as defined in the schema) and generates a new id for the message automatically, we only need to set the recipient_id to the id of the user we've selected to chat with, and the content to the input's value.
Minute 7: Display sent messages
There's only one problem: once we send the message, there's no way to read it!
So the next step is to display all messages sent into the current chat.
To do so, we'll write another query using useQuery inside the Chat component. Let's start simple and get all messages the user has access to:
const messages = useQuery(query('messages'));
We can display this list of messages by adding these lines above the form tag and below the {user.email} line:
{messages?.map(message =>
    <div
        key={message.id}
        className={'message ' + (message.userId === getCurrentUserId() ? 'from-me' : 'to-me')}
    >
        <div className='message-content'>
            {message.content}
        </div>
    </div>
)}
All we're doing here is mapping over the messages, displaying each message's content inside two divs. We also assign CSS classes based on whether the current user sent the message or received it by comparing the message's userId to the current user's id (accessed with getCurrentUserId()).
For the CSS classes to do anything, add the following styles to public/app.css:
.message.from-me {
    text-align: right;
    padding-left: 2rem;
}

.message.to-me {
    padding-right: 2rem;
}

.message .message-content {
    border-radius: 5px;
    margin-top: 1rem;
    padding: 0.5rem;
    display: inline-block;
    text-align: left;
}

.message.to-me .message-content {
    background-color: lightgray;
}

.message.from-me .message-content {
    background-color: lightblue;
    right: 0;
}
I won't go over this in detail; it just makes things look a bit better. Feel free to take a closer look if you want, though.
After changing the CSS, you might have to reload the app in the browser to see the effects.
Currently, we display all messages in every chat and no particular order. Since that doesn't make sense, let's modify the query we use to fetch the messages only to fetch those messages sent to us from the user we have selected to chat with and those we sent to them. After query('messages'), we can add a .where(..) condition as we did earlier, filtering the messages we sent:
const messages = useQuery(
        query('messages')
                .where('userId', getCurrentUserId())
);
That still doesn’t limit the messages to those sent to the selected person though, so we’ll add another .where condition based on the recipient:
const messages = useQuery(
    query('messages')
        .where('userId', getCurrentUserId())
        .where('recipientId', user.id)
);
Multiple where conditions like this will be combined using AND.
Now we have all of the messages we sent, but we’re now missing the messages we received. To fix that, we can add a set of conditions using .or:
const messages = useQuery(
    query('messages')
        .where('userId', getCurrentUserId())
        .where('recipientId', user.id)
        .or(
            where('userId', user.id)
            .where('recipientId', getCurrentUserId())
        )
);
.or takes a list of conditions just as you can add them to query('messages'). You might have to add an import for where to the import list of ihp-backend at the top of the file.
.or uses all previous conditions for the left side of the resulting OR condition. If you want a bit more clarity, you can wrap the initial conditions with a single call to .where:
const messages = useQuery(
    query('messages')
        .where(
            where('userId', getCurrentUserId())
            .where('recipientId', user.id)
        )
        .or(
            where('userId', user.id)
            .where('recipientId', getCurrentUserId())
        )
);
I, personally, don't think that's necessary, though.
If we check the result in the browser, messages will now only show in the correct chat! However, even if the order of messages might look correct, we have done nothing to ensure this will stay consistent. To always ensure that messages are displayed in the correct order, we can add a simple .orderBy('createdAt') to the query:
const messages = useQuery(
    query('messages')
        .where(
            where('userId', getCurrentUserId())
            .where('recipientId', user.id)
        )
        .or(
            where('userId', user.id)
            .where('recipientId', getCurrentUserId())
        )
        .orderBy('createdAt')
);
And finally, the correct messages show, in the proper order!

Minute 8: Realtime
We haven't done anything to make our app realtime yet... But the useQuery hook is realtime by default, meaning we don't have to do anything! IHP Backend will push new data to each client who requires it over a WebSocket connection. You can quickly try it out by opening a new private window in which you sign in as another user, sending messages between clients - the messages will show up in each browser without requiring a reload of the page!
I guess we can use this time for doing something else then.
Minute 8b: Commit and push (deploy)
Now that we've finished the frontend let's deploy it to production. Commit all changes and push them to your repository:
git add app.tsx public/app.css package.json package-lock.json
git commit -m "implement realtime chat"
git push
Vercel will notice a change on the main branch of our repository and deploy the changes automatically.
Enjoy your new app and possibly spare time!
Moving on
From here, you can continue playing around with IHP Backend. Maybe you want to allow users to set a different display name instead of displaying their email? Maybe you want users to request a chat with others, so they can't just send messages to anyone willy-nilly? Perhaps you want to implement group chat functionality?
If you don't feel comfortable trying things out alone, you might also want to follow the normal Onboarding process. It'll lead you through creating another app, similar to this article, but possibly give you some new information not covered here or covered differently.
What will you build with IHP Backend? Tell us in the comments!

Oldest comments (0)