
Learn how to combine your knowledge of Gridsome for SPA and Electron for desktop apps to build a desktop app.
Electron and Gridsome was the basic requirement for an application i and my team were working on so i started to make some research on how to use gridsome in electron both in development and production with a smooth developer experience but i couldn't find any article or video on building desktop applications with electron and gridsome that is why i'm writing this article because I'm sure someone might run into some issues i faced setting it up :).
Prerequisites
- Basic knowledge of Javascript
- Must have Node installed on your machine.
- Basic knowledge of Electron
Project structure

What is Gridsome?
Gridsome is a Vue-powered static site generator for building blazing fast static websites. It is data-driven meaning it uses a GraphQL layer to get data from different sources in order to dynamically generate pages from it. Gridsome is the Vue alternative to Gatsby for React.js.
As this tutorial is not a beginners guide for gridsome, I'll not go into full details of gridsome.
Setting up Gridsome.
Installation.
Run the following command to install Gridsome globally in your computer:
yarn global add @gridsome/cli
 # or
npm install -g @gridsome/cli
Next step is to create a new project using the CLI we just installed:
gridsome create gridsome-electron-boilerplate
This command will bootstrap a new gridsome site for you and install all the necessary dependencies.
Once that is done installing we can run the Gridsome site with this command:
cd gridsome-electron-boilerplate && gridsome develop
Electron
Electron, managed by Github, is used in a myriad of projects + companies. Making your web apps available for desktop makes them that much more versatile. So it makes sense to have a fundamental understanding of Electron, and how to integrate it into current projects.
What is Electron?
Electron allows you to build cross-platform desktop applications, using a Node.js backend and a Chromium front-end. It might seem like a challenge to turn your Gridsome web-app into a full fledged, downloadable desktop app — but Electron’s objective is to make this process seamless. I was intimidated at first, but the learning curve wasn’t nearly what I thought it would be.
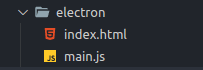
Basic structure of an electron app:
Install electron in your project by running:
yarn add -D electron@latest
You might have noticed that our base electron files are situated in a folder called electron and I'm emphasizing on this because electron is not going to work without making few changes to our package.json file.
You need to point the main in your package.json file to point to your electron main.js fille.
After that, your package.json should look like this:
{
    "name": "hardocs-electron-gridsome",
    "private": true,
    "main": "electron/main.js", // pointing to the main.js in electron folder
    "dependencies": {
        "@gridsome/source-filesystem": "^0.6.2",
        "gridsome": "^0.7.0",
    },
    "devDependencies": {
        "electron": "^9.1.0",
        ...
    },
    ...
}
You can simply run the following commands to startup your electron app:
npx electron .
Now we need to load gridsome contents into our electron app.
Add the following lines of code to load gridsome url in your electron app:
const { app, BrowserWindow } = require("electron");

function createWindow() {
  const mainWindow = new BrowserWindow({
    width: 800,
    height: 600,
  });

  mainWindow.loadURL("http://localhost:8080");
}

app.whenReady().then(() => {
  createWindow();

  app.on("activate", function () {
    if (BrowserWindow.getAllWindows().length === 0) createWindow();
  });
});

app.on("window-all-closed", function () {
  if (process.platform !== "darwin") app.quit();
});
Before you start up your electron app you need to make sure your gridsome website is running on http://localhost:8080 then you can proceed to run this command in your terminal:
npx electron .

Bravo 😁. Gridsome is working perfectly in electron.
It's clear that electron is loading gridsome pretty fine in development mode. However, It's totally different in production mode because in production, gridsome generates just html, css and javascript files.
Now lets get everything working in both development and production environments.
To do this, we need the help of this packages:
yarn add live-server
-
Live-server: Live server helps us to serve
html, css and javascriptfiles including folders with LIVE RELOAD.
Basically, what we're going to do is to conditionally load the build index.html file from gridsome or load gridsome development server url.
const { app, BrowserWindow } = require("electron");
const path = require("path");
const liveServer = require("live-server");

const distDir = path.join(__dirname, "..", "dist"); // require build directory
const host = "localhost"; // host: localhost or 0.0.0.0
const port = 4000;
const url = "http://" + host + ":" + port; // => http://localhost:8081
const params = {
  port: port,
  host: host,
  root: distDir,
  open: false, // prevents auto-open in browser
  file: "index.html",
};

function createWindow() {
  const mainWindow = new BrowserWindow({
    width: 800,
    height: 600,
  });
  if (process.env.NODE_ENV === "prod" || process.env.NODE_ENV === "production") {
    // Here we check if we're in production env
    liveServer.start(params); // startup live-server
    mainWindow.loadURL(url); // load the url in gridsome
  } else {
    mainWindow.loadURL("http://localhost:8000");
  }
}

app.whenReady().then(() => {
  createWindow();

  app.on("activate", function () {
    if (BrowserWindow.getAllWindows().length === 0) createWindow();
  });
});

app.on("window-all-closed", function () {
  if (process.platform !== "darwin") app.quit();
});
From the code above, you can see that we're either loading the url we get from live-server or the gridsome dev server url.
However, we need to build our gridsome application into static html, css and js files and to do that we have to tweak our package.json a little bit.
your final package.json file should look exactly like this:
{
  "name": "hardocs-electron-gridsome",
  "private": true,
  "main": "electron/main.js",
  "scripts": {
    "build": "gridsome build",
    "develop": "NODE_ENV=dev gridsome develop",
    "electron": "electron ."
  },
  "dependencies": {
    "@gridsome/source-filesystem": "^0.6.2",
    "gridsome": "^0.7.0",
    "live-server": "^1.2.1"
  },
  "devDependencies": {
    "electron": "^9.1.0"
  }
}
Now, run the build command to generate a build directory:
yarn build
We can now run yarn start our electron app by running:
yarn electron
However, you might run into issues when your live-server fails to start before the electron app so we need some extra help to handle that part and also setup a proper development experience.
yarn add wait-on
- wait-on: wait-on - wait for files, ports, sockets, http(s) resources.
Finally, we need to do some shell scripting.
Create a startServer.sh file in your root directory and add the following lines of code:
#!/bin/bash
read -p "Enter your environment: " NODE_ENV

if [ "$NODE_ENV" = "production" ] || [ "$NODE_ENV" = "prod" ]
then
    echo $NODE_ENV;
    exec yarn prod;
else
    echo $NODE_ENV;
    exec yarn develop & yarn wait
fi
What the above code does is that it would prompt you to enter your environment and if it matches prod or production then it would execute the first if block else it would execute the else block.
Now add these scripts to your package.json and you're all set :
{
    ...
    "scripts": {
      "build": "gridsome build",
      "develop": "gridsome develop -p 8000",
      "explore": "gridsome explore",
      "prod": "NODE_ENV=production electron .",
      "wait": "wait-on http://localhost:8000 && electron .",
      "grant": "chmod +x ./startServer.sh",
      "start": "./startServer.sh"
  },
  ...
}
I'll focus on the develop, prod, wait, grant and start commands.
-
develop: I specified a port 8000 for the development mode of the gridsome server. -
prod: assigns the NODE_ENV toproduction -
wait: uses thewait-onpackage we installed earlier to wait for port 8000 to be ready before executing theelectron .command -
grant: makesstartServer.shexecutable. -
startcommand executesstartServer.shfile.
make startServer.sh executable by running:
yarn grant
then startup your project smoothly with:
yarn start
You can find the entire code for this article on my github repo https://github.com/DNature/gridsome-electron-boilerplate.
It's open source so feel free to contribute and also don't forget to star it 😉.
Conclusion:
To conclude, we were able to:
- Setup gridsome
- Setup electron
- Work with electron and gridsome in development mode
- Overcome some challenges that usually occur when gridsome is in production mode with the help of
wait-onpackage and some shell scripts.
If you are reading this then I'm sure you know that you are awesome and if you have any questions let me know in the comments or contact me: contact@divinehycenth.com
I hope you find this helpful.

Top comments (0)