
Below are the steps you need to take to create an Azure blob storage and upload an unstructured document, making it accessible to the public through the document URL.
STEP 1
Sign into azure using the URL https://portal.azure.com
Go to the search bar at the top of the and type *Storage accounts * click on it when it pops up.

STEP 2
- On the Storage accounts page that displayed, select Create storage account

This will take you to a page with options for your new storage account organized into tabs for you to fill in the details of the account to be created.
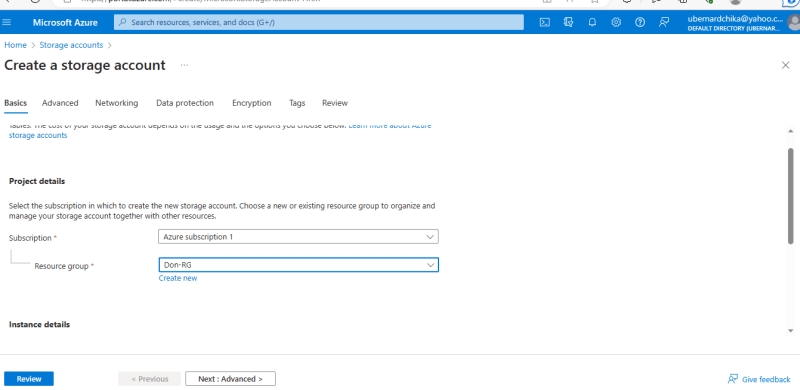
In the Basics tab:
- Under Project details, Select the subscription **for the new storage account and create a new **resource group for this storage account, or select an existing one.
- Under Instance details input the Storage account name, Region, Performance and Redundancy.

The name for your storage account must be unique. Storage account names must be between 3 and 24 characters in length and may contain numbers and lowercase letters only.
Select Standard performance for general-purpose v2 storage accounts (default).
If you select a geo-redundant configuration (GRS or GZRS), your data is replicated to a data center in a different region.
Leave other configurations as default and click on the Review button.

If the verification is successful, click on the Create button.

It will display Deployment is in progress and start creating the storage account and its dependencies.

When deployment is complete, click on Go to resource button.

This will take you to the new storage account you created, displaying its overview details.

STEP 3
Creating a Container
Click on Containers **by the left side of the overview details and select **container. Then input your container Name in the tab provided and change Public access level to Blob and save.

Your container is now ready for use.

STEP 4
Uploading an Unstructured Document
Click on the container you created, then in your container page click on Upload button and click on Browse for files

This will take you to your desktop where you can select document you wish to upload, then click on your chosen document to be attached.
Procced to click the Upload button.

Click on the uploaded document, this will take you to the URL link.

Copy the URL. This URL will give access to your document.
Use the link to view the document.

STOP 5
Changing Tiers of a Document
- Click on the uploaded document, select the Change tier button.

This will pop-up the Access tier tab with tier selection options, with the Hot tier as the default tier. The tiers can be changed, depending on the frequency of the document usage.
Hot Tier (Daily Usage)

Cool Tier (Monthly Usage)

Archive Tier (180 Days)


Top comments (0)