
STEP 1
Sign into the Azure portal:
Go to the Azure portal at portal.azure.com and sign into your Azure account. If you do not have any, then create one.
STEP 2
Create a new virtual machine:
Go to the search box on top of the page and type virtual machine. Select the virtual machine from the options that appear.

Click on create and select Azure virtual machine

STEP 3
Configure the virtual machine settings:
Under the Basics tab, specify the following details:
Subscription: Choose the appropriate subscription.
Resource group: Create a new resource group or select an existing one.

Virtual machine name: Provide a name for your virtual machine.
Region: Choose the region closest to your location.
Image: Select the desired Windows Server version.
Size: Choose an appropriate size for your VM based on your requirements.

Under the Administrator account section, provide a username and password for the administrator account. This will be used to log in to the VM.
Under the Inbound port rules check allow selected ports button and select RDP (3389).
Under Licensing check the box.
Leave the remaining settings as default or modify them as per your requirements.

STEP 4
Configure networking
Under the Networking tab, select the appropriate virtual network and subnet for your VM or leave it at default.
Leave the other settings as default or modify them as needed.
Then click on review + create button.

STEP 5 **
**Review and create:

Review the summary of your VM configuration and click on the "Create" button to start the deployment process.

Still in progress, creating dependencies.

Deployment is complete, click on go to resource.

Virtual machine overview

STEP 7
Connect to the virtual machine using RDP:
Once the virtual machine is deployed, you can connect to it using Remote Desktop Protocol (RDP).
Go to the Azure portal and navigate to your VM.
Click on the "Connect" button at the top of the VM overview page.

In the "Connect" blade, select "RDP" as the connection method,
and when prompted, enter the username and password you provided while creating the virtual machine.

This may pop-up, click yes to connect.

Your virtual desktop will be visible for use at this point.
With this, you have now created a Windows virtual machine in Azure and connected to it using RDP. You can now use the remote desktop session to manage and configure your VM.
STEP 8
Delete the resource
It is advised you delete the resource and its dependencies if you are not making us of it for cost optimization.
The best way to achieve this is to delete the resource group you created.
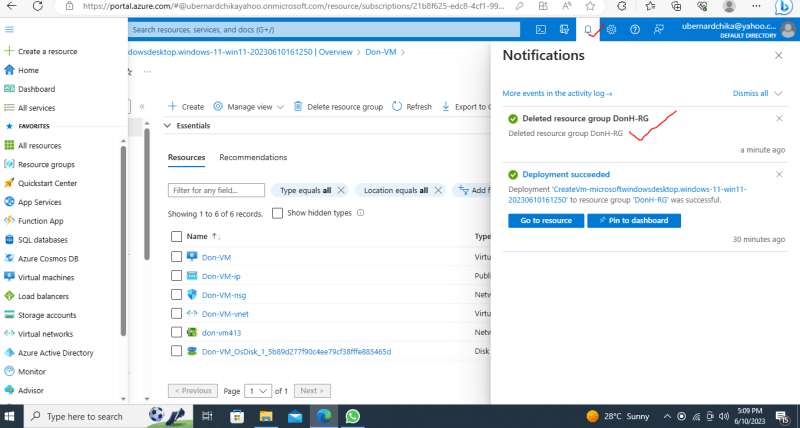
Go to the VM, click on resources group and when it opens, click on delete resource group button.

Copy the resource group name and paste it in the box to confirm deletion. Then click on the delete button.

With this, the Virtual Machine you created all the dependencies will be deleted.

Top comments (0)