

Calling all AR developers and content creators! Looking to create an AR face tracking experience? With echo3D’s 3D-ready cloud platform, you can create an AR Face experience with ease.
FaceAR is a web-based library that enables you to view your 3D content through a web browser and supports face tracking. With echo3D, you can manage, stream, and update 3D/XR content to your app on any device.
📲 Adding 3D Content
Add any type of hologram through the console. You can choose any type of target.
Click the “Add to Cloud” button at the top of the sidebar or the empty card in the Content page to add a new entry (hologram and target) to the project.

Choose a Hologram
You can either select files from local storage or choose from the displayed sample models.

Use the search bar to find free 3D models that you can instantly add to the console.
You can find additional free 3D models on Sketchfab, TurboSquid, Sketchup’s 3D Warehouse, Clara.io, Thangs, Poly Haven, Archive3D, and Free3D.
You can create your own 3D models with Tinkercad, Blender, KenShape, Fusion 360, MagicaVoxel, Maya, Maya LT, Maxon Cinema4D or use 3D scanning apps.
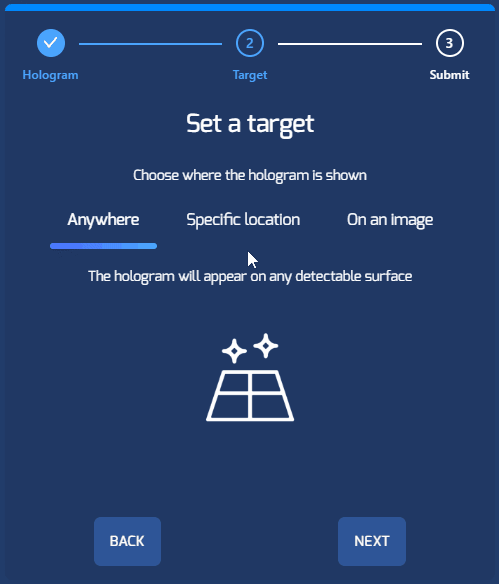
Set a Target
Select “Anywhere” as the target which would sets a surface target. Your hologram will show up on any detectable surface (including your face!).
Click “Done” to upload your hologram.
- You did it! 🎉 Your content will be displayed in the Content page. Any issues? click here to learn more about adding content).
🚀 Launching the FaceAR App
Option 1: Scan a QR code
Once the 3D hologram is set you can view it instantly with FaceAR.
Click on the “QR code” icon to generate and show the QR codes. Choose the “See on a face” tab.

Scan the QR code with your phone’s camera app or with a QR reader app.
Latest iOS and Android phones are able to read QR code with their default camera apps.
Click the pop-up message to get redirected to our website. Your browser should open. Your camera should open in the browser.
You might need to allow camera access. In iOS, we recommend using the Safari browser. In Android, Chrome browser is recommended as the default browser.
Your camera should open in the browser.
- You did it! 🎉
Option 2: Go directly to website
Instead of scanning the QR code, you can also browse directly to:
https://api.echo3D.co/facear?key=<YOUR_API_KEY>
Your camera should open in the browser.
- You did it! 🎉
👀 Seeing 3D Content in AR
Now that the camera is running in your browser, keep the camera pointed to a face to see the 3D model appear.
💗 Capturing the AR Moment
You can snap a picture of the AR scene by clicking the “camera” button on the bottom of the screen.

An image will be captured and saved to your device.
- Share it with others! 💗
🔑 Password-Protecting Content
You can password-protect FaceAR experiences so that users that access the experience will be prompted to enter a password. If you’d like to password-protect the 3D content, go back to the console and add metadata to set a password. After adding metadata, relaunch the experience. on echo3D, “passwd” is a pre-defined metadata key to password-protect content (type should be “string” and you can add any value as your password, for example “1a2B3c4D5e6”).
📐Transforming Content
You can move, scale, rotate, and add text to 3D content in FaceAR by updating the 3D content’s metadata on echo3D. By updating metadata, you’ll be able to persistently transform your 3D content.
If the content is too big or too small or if you’d like to move or rotate it, go back to the console and add metadata to affect its transformation. After adding or changing metadata you can instantly see the changes in the browser even while the experience is running.
See here for a list of words the system uses as pre-defined metadata keys to control transformations (x, y, z, scale, height, width, etc.).
Remember to refresh the browser after adding metadata with FaceAR experiences for the changes to take effect.
🔢 Embed into Website or App using iframe
You can easily embed the FaceAR experience generated and hosted through the console to any web page. The web page can be part of a website or integrated in a mobile app.
In order to embed the FaceAR experience you must declare an iframe tag and set its source to the address of the hosted experience:
Using iframe
In order to embed the FaceAR experience you must declare an iframe tag and set its source to the address of the hosted experience:
<iframe src=”https://api.echo3D.co/facear?key=<YOUR_API_KEY>" allow="camera *"/>
Note that you must allow for camera access to avoid camera permission errors.
Click here for a code example of a full styled HTML page and more information on how to embed an FaceAR experience with iframe.
❔ Troubleshooting
- I can’t see the 3D asset!
Are you pointing to the right target? Make sure to point your phone to a face.
- Is your asset too small/big?
It might be the case that your 3D assets it too small or too big to appear in the camera view. Scale the model by adding a metadata key named scale to the 3D models. See how to add metadata in the Data Page section of the documentation.
Now rescan the QR code to rebuild and refresh your FaceAR app.
- I am getting some other error.
Let’s talk! Ask on Slack or send an email to support@echo3D.co and please attach a screenshot of the error you are experiencing.
Troubleshoot issues here. You can check out our full documentation for other useful tutorials here and also reach out to our
support team here.
echo3D (www.echo3D.co; Techstars 19’) is a cloud platform for 3D/AR/VR that provides tools and network infrastructure to help developers & companies quickly build and deploy 3D apps, games, and content.


Top comments (0)