Step 1: Logging into Azure Portal
Open your web browser and navigate to https://portal.azure.com.
Sign in using your Azure account credentials.
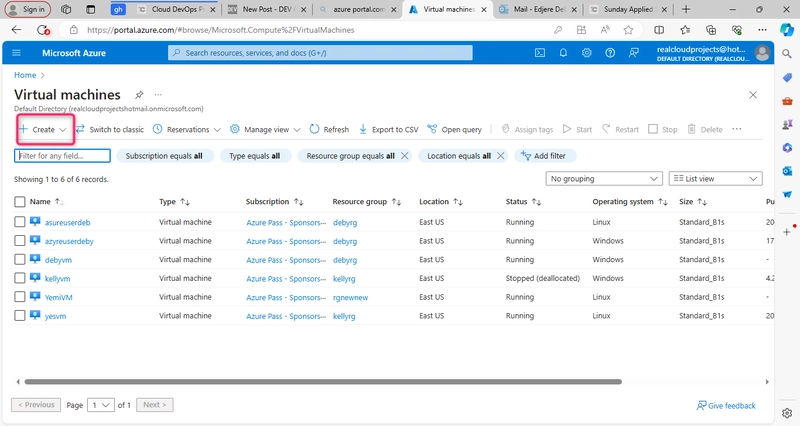
Step 2: Navigating to Virtual Machines
After logging in, you’ll land on the Azure dashboard. In the left-hand menu, click on “Virtual machines”

step 3: click on create
4: Click on Azure virtual machine.
We will now go through different tabs to configure our virtual machine.

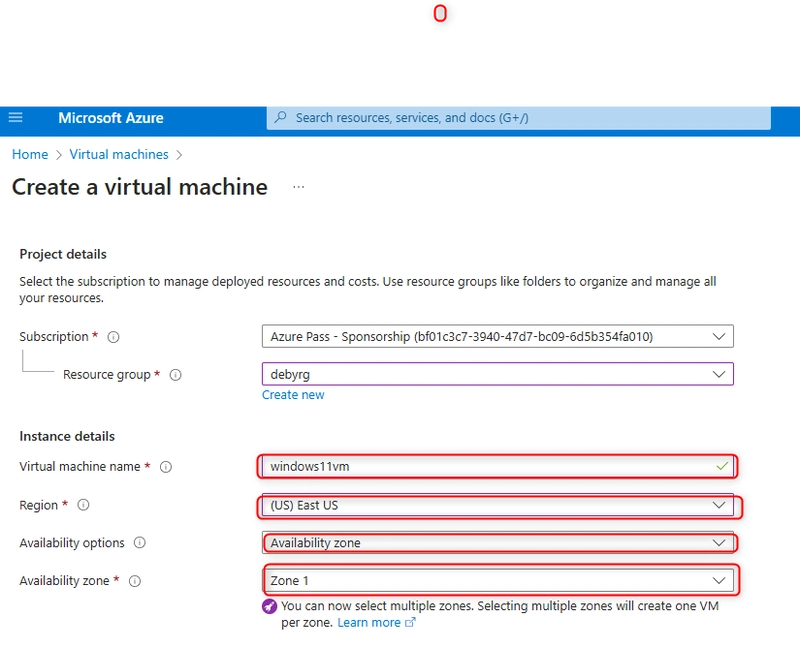
step 5: In Basics tab:
Click on Create new below the Resource group selection field, enter a Name and click OK button.

step 6: Enter a name in Virtual machine name field.
step 7: Select a region closest to you in the Region field.
Select Zone 1 in Availability zone field.

step 8 In the Size field, the free default choice should be selected as shown in the picture below.
step 9 Enter a Username and Password. Save them somewhere safe as we will need them later on to sign in to our virtual machine.

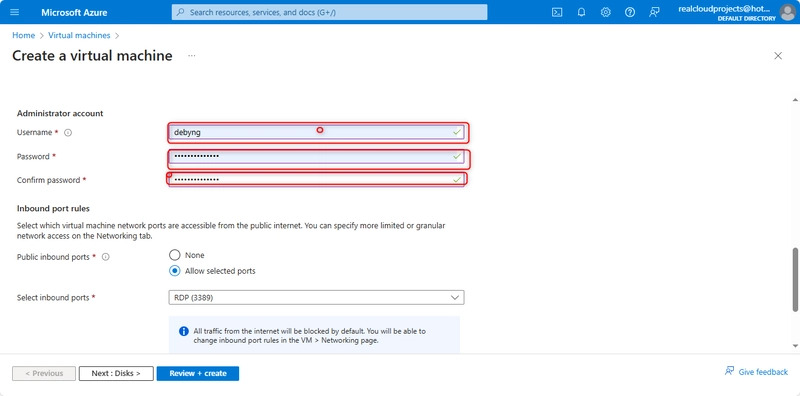
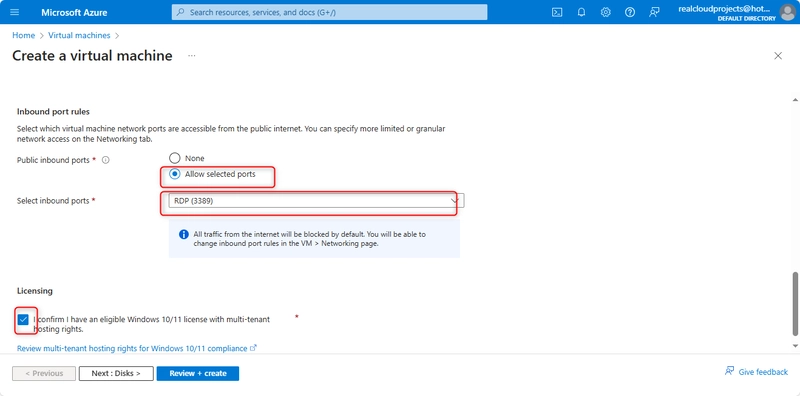
step 10: In Public inbound port field, select Allow selected ports.
In Select inbound port field, select RDP (3389).
Check Licensing checkbox and click Next button.
step 11: Click “Next” till we get to boot diagnostics in the Monitoring tab and click on “disable”.

step 12: Click on “Review + Create” button, if the validation passes, the deployment will go on if not take not of any recommendation, fix and try again.

step 13:When done, click on the Go to resource button.

step 13: Save the Public IP address as we will need it in the next part and extend the Ip address

Congratulations! You successfully created your Windows 11 virtual machine!

Top comments (0)