
What is SonarQube?
SonarQube is an inspection tool that analyzes aspects of your code, like code quality, code smells but also tech dept and security vulnerabilities. It's a good addition to Prettier and Eslint to ensure code quality.
Sometimes, adding SonarQube to your CICD or even paying SonarCloud is out of scope and out of budget for your project. In this guide, I show you how to set it up locally:
⚠️ All the instructions I give are tested on a Debian based distribution, you might have to adjust them slightly for other operating systems! ⚠️
1. Install the SonarLint extension
SonarLint works together with Eslint and prettier to notify you about possible issues as you are coding. Install the extension in your editor it to make your life easier: https://www.sonarsource.com/products/sonarlint/
For VSCode, it looks like this:

2. Setup the SonarQube server
- In a location of your choice, create a docker-compose.yml file with the following content: ```yaml
version: "3"
services:
SonarQube:
image: sonarqube:community
depends_on:
- db
environment:
SONAR_JDBC_URL: jdbc:postgresql://db:5432/sonar
SONAR_JDBC_USERNAME: sonartest
SONAR_JDBC_PASSWORD: sonartest
volumes:
- SonarQube_data:/opt/sonarqube/data
- SonarQube_extensions:/opt/sonarqube/extensions
- SonarQube_logs:/opt/sonarqube/logs
ports:
- "9000:9000"
db:
image: postgres:12
environment:
POSTGRES_USER: sonartest
POSTGRES_PASSWORD: sonartest
POSTGRES_DB: sonar
volumes:
- postgresql:/var/lib/postgresql
- postgresql_data:/var/lib/postgresql/data
volumes:
SonarQube_data:
SonarQube_extensions:
SonarQube_logs:
postgresql:
postgresql_data:
This contains the images for two containers: The first one is the SonarQube server and the second one is a database that SonarQube needs to store all its configurations.
- Start up the docker-compose with the command: `docker-compose up -d`

### Fixing SonarQube Errors Part 1
In the beginning, you will maybe notice that the SonarQube container dies and if you execute the command `docker compose logs`, you will see the following error message: `ecl-frontend-SonarQube-1  | bootstrap check failure [1] of [1]: max virtual memory areas vm.max_map_count [65530] is too low, increase to at least [262144]`

- To solve this, change the vm.max_map_count setting in /etc/sysctl.conf with the following command: `echo "vm.max_map_count=262144" | sudo tee -a /etc/sysctl.conf`
- Then, reload the configurations: `sudo sysctl -p`
- For Docker on Windows, you can go to the Docker Desktop settings and under Deamon, switch to Advanzed. There, you can add the following configuration:
```json


{
  "sysctls": {
    "vm.max_map_count": "262144"
  }
}
- You will have to restart Docker Desktop afterward for the change to be available.
Fixing SonarQube Errors Part 2
- Most likely, the SonarQube container will still fail with the error:
FATAL: database "sonar" does not exist - To fix this, get a shell inside the PostgreSQL container
docker-compose exec db psql -U sonartest - And once inside the container, create the sonar database with the command:
CREATE DATABASE sonar; - Then, exit the psql shell with
\q - Now that the database is created, you can run
docker-compose up -dagain or restart the SonarQube service withdocker-compose restart SonarQube - The SonarQube server should now be available at
localhost:9000the default credentials are username: admin and password: admin
3. Run SonarQube in your project
- First, follow the steps to install the sonar scanner for your operating system: https://docs.sonarcloud.io/advanced-setup/ci-based-analysis/sonarscanner-cli/
- Create a file with the name sonar-project.properties in your project root and adjust it accordingly: ```bash
Organization and project keys are displayed in the right sidebar of the project homepage
sonar.organization=my_organization
sonar.projectKey=my_project
sonar.host.url=https://sonarcloud.io
--- optional properties ---
defaults to project key
sonar.projectName=My project
defaults to 'not provided'
sonar.projectVersion=1.0
Path is relative to the sonar-project.properties file. Defaults to .
sonar.sources=.
Encoding of the source code. Default is default system encoding
sonar.sourceEncoding=UTF-8
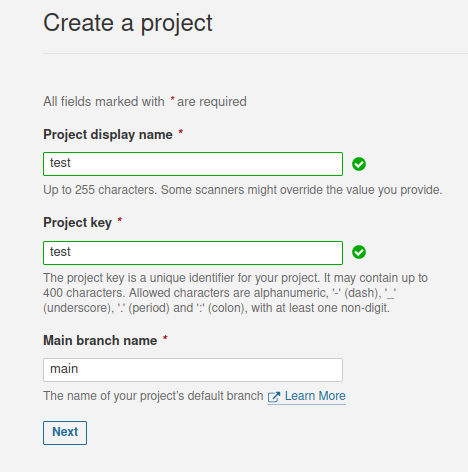
- Enter the server on [localhost:9000](http://localhost:9000) and create a new project
- Select a name and a baseline branch for the project
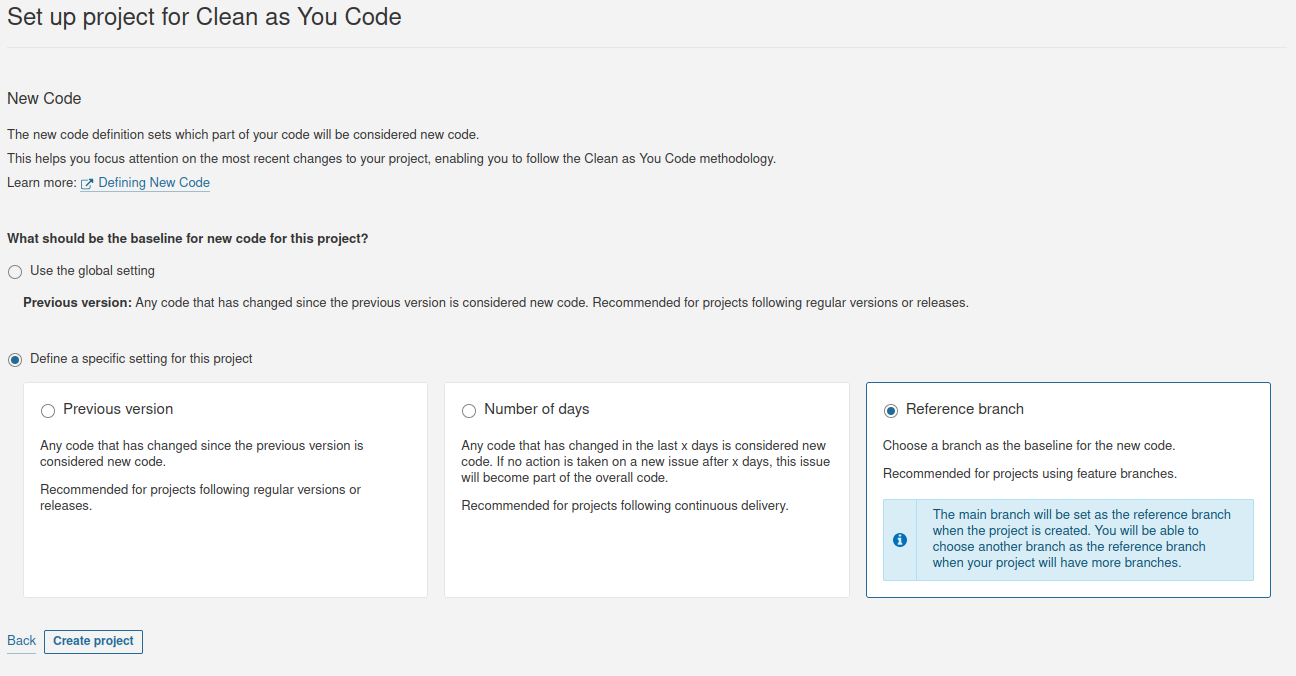
- Choose how SonarQube should analyze your code changes. In my case, I choose the reference branch option because we are working with feature branches, but you will have to adapt this option to your workflow.
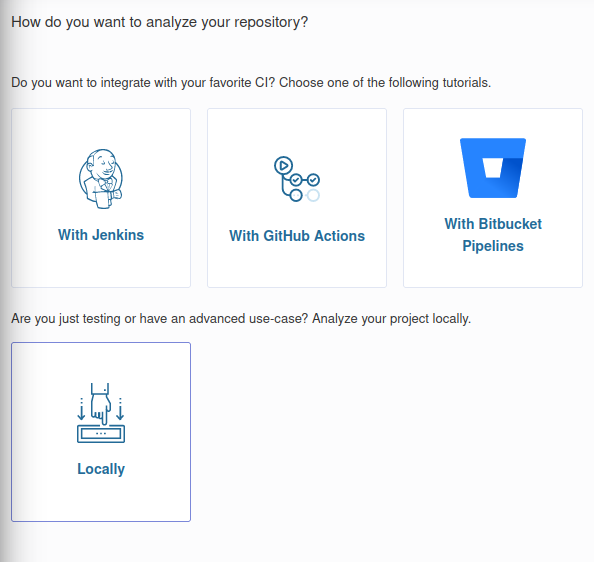
- In the next step, you will be asked how you want to analyze your repository. Since we are configuring a local setup, let’s select “locally”
- Now, generate a token for your project. This will link your SonarQube server with your code.
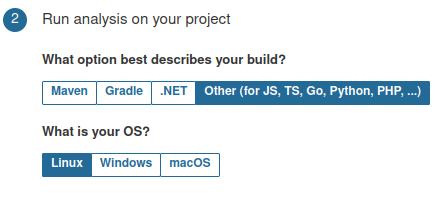
- Once you have your token, SonarQube will let you choose a programming language and an operating system and based on that, will give you the command you can execute to run your analysis.
- Run the command that SonarQube gives you at the root of your project.
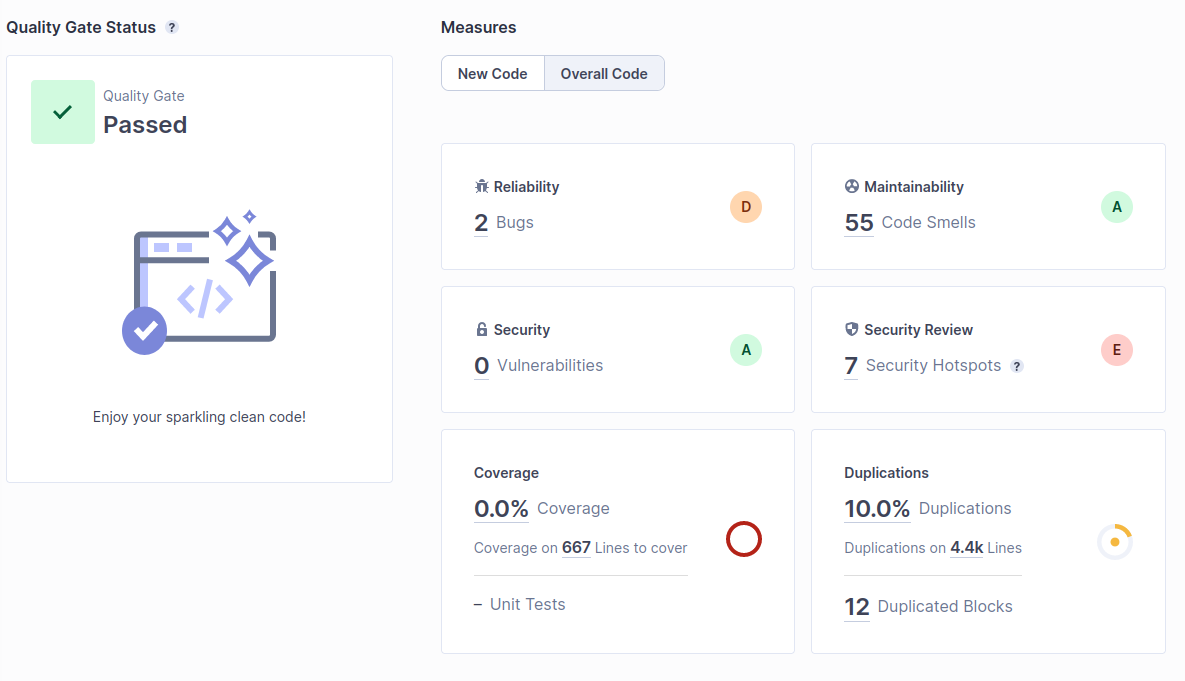
- After running the command, SonarQube should show the project results in your Dashboard. Click on the project and inspect its findings. Make sure to click on “Overall Code” to be able to see problems in your whole codebase and not only for the latest changes.
That’s it - you did successfully configure SonarQube on your local machine. As long as you don’t delete the volumes of the docker-compose, the data will stay even if you turn off your machine or kill the docker containers.
Is there a better way? Let me know in the comments! I hope this was helpful!

Top comments (0)