
No matter, what type of application you are developing, it is most likely that your application needs some sort of data access for the purpose of reading and writing data to and from the database. Back in the day, the developers often used to write ADO.NET code to communicate with the database but in 2008, Microsoft introduced an ORM framework called Entity Framework to bridge the gap between the relational databases and object-oriented programming languages such as C#. Entity Framework is still the most popular and widely used data access technology for .NET developers and its latest version is Entity Framework Core 5. In this tutorial, I will give you an overview of using Entity Framework Core 5 with ASP.NET Core 5 and we will focus on Code First technique that will allow you to create and manage database using code.
Introduction to Entity Framework Core
Entity Framework (EF) Core is a lightweight, extensible, open-source, and cross-platform version of the popular Entity Framework data access technology. Like other ORM frameworks, EF Core also enables .NET developers to work with a relational database using .NET classes and objects. Developers don’t need to worry about opening database connections, executing SQL commands or stored procedures, and so on. They can simply create and save objects to create rows in database tables and they can also run queries and fetch data from the database and load into .NET objects without writing any SQL queries ever.
Entity Framework Database Providers
EF Core can access many different databases using database providers. There are providers available for almost all popular databases such as SQL Server, MySql, Oracle, PostgreSQL, etc. Some of these providers are maintained as part of the Entity Framework Core Project but others are available from third-party software vendors. Most of these database providers are available as NuGet packages and they are easy to install using the NuGet package manager. Make sure you review each provider's documentation for detailed information about configuring and using the provider.
Following are some of the popular database providers for Entity Framework Core.
| Data Provider | Package |
|---|---|
| SQL Server 2012 onward | Microsoft.EntityFrameworkCore.SqlServer |
| SQLite | Microsoft.EntityFrameworkCore.Sqlite |
| MySQL | MySql.Data.EntityFrameworkCore |
| Oracle | Oracle.EntityFrameworkCore |
| Db2 | IBM.EntityFrameworkCore |
If you want to learn how to use NuGet to download packages then read my post Working with Packages and Libraries in ASP.NET Core
What is Entity Model?
Entity Framework supports data access using C# classes called data or entity models. These entity models are then used by a DbContext object that represents a session with the database. This DbContext object allows querying and saving data. There are different ways to create entity models in .NET projects.
- Code First: We can hand code a model as a C# class and then use EF Migrations to create and update a database from the model. EF Migrations help us to create, update our database and keep the database synced with our model classes. This tutorial will cover this approach in detail.
- Database First: We can generate a model from an existing database. You can learn more about this approach in my other tutorial Data Access in ASP.NET Core using EF Core (Database First)
This article will help you to understand the Code First approach in an ASP.NET Core MVC application using Entity Framework Core migrations. We will create entities such as Product, Customer, Order, and ProductOrder and will create the following tables and relationships in the database.

Getting Started with Entity Framework Core
Let’s create a new ASP.NET MVC Web Application in Visual Studio 2019 using the File > New > Project menu. The first thing we need is to install Entity Framework Core and because we are using SQL Server database so we also need to install SQL Server Data Provider. Open the NuGet package manager and search for the following packages and install them in your project.
| NuGet Package | Description |
|---|---|
| Microsoft.EntityFrameworkCore.SqlServer | Microsoft SQL Server database provider for Entity Framework Core. |
| Microsoft.EntityFrameworkCore.Design | This package has some shared design-time components for Entity Framework Core Tools |
| Microsoft.EntityFrameworkCore.Tools | Entity Framework Core Tools will help us in running Migrations related commands e.g. Add-Migration, Remove-Migration, Update-Database directly from NuGet Package Manager Console in Visual Studio. |
Product Model
Next, we need to create our entity models and we normally put our models in the Models folder by convention so let’s create a Models folder in the project root folder and create our first model class called Product in it. I am adding the [Key] attribute with the Id property to make sure that the Id column is defined as the primary key column of the table. The [Required] attribute with the Name property will make it a Non-Nullable column. Finally, we have a [Column] attribute with the Price property that specifies the data type and the length in the database to be 18 and 2 decimal point precision.
public class Product
{
    [Key]
    public int Id { get; set; }

    [Required]
    public string Name { get; set; }

    [Column(TypeName = "decimal(18, 2)")]
    public decimal Price { get; set; }
}
Customer Model
Next, we need to create a Customer class that is slightly different than the Product class. We have basic properties such as Id, FirstName, LastName, etc., and a Navigation property Orders which is a Collection of Order entities we will create shortly. When Entity Framework Core will generate database table Customers, it will automatically create a one to many relationships between the Customer and the Orders which means one customer can have many orders in the database.
public class Customer
{
    [Key]
    public int Id { get; set; }

    [Required]
    public string FirstName { get; set; }

    [Required]
    public string LastName { get; set; }

    public string Phone { get; set; }

    public ICollection<Order> Orders { get; set; }
}
Order Model
Next, we need to create an Order entity that has some basic properties as well as a navigation property ProductOrders that will automatically generate an intersection table in the database for the Products and Orders table. The Order class also has another navigation property called Customer that specifies that a customer can be associated with a single order. Note that I am also defining a CustomerId property that will become the foreign key of Customer table.
public class Order
{
    [Key]
    public int Id { get; set; }

    public DateTime? OrderDate { get; set; }

    public int CustomerId { get; set; }

    public Customer Customer { get; set; }

    public ICollection<ProductOrder> ProductOrders { get; set; }
}
ProductOrder Model
Finally, we need to create a ProductOrder entity that will map to our intersection table ProductOrders in the database. There are two navigation properties Product and Order in this class along with two foreign key properties OrderId and ProductId.
public class ProductOrder
{
    [Key]
    public int Id { get; set; }

    public int Quantity { get; set; }

    public int ProductId { get; set; }

    public int OrderId { get; set; }

    public Product Product { get; set; }

    public Order Order { get; set; }
}
Creating Database Context in Entity Framework Core
The DbContext is the most important class of Entity Framework. An instance of DbContext represents a session with the database which can be used to query and save instances of your entities to a database. It can be used to perform the following operations:
- Manage database connection
- Configure model & relationship
- Querying database
- Saving data to the database
- Configure change tracking
- Caching
- Transaction management
Let’s create a folder called Data in our project and create a new class called OnlineShopDbContext in this folder. We need to derive this class from the Entity Framework DbContext class. Next, I created four properties of type DbSet where each DbSet represents a table in the database.
public class OnlineShopDbContext : DbContext
{
    public OnlineShopDbContext(DbContextOptions<OnlineShopDbContext> options)
        : base(options)
    {

    }

    public DbSet<Product> Products { get; set; }
    public DbSet<Customer> Customers { get; set; }
    public DbSet<Order> Orders { get; set; }
    public DbSet<ProductOrder> ProductOrders { get; set; }
}
Next, we need to define our database connection string and we can save the connection string in the appsettings.json file as shown below:
{
   "ConnectionStrings":{
      "DefaultConnection":"Server=DESKTOP-6SDKTRC; Database=OnlineShopDb; Trusted_Connection=True; MultipleActiveResultSets=true"
   },
   "Logging":{
      "LogLevel":{
         "Default":"Information",
         "Microsoft":"Warning",
         "Microsoft.Hosting.Lifetime":"Information"
      }
   },
   "AllowedHosts":"*"
}
Finally, we need to register the SQL Server database provider in Startup.cs file using the UseSqlServer method. The UseSqlServer method requires a database connection string and we can read and pass this information using the GetConnectionString method.
public void ConfigureServices(IServiceCollection services)
{
    services.AddControllersWithViews();

    services.AddDbContext<OnlineShopDbContext>(options =>
        options.UseSqlServer(Configuration.GetConnectionString("DefaultConnection")));

}
Using Entity Framework Core Migrations
We have created entity models and DbContext object above so it is now time to generate our database with the help of migrations. Migrations allow us to easily create a new database and then incrementally update the database schema to keep it in sync with the application models. You can run migrations using .NET Core CLI tools which will work on all platforms but if you want to stay within Visual Studio then you can also use Package Manager Console tools. For this tutorial, I will use Package Manager Console tools so let open Package Manager Console and add our first migration using the following Add-Migration command.
Add-Migration InitialDatabaseCreate
Our first migration will be used to create a new SQL Server database that’s why I named it InitialDatabaseCreate but you are free to use any name you want. Press Enter and you will see Build started and succeeded messages as follows.

EF Core will create a directory called Migrations in the project and will also generate some files in this folder. Every time you will add a new migration using the Add-Migration command, a new file will be created in the Migrations folder.

If you will open the generated file, you will see that the generated class InitialDatabaseCreate is derived from the Migration class, and two methods Up and Down are overridden in the class. The code inside these methods is self-explanatory. There are CreateTable and CreateIndex method calls in the Up method and there are DropTable calls in the Down method. Up method upgrades our database from its current state to the new state expected by us. The Down method will do the reverse. It will revert our database to the state expected from the previous migration. We are free to add/update code in the files generated by migration commands such as Add-Migration.
public partial class InitialDatabaseCreate : Migration
{
   protected override void Up(MigrationBuilder migrationBuilder)
   {
        migrationBuilder.CreateTable(
            name: "Customers",
            columns: table => new
            {
                Id = table.Column<int>(type: "int", nullable: false)
                    .Annotation("SqlServer:Identity", "1, 1"),
                FirstName = table.Column<string>(type: "nvarchar(max)", nullable: false),
                LastName = table.Column<string>(type: "nvarchar(max)", nullable: false),
                Phone = table.Column<string>(type: "nvarchar(max)", nullable: true)
            },
            constraints: table =>
            {
                table.PrimaryKey("PK_Customers", x => x.Id);
            });

       ...
       ...
   }

   protected override void Down(MigrationBuilder migrationBuilder)
   {
        ...
        ...
        migrationBuilder.DropTable(name: "Customers");
   }
}
We are now ready to create our database and tables using the migration code generated for us. This can be done by running Update-Database command in Package Manager Console within Visual Studio.
Update-Database
Let’s take a look at the database and tables created automatically for us without writing a single line of SQL. Open SQL Server database and you will see a new database OnlineShopDb is now available in the list of Databases. If you will expand the Tables node, you will also see that the Products, Orders, etc. tables are created for us.

If you will open the Products table design view, then you will see the table has the same fields and data types we specified in our Product model above.

Now open the Customer table and you will notice that it is also created exactly how we expected.

You may be wondering from where that __EFMigrationsHistory table came from because we haven’t created any model for this table. This table is a special table, auto created by Entity Framework to keep track of all the migrations already ran against the database. If you will open the table, you will see that it has our first migration InitialDatabaseCreate entry saved in it.

Let’s say you have a new requirement and you want to save customer Emails in the database. You first need to create a new property Email in the Customer model class.
public class Customer
{
    [Key]
    public int Id { get; set; }

    [Required]
    public string FirstName { get; set; }

    [Required]
    public string LastName { get; set; }

    public string Phone { get; set; }

    public string Email { get; set; }

    public ICollection<Order> Orders { get; set; }
}
Next, you need to add a new migration to sync your model with the database. I have given it the name AddEmailInCustomers.
Add-Migration AddEmailInCustomers
Entity Framework will generate another class in the Migrations folder for our migration and you can update your database using the same Update-Database command
Update-Database
Go to database and open the Customers table in design view and you will see a new column Email added in the table as expected. A new migration entry will also be added in __EFMigrationsHistory table.

Seeding Data using EF Core Migrations
So far, we have learned how to create database and tables using EF Migrations and how to keep our database synched with the entity model. Now, let’s say you want to add some initial data in the Products table. You can do this easily by overriding the OnModelCreating method of DbContext in our project OnlineShopDbContext class.
public class OnlineShopDbContext : DbContext
{
    public OnlineShopDbContext(DbContextOptions<OnlineShopDbContext> options)
        : base(options)
    {
    }

    public DbSet<Product> Products { get; set; }
    public DbSet<Customer> Customers { get; set; }
    public DbSet<Order> Orders { get; set; }
    public DbSet<ProductOrder> ProductOrders { get; set; }

    protected override void OnModelCreating(ModelBuilder modelBuilder)
    {
        modelBuilder.Entity<Product>().HasData(
            new Product() { Id = 1, Name = "Apple iPad", Price = 1000 },
            new Product() { Id = 2, Name = "Samsung Smart TV", Price = 1500 },
            new Product() { Id = 3, Name = "Nokia 130", Price = 1200 });
    }
}
We want to see some products in the Products table that’s why I am adding the migration with SeedProductsData name
Add-Migration SeedProductsData
As soon as the above command will execute, a new migration class will be added in the Migrations folder and if you will open the class you will see code similar to the following. You can see how the code is calling the InsertData method of MigrationBuilder class add adding the same data we seeded above in the Products table.
public partial class SeedProductsData : Migration
{
    protected override void Up(MigrationBuilder migrationBuilder)
    {
        migrationBuilder.InsertData(
            table: "Products",
            columns: new[] { "Id", "Name", "Price" },
            values: new object[] { 1, "Apple iPad", 1000m });

        migrationBuilder.InsertData(
            table: "Products",
            columns: new[] { "Id", "Name", "Price" },
            values: new object[] { 2, "Samsung Smart TV", 1500m });

        migrationBuilder.InsertData(
            table: "Products",
            columns: new[] { "Id", "Name", "Price" },
            values: new object[] { 3, "Nokia 130", 1200m });
    }
}
Finally, run the Update-Database command and then open the Products table
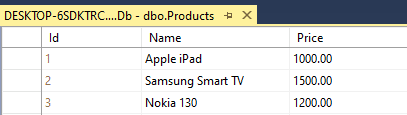
Displaying Data in ASP.NET Core using EF Core
In this final section of the tutorial, I will show you how you can use the Entity Framework Core in ASP.NET Core MVC to display data from the database. First of all, we need to inject OnlineShopDbContext class in our HomeController constructor and then we can simply call the ToListAsync method on Products DbSet as shown below. This will automatically fetch data from the database and we are then returning the data to Razor View.
public class HomeController : Controller
{
    private readonly OnlineShopDbContext _context;

    public HomeController(OnlineShopDbContext context)
    {
        _context = context;
    }

    public async Task<IActionResult> Index()
    {
        return View(await _context.Products.ToListAsync());
    }
}
The Index Razor View will first declare the model as IEnumerable because our Home Controller is passing a list of products to our Razor View. Finally, I have a standard foreach loop that will iterate over the list of Products and will generate an HTML table on the page.
@model IEnumerable<Product>

@{
    ViewData["Title"] = "Home Page";
}
<h2>Products</h2>
<table class="table">
    <thead>
        <tr>
            <th>
                @Html.DisplayNameFor(model => model.Id)
            </th>
            <th>
                @Html.DisplayNameFor(model => model.Name)
            </th>
            <th>
                @Html.DisplayNameFor(model => model.Price)
            </th>
            <th></th>
        </tr>
    </thead>
    <tbody>
        @foreach (var item in Model)
        {
            <tr>
                <td>
                    @Html.DisplayFor(modelItem => item.Id)
                </td>
                <td>
                    @Html.DisplayFor(modelItem => item.Name)
                </td>
                <td>
                    @Html.DisplayFor(modelItem => item.Price)
                </td>
            </tr>
        }
    </tbody>
</table>
If you will run the project now, you will see the following page showing all the products from the database.

Summary
In this tutorial, I have covered the basics of Entity Framework Core and gave you an overview of Entity Models. I have also covered how to use Entity Framework Code First technique to create a database from scratch using EF Core Migrations. I hope this tutorial will help you at your work or in your projects. Please leave your comments so that I can improve my posts based on your feedback. If you like this post, please share it with your friends or colleagues to spread the knowledge further.

Top comments (0)