In this post, I will show you how to create an Ubuntu VM (virtual machine) on Windows 11, using VirtualBox.
The Ubuntu version used in this guide is going to be 22.04 LTS, however, the process should look pretty much identical for other versions of Ubuntu.
Download and Install VirtualBox
Download the VirtualBox platform packages for Windows hosts on this page and then simply install the software on your computer.
Download an Ubuntu Image
Download an Ubuntu image, in this case Ubuntu 22.04 LTS.
The .iso file is over 3 GB in size, so depending on your connection, this step may take a while.
Creating the Ubuntu Virtual Machine
Open VirtualBox and click "New".
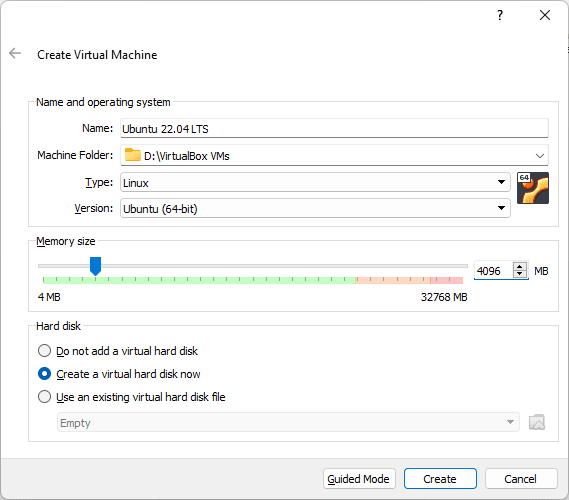
Enable Expert Mode, give your VM a name, choose "Linux" as type and indicate, which version of Linux you will be using.
Also, make sure to allocate your VM enough memory. In my case, I went with 4 GB, although less should easily do in most cases. As a minimum, I'd recommend you go with 2 GB.
This is a value you can change easily later on, so don't worry about it too much.
When you are done, click the "Create" button.
In the next window, confirm the directory where your VM file is going to be stored.
Unless you know what you are doing, choose "VDI (VirtualBox Disk Image)" as the hard disk file type and decide, how much space you would like to allocate to your virtual machine.
The latter is a bit more complicated to change later on than for example the available RAM, so best go with a value that will be enough for quite a while. In my case, I went with dynamically allocated 100 GB. As a minimum, I'd recommend 15 GB.
The main advantage of dynamic allocation is that on your host OS only the actual space used by the VM will be used, whereas with fixed allocation, the amount of space you choose will be taken immediately.
Fixed allocation can have a performance benefit, however, in most cases you will not notice the difference at all.
Click the "Create" button.
Optimal Settings
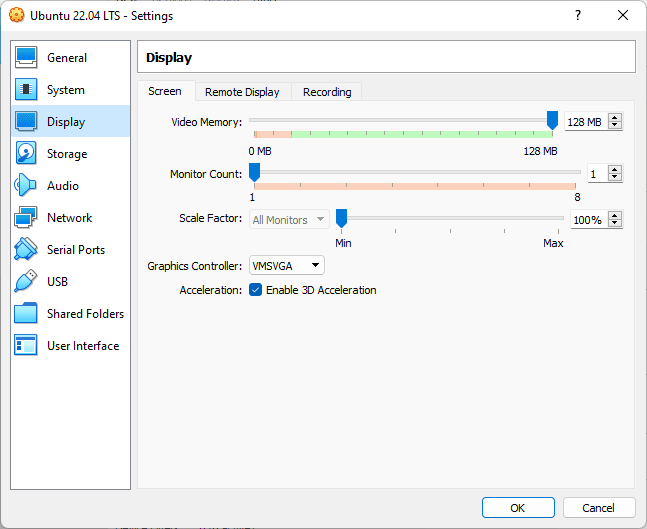
Before you move on to the next step, choose "Settings". Then apply the optimal settings described next.
Attention: These are no hard-written rules, so take them with a grain of salt and feel free to adapt to your own needs.
- System > Motherboard: Enable EFI
- System > Processor: Set CPU cores to half of your available cores
- System > Display: Increase video memory to 128 MB, enable 3D acceleration
Installing Ubuntu
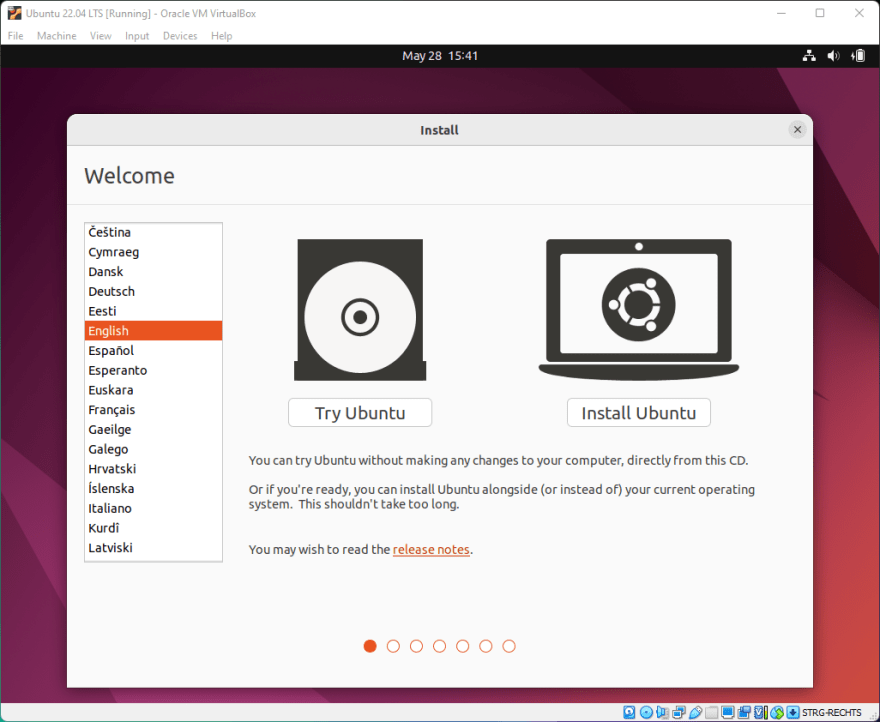
Start your virtual machine now and choose the Ubuntu image your downloaded earlier as your startup disk.
Choose "Try or install Ubuntu" and simply follow the normal Ubuntu installation flow, choosing the settings you deem adequate.
If you need help at any time, you may consult this guide:
What To Do After Ubuntu Has Been Installed?
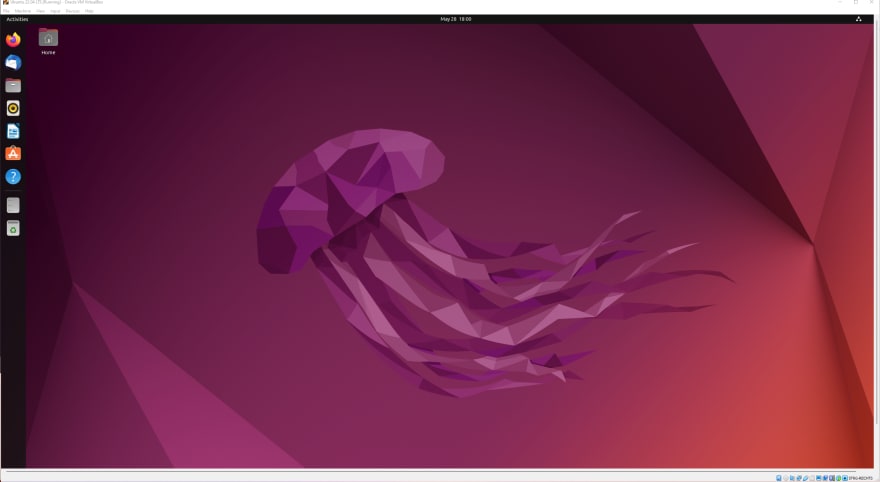
Congratulations, Ubuntu should now be up and running. Here is a list of things you might want to do before you proceed:
- Change screen resolution to the resolution of your monitor, as the default will be 800 x 600
- Run any updates that Ubuntu is suggesting
- Switch between windowed mode and full screen mode by pressing your host key + F; your host key is the one displayed on the bottom right of your VM instance, in my case "STRG-Rechts" (German for "CTRL-right"
- Connect with your Google account, as this will give you instant access to your Google Drive files from within Ubuntu
- Install Guest Additions (more below)
- Set up a shared folder (more even further below)
Note: There are some cases where the native resolution of your monitor just won't show up, despite everything apparently having been set up correctly. I've published a Shell script on GitHub that can help you fix this, by forcing the desired screen resolution.
Installing Guest Additions
This point is specific to Ubuntu as a virtual machine. Guest Additions is an additional piece of software that improves
integration between your virtual machine your host OS.
In order to install Guest Additions, first boot to the Desktop, then select Devices > Insert Guest Additions CD.
In some cases you can now simply install Guest Additions and you are good to go.
It's also possible, however, that clicking the "Run Software" button won't do anything. In this case, do a right click and open the CD folder in your terminal.
Execute by typing this command:
sudo ./VBoxLinuxAdditions.run
If installing guest additions didn't work for you before, your terminal will now give you some information about why it didn't work.
In my case, a required package was missing, which I was able to install by executing the following commands:
sudo apt-get update
sudo apt-get install build-essential gcc make perl dkms
After that, everything went smoothly.
Installing Guest Additions can sometimes be a bit tricky - so feel free to comment in case you are struggling and I will try to help.
Setting up a Shared Folder
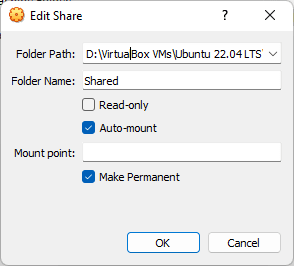
In order to set up a shared folder, again go to your VMs settings and this time navigate to "Shared Folders".
Now choose a path for your shared folder on the host OS and apply the same settings you can see in the screenshot below.
When you start your VM again now, the shared folder should already be showing up, however, it is likely that you are receiving the following error message when you try to open it:
This location could not be displayed. You do not have the permissions necessary to view the contents of "Shared_Folder"
In order to fix this simply run this command:
sudo adduser $USER vboxsf
Then reboot your VM and you should be good to go.



Latest comments (0)