Originally published at rharshad.com
Building your Bot
In this example, we will use Node.js to build our bot which will respond to user's messages.
Create a new Node.js project
mkdir dbei-bot
cd dbei-bot

// create package.json file
npm init
touch index.js

// install project dependencies
npm install express body-parser --save // http server
npm install axios --save // promise based http client
npm install dotenv --save // loads environment variables from .env file
Configure an Environment File
We will create a .env file which will have below entries:
SEND_API=https://graph.facebook.com/v3.0/me/messages
VERIFY_TOKEN=<VERIFY_TOKEN>
PAGE_ACCESS_TOKEN=<PAGE_ACCESS_TOKEN>
VERIFY_TOKEN
It can be a random string. We will configure this token in the messenger platform at a later stage.
Purpose - Messenger platform will send a challenge request to our webhook and we must verify whether it matches the configured token. Only then, our webhook will be subscribed.
PAGE_ACCESS_TOKEN
We will generate this token at a later stage in the messenger platform and replace it here.
Purpose - We need this token to send API requests to messenger.
Create an HTTP server
We will create an HTTP server that listens for requests. In the index.js file which we had created earlier add below code:
// configure dotenv so that process.env has the keys and values you defined in your .env file
require('dotenv').config();

const
    express = require('express'),
    bodyParser = require('body-parser'),
    app = express().use(bodyParser.json());

app.listen(process.env.PORT || 1337, () => console.log('webhook is listening'));
Add webhook verification endpoint
In index.js file we add below code to expose /webhook GET endpoint.
/**
 * Webhook challenge endpoint
 */
app.get('/webhook', (req, res) => {
    let VERIFY_TOKEN = process.env.VERIFY_TOKEN;
    let mode = req.query['hub.mode'];
    let token = req.query['hub.verify_token'];
    let challenge = req.query['hub.challenge'];
    if(mode && token) {
    // Checks the mode and token sent is correct
        if(mode == 'subscribe' && token == VERIFY_TOKEN) {
            res.status(200).send(challenge);
        } else {
            res.sendStatus(403);
        }
    }
});
We will configure this endpoint in the messenger platform later which will be used for challenge verification using the VERIFY_TOKEN we provide.
If the token sent by the messenger platform matches the one we had configured then we need to send 200 response otherwise 403.
On successful challenge verification, messenger platform will subscribe our webhook.
Test your webhook by running below commands:
node index.js // starts the express HTTP server to serve at port 1337

curl -X GET "localhost:1337/webhook?hub.verify_token=<YOUR_VERIFY_TOKEN>&hub.challenge=CHALLENGE_ACCEPTED&hub.mode=subscribe"
Above should return HTTP status code 200 with response as CHALLENGE_ACCEPTED if everything was set up properly.
Add webhook endpoint
In index.js file we add below code to expose /webhook POST endpoint which will be used by the Messenger platform to send webhook events.
/**
 * Messenger webhook endpoint
 */
app.post('/webhook', (req, res) => {
    let body = req.body;
    // Checks this is an event from a page subscription
    if(body.object === 'page') {
        // Iterates over each entry - there may be multiple if batched
        body.entry.forEach(function(entry) {
            // entry.messaging is an array, but will only ever contain one message
            let webhook_event = entry.messaging[0];
            // A person is assigned a unique page-scoped ID (PSID)
            // for each Facebook Page they start a conversation with.
            // The PSID is used by your Messenger bot to identify a person when sending messages.
            let sender_psid = webhook_event.sender.id;
            messenger.handleMessage(sender_psid, webhook_event.message);
        });
        res.status(200).send('EVENT_RECEIVED');
    } else {
        res.sendStatus(404);
    }
});
Handler functions
Previously we had mentioned messenger.handleMessage(sender_psid, webhook_event.message); function call. We will define this function now to handle and respond to text messages from uers.
/**
 * Incoming Message Handler
 */
function handleMessage(sender_psid, received_message) {
    // check if the input is text message
    // users might send smiley which can be filtered out
    if(typeof received_message.text !== "undefined") {
        let message = received_message.text.toLowerCase();
        callSendAPI(sender_psid, { text: message });
    }
}
We will define callSendAPI to send response messages via the SEND API.
// access environment variables
const PAGE_ACCESS_TOKEN = process.env.PAGE_ACCESS_TOKEN;
const SEND_API = process.env.SEND_API;

/**
 * Calls the Messenger API to send the message
 */
function callSendAPI(psid, message) {
    let data = {
        "recipient": { "id": psid },
        "message": message
    };
    return axios({
        method: 'POST',
        url: SEND_API,
        params: { access_token: PAGE_ACCESS_TOKEN },
        data: data
    })
    .catch((error) => {
        if (error.response) {
            console.log('PSID: ', psid);
            console.log('Status code: ', error.response.status);
            console.log('Response: ', error.response.data);
        } else if (error.request) {
            console.log('Request: ', error.request);
        } else {
            console.log('Error: ', error.message);
        }
    });
}
Here,
recipient - Sets the intended message recipient. In this case, we identify the person by their PSID.
message - Sets the details of the message to be sent.
We are sending our message to the Send API whose URL we had defined previously in a .env file. We are also appending PAGE_ACCESS_TOKEN in the access_token parameter of the URL query string.
If in case you are sending a subscription message, you need to include NON_PROMOTIONAL_SUBSCRIPTION tag in your data request.
let data = {
    "recipient": { "id": psid },
    "message": message,
    "messaging_type": "MESSAGE_TAG",
    "tag": "NON_PROMOTIONAL_SUBSCRIPTION"
};
Sending structured message
Messenger Platform provides a set of useful message templates, each designed to support a different, common message structure, including lists, receipts, buttons, and more.
Below is sample templates.js helper script which can be used to send structured messages to the Send API.
/**
 * link https://developers.facebook.com/docs/messenger-platform/reference/template/generic
 */
function genericTemplate(elements) {
    return {
        "attachment": {
            "type": "template",
            "payload": {
                "template_type": "generic",
                "elements": elements
            }
        }
    };
}

/**
 * link https://developers.facebook.com/docs/messenger-platform/reference/template/list
 */
function listTemplate(elements) {
    return {
        "attachment": {
            "type": "template",
            "payload": {
                "template_type": "list",
                "top_element_style": "compact",
                "elements": elements,
                "buttons": [
                    {
                        "title": "Donate",
                        "type": "web_url",
                        "url": 'https://www.paypal.me/harshadranganathan'
                    }
                ]
            }
        }
    };
}

/**
 * link https://developers.facebook.com/docs/messenger-platform/send-messages/quick-replies/
 */
function quickRepliesTemplate(text, quickReplies) {
    return {
        "text": text,
        "quick_replies": quickReplies
    }
}

module.exports = {
    genericTemplate: genericTemplate,
    listTemplate: listTemplate,
    quickRepliesTemplate: quickRepliesTemplate
};
Messenger Quick Replies Sample:
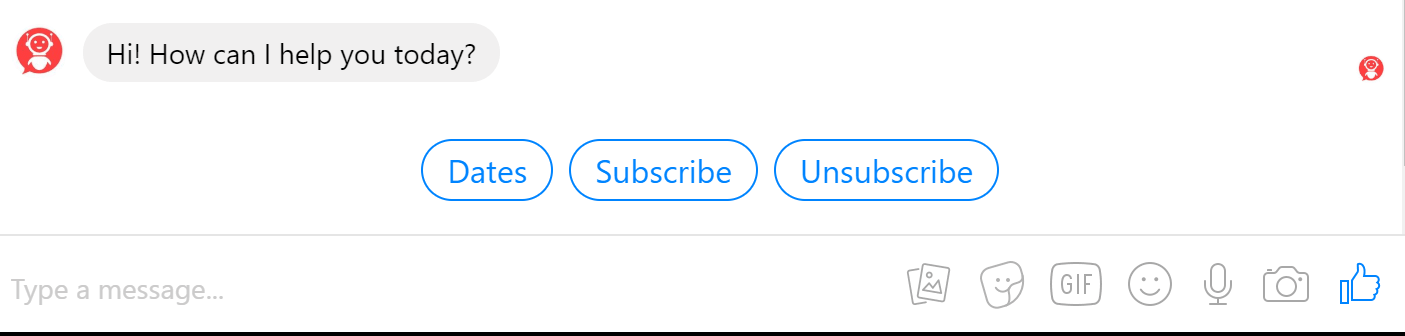
For example, to make use of quickRepliesTemplate, import the templates script and pass in the reply options referring the template documentation:
const _ = require('lodash');
const templates = require('./templates');

function quickReplyOptions(text) {
    let quickReplies = [];
    _.forEach(['Subscribe', 'Unsubscribe'], (option) => {
        quickReplies.push({ content_type: 'text', title: option, payload: option });
    });
    return templates.quickRepliesTemplate(text, quickReplies);
}

callSendAPI(sender_psid, quickReplyOptions("Hi! How can I help you today?"));
Deploy your webhook
Now that we have built our sample bot, we have to deploy it on a server with a valid SSL certificate so that it can accept requests over HTTPS.
HTTPS connection is a must have for integrating our bot with Messenger platform.
We have couple of options:
- If you need to integrate and test it from your local you can make use of ngrok.
- You can remix messenger quick start project on glitch which will provide a public URL served over HTTPS for your webhook.
- You can host the node.js application in your linux instance with Nginx as a proxy and configure SSL certificates with Let's Encrypt.
Once you have deployed your app and configured HTTPS connection, your webhook url will be https://<server-ip>/webhook (or) https://<domain>/webhook if you had mapped a domain to your server IP.
Proceed to next steps for integrating it with Messenger platform.
Set Up Your Facebook App
Follow below steps to set up your facebook app for use with the Messenger Platform and subscribe your webhook to receive events.
Facebook Page
A Facebook Page will be used as the identity of your bot. When people chat with your app, they will see the Page name and the Page profile picture.
Create a facebook page for your bot first.
For our bot, we are going to create a business page with category as Internet Company.
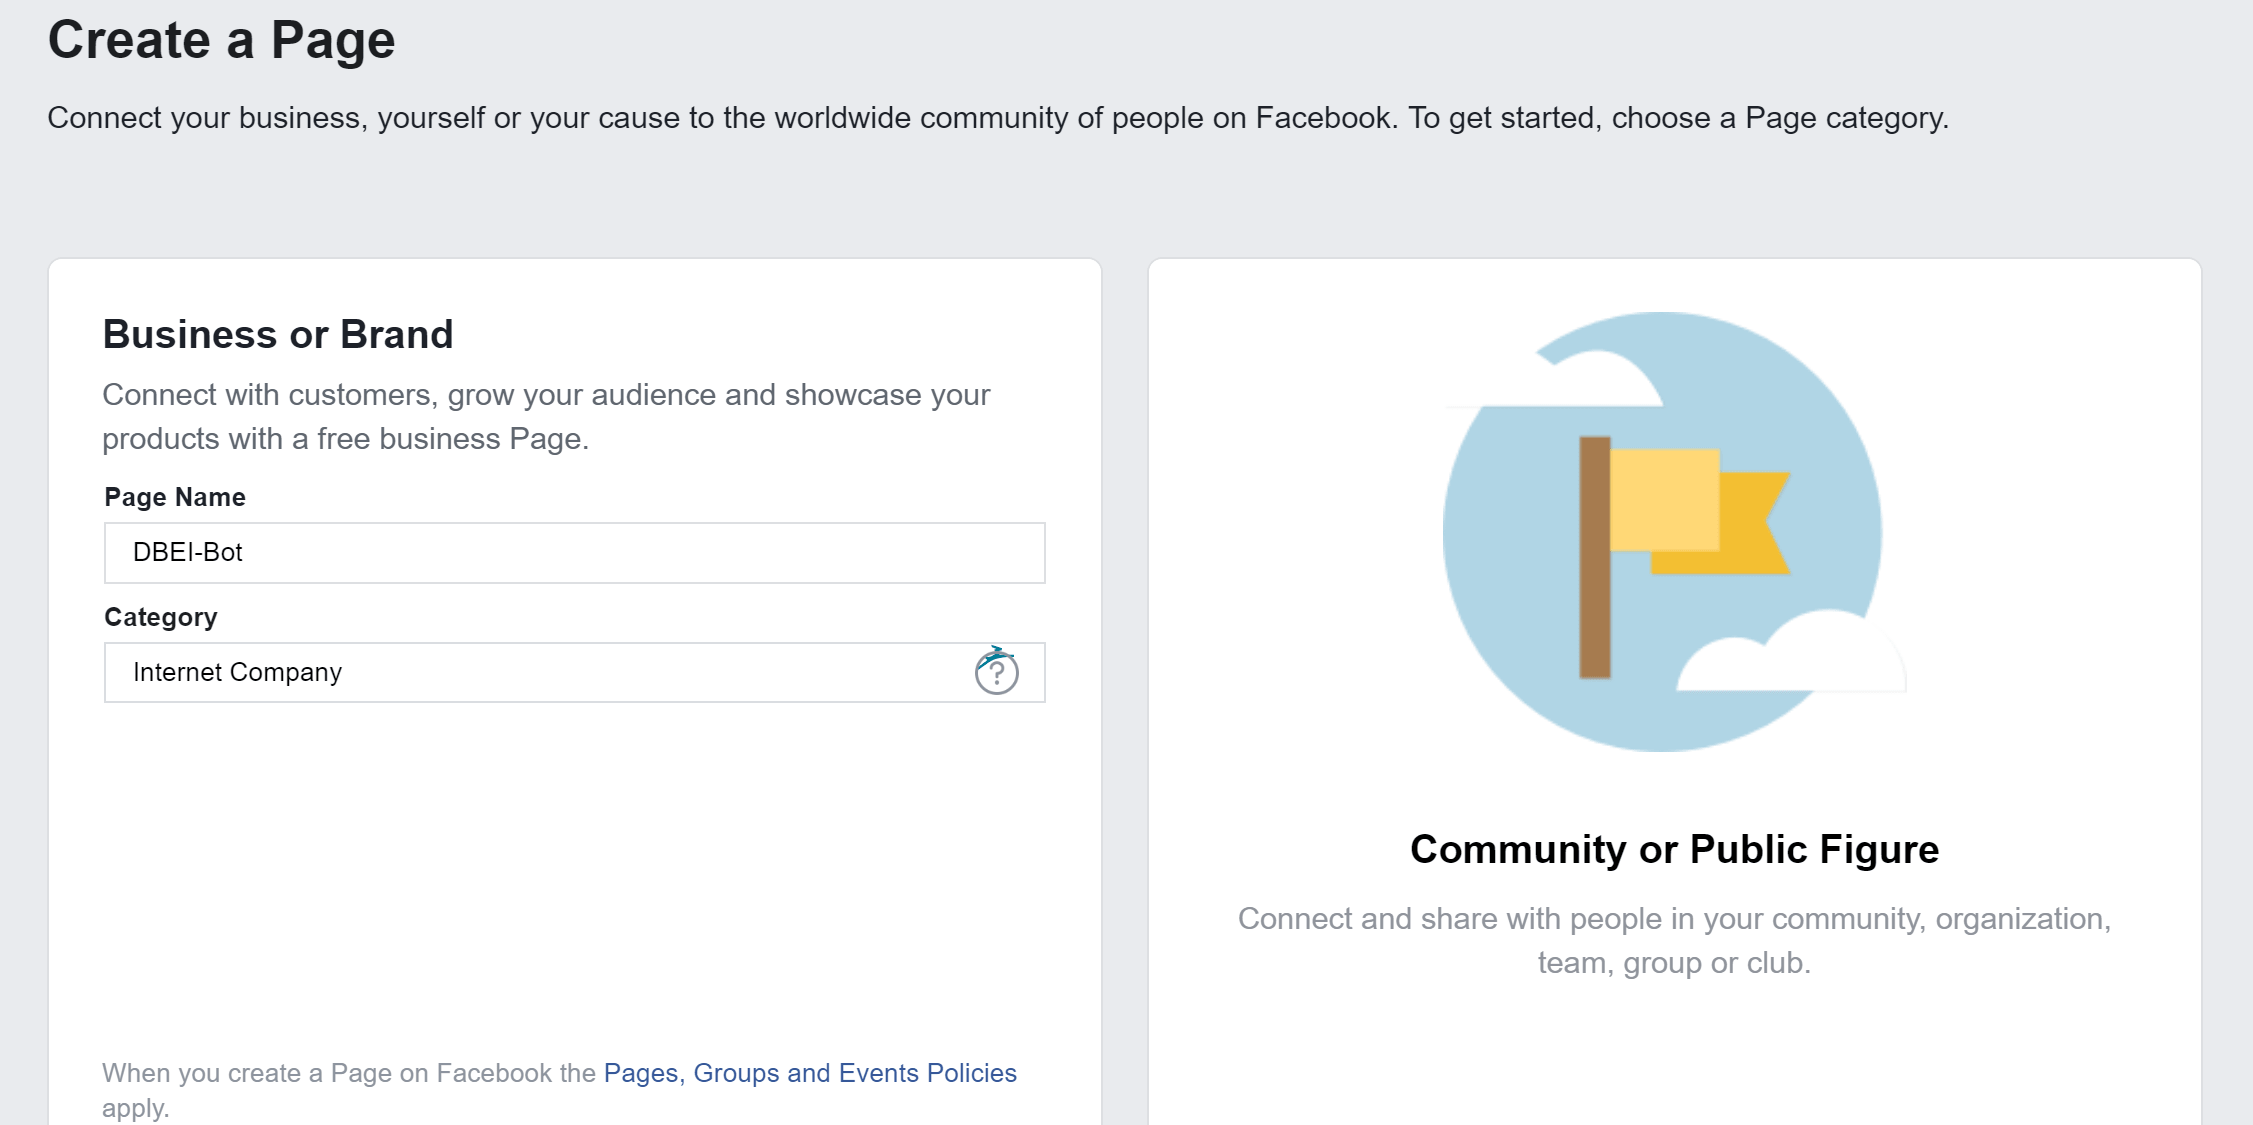
You can then choose a profile picture and cover page.
Additional page configurations:
-
Create Page UsernameCreate a custom url which people can use to search and visit your page. -
Visitor PostsYou can disable posts by other people on the page. -
Page InfoYou can provide a description and email address for contact. -
NotificationsTurn off notifications for messages so that you don't receive an alert for every message sent to the bot via messenger. -
Add a Button to Your PageYou can add a contact button so that people can send a message from your page.
Whitelist Domain & Subscription Messaging
We will be integrating your webhook URL with messenger platform soon. In order for your webhook to be invoked by messenger you need to whitelist your domain.
Add your domain in the Whitelisted Domains section under Messenger Platform settings.
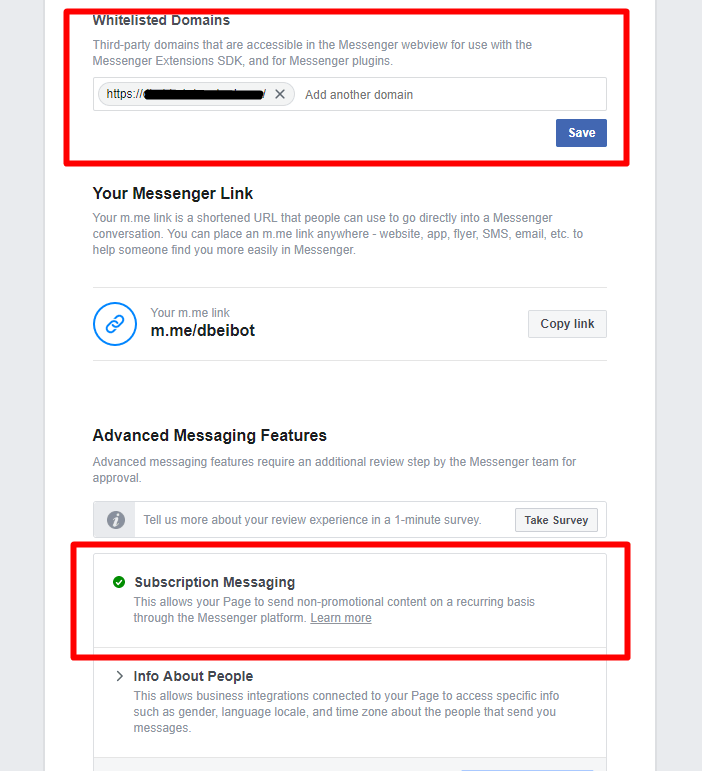
If your bot needs the ability to send regular content to a person on Messenger you need to raise Subscription Messaging permission at a page level.
You will able to send messages to the person outside Standard Messaging only after this permission is reviewed and approved.
https://developers.facebook.com/docs/messenger-platform/policy/policy-overview/
Facebook Developer Account
You need a developer account to create new apps which serve as an integration between your page and bot.
Create a developer account through Facebook for Developers platform.
Facebook App
Facebook app contains the settings for your Messenger bot, including access tokens.
Create a new app using the app dashboard.
Your new app will be created in Development Mode.
Under Development Mode only users who have been granted Administrator, Developer, or Tester role in the app will be able to interact with the bot once we complete the integration with messenger.
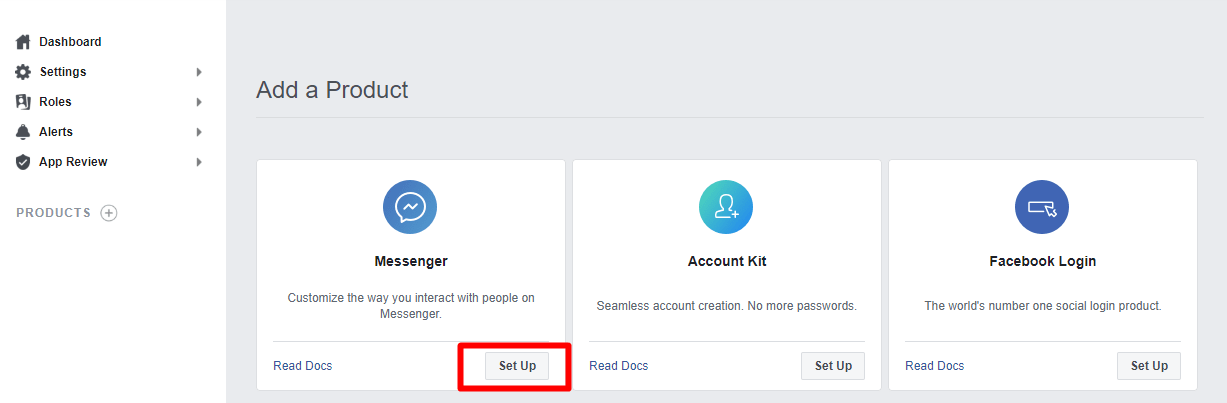
Add Messenger Platform to your App
- In the sidebar of your app settings under 'PRODUCTS', click '+ Add Product'.
- Hover over 'Messenger' to display options.
- Click the 'Set Up' button.
Setup Webhook
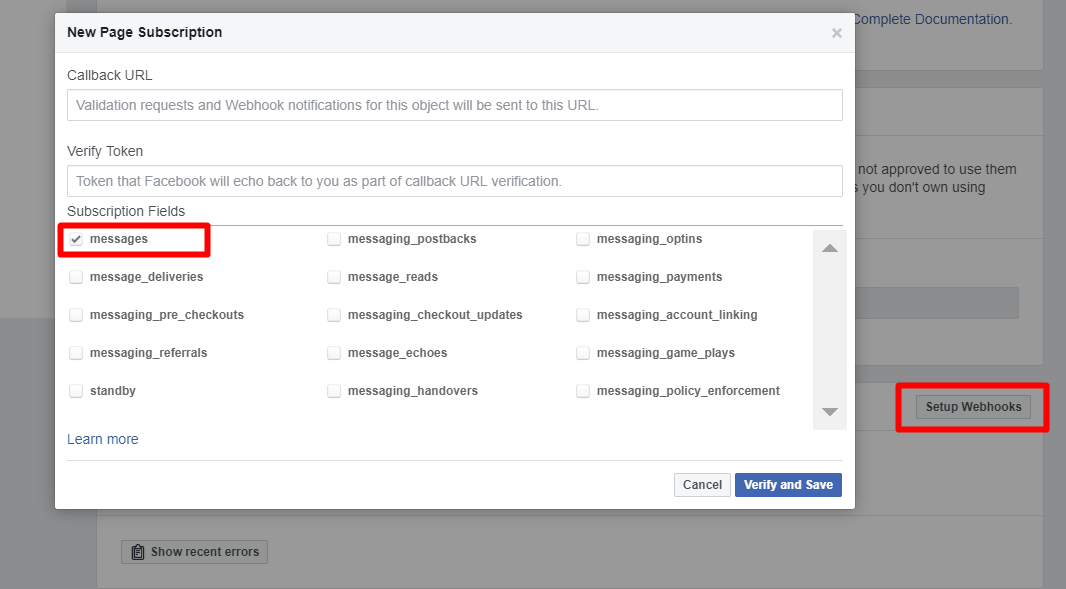
In the 'Webhooks' section of the Messenger settings console, click the 'Setup Webhooks' button.
Configure the Callback URL and Verify Token.
Here, the Callback URL will be https://<server-ip-or-domain>/webhook and Verify Token will the value which you had given in the .env file previously.
The Messenger Platform will send a GET request to your webhook with the verify token you provided. If your webhook is valid and properly set up to respond to the verification request, your webhook settings will be saved.
Also, in the subscription field choose messages and save the webhook config.
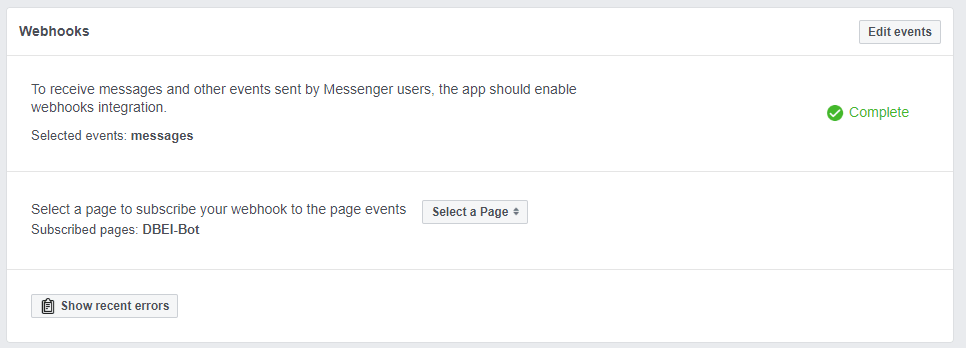
Subscribe your Facebook Page
In the 'Webhook' section of the Messenger settings console, click the 'Select a Page' dropdown and select the facebook page which you had created earlier.
This will subscribe your app to receive events when people on Messenger chat with your page and forward them to your webhook.
Generate Page Access Token
In the 'Token Generation' section of the Messenger settings console, click the 'Select a Page' dropdown and select the Facebook Page that you had created before.
Copy the token that appears in the 'Page Access Token' field.
Add this token to property PAGE_ACCESS_TOKEN which we had defined in the
.envfile.
The generated token will NOT be saved in this UI. Each time you select a Page from the dropdown, a new token will be generated. If a new token is generated, previously created tokens will continue to function.
Test App Subscription
Send a message to your Page from facebook.com or in Messenger. If your webhook receives a webhook event then everything has been wired up properly.
Publishing your App
While in Development mode, apps are automatically approved for all login permissions, features, and product-specific features.
Once you switch your app to Live Mode, however, your app can only use permissions and features that it has been approved for.
Messenger platform requires below review and approval steps:
- Permissions and Features Review
- Business Information and Verification Documents
- Accept Supplemental Terms and Sign Tech Provider Agreement
Permissions and Features Review
Once you are ready to publish your bot, ensure your app is in Development Mode.
Provide basic information on the app console under Settings > Basic:
- App Icon
- Privacy Policy URL
- Category
- Business Use
You can generate a privacy policy using this bot.
Select app permissions
Request the pages_messaging permissions under App review section in messenger settings, which allows your bot to send messages in live mode.
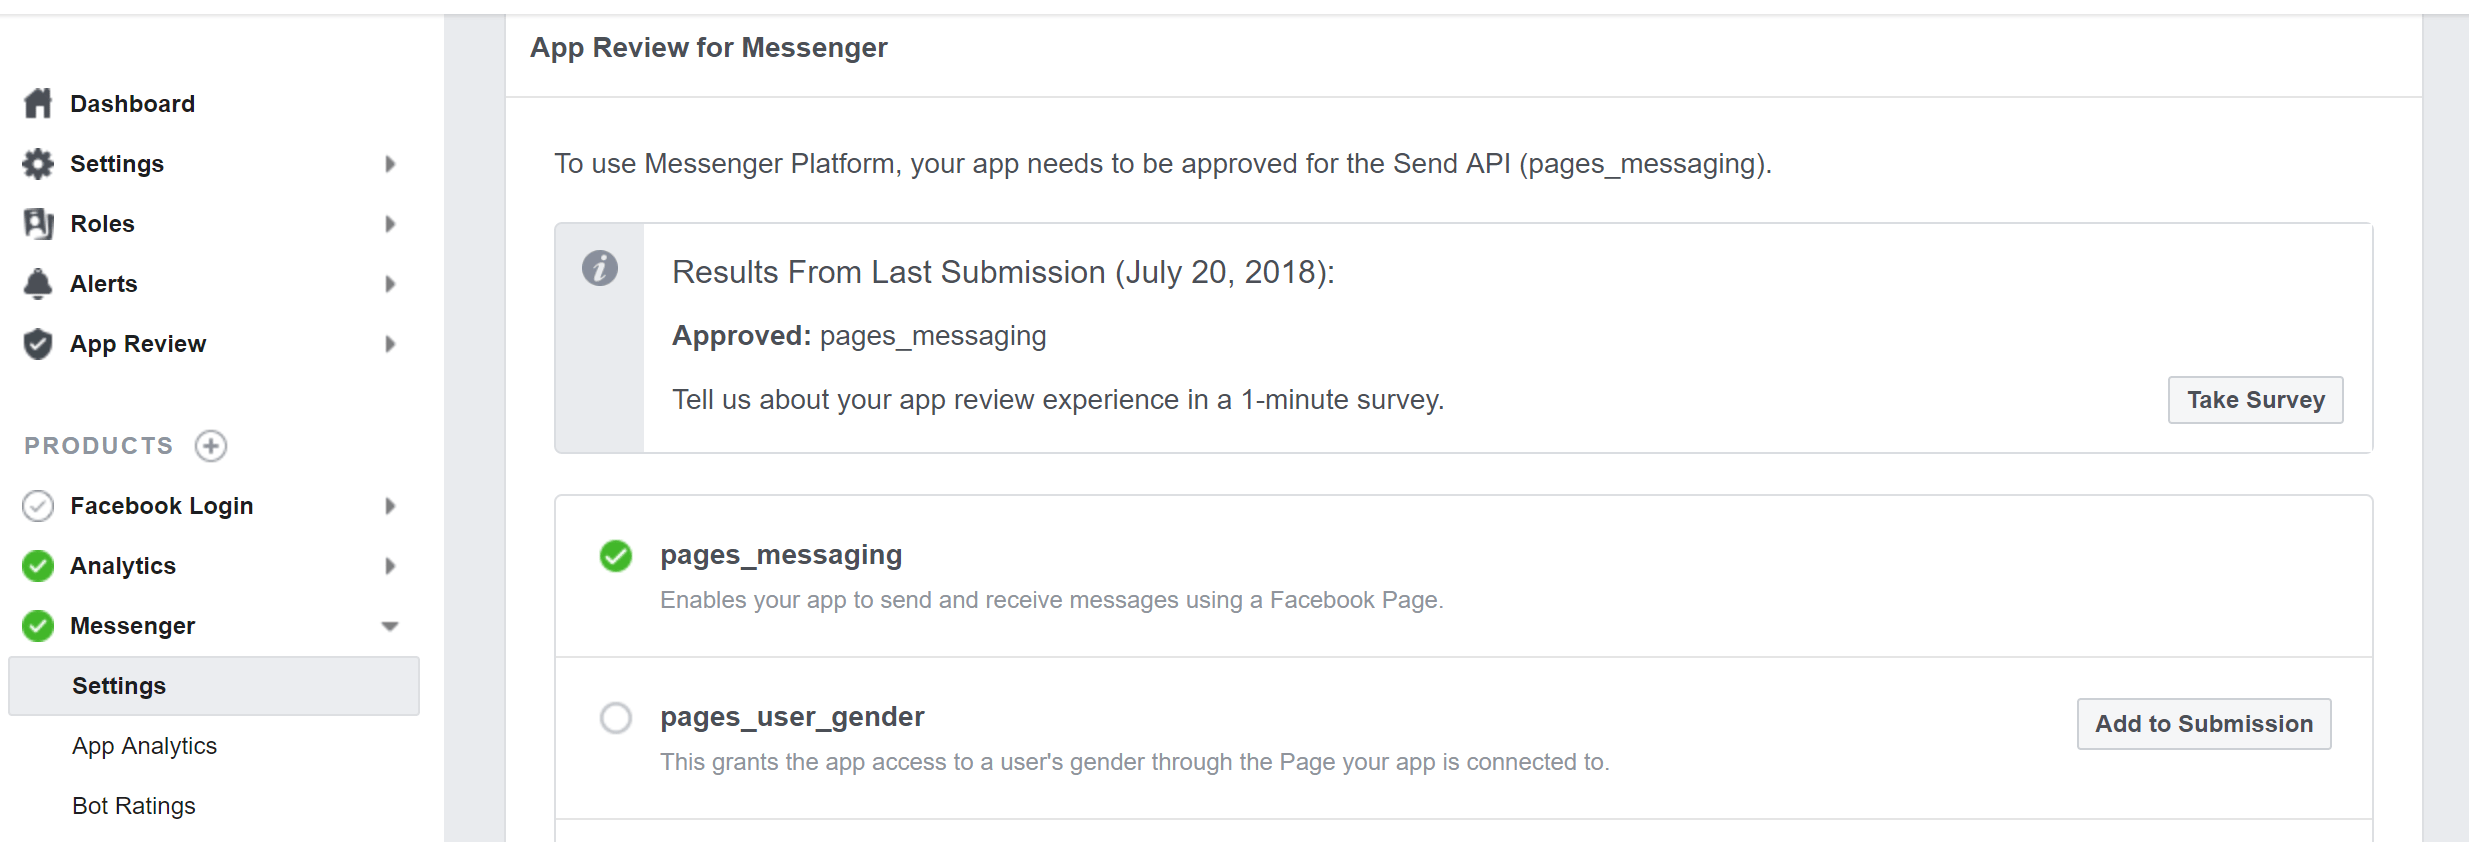
Submit your bot for review once you have chosen all the required permissions.
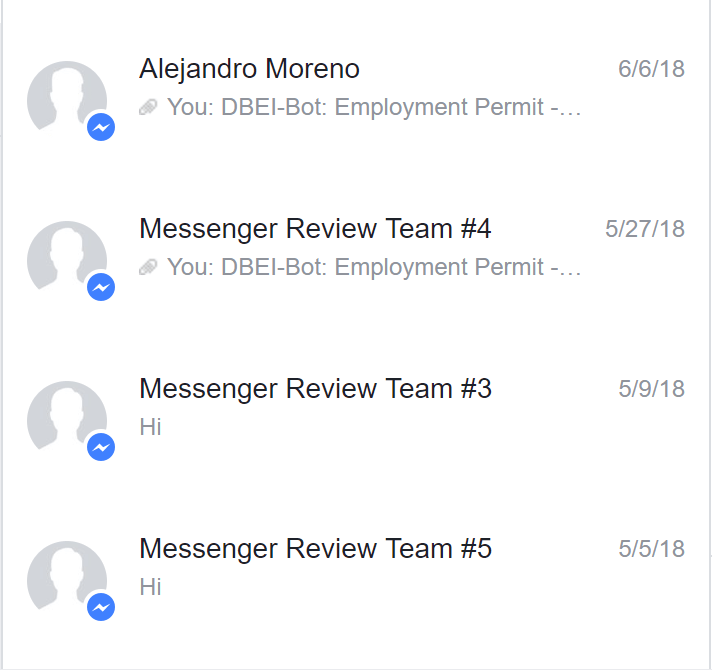
Your bot will then be reviewed by messenger test users who will post the command which you had mentioned while submitting your app for review. Your bot is expected to respond to their messages within 20 seconds.
If no response is returned within the stipulated time then your app submission will be sent back.
Gotchas:
- I had sent a message to my page and received a response back from my bot. However, when the test users had sent a message they aren't getting any response.
This could be a platform bug as I had faced the same issue. When the test user had sent their first message the webhook wasn't called however when the same user sent the message the subsequent time everything worked fine. I had raised a bug report and it was fixed by messenger team.
Business Information and Verification Documents
If you use the messenger API then your business needs to be verified.
You need to create a Business manager account and link it to your app.
Once your bot has been reviewed for responsiveness, functionality, and policy compliance, you will receive a message asking you to complete business verification in the 'Alerts' tab of the app console.
You then need to provide the proofs for verification. If you are not an actual business, you can submit your home utility bill (must match your name in business manager account) as proof.
Business verification is required once per Business Manager account.
Accept Supplemental Terms and Sign Tech Provider Agreement
After your business information and verification documents are submitted, you will receive an email from the Facebook legal team asking you to digitally sign the supplemental terms and apply for review.
Once all the review is completed, your bot will be approved. You can then make it live and anyone will be able to message and get the response back from your page.
References:
https://developers.facebook.com/docs/messenger-platform/getting-started/webhook-setup
https://developers.facebook.com/docs/messenger-platform/getting-started/quick-start
https://developers.facebook.com/docs/messenger-platform/getting-started/app-setup
https://developers.facebook.com/docs/messenger-platform/policy/policy-overview/
https://developers.facebook.com/docs/apps/review/
https://developers.facebook.com/docs/messenger-platform/app-review/

Top comments (0)