Welcome back to Tutorial Tuesday!
This week we'll cover Code Engine's Auto-Scale feature! With IBM Cloud™ Code Engine, you don't need to think about scaling, because the number of running instances of an application is automatically scaled up, or down (to zero), based on incoming workloads. With automatic scaling, you don't pay for resources that are not used.
Code Engine monitors the number of requests in the system and scales the application instances up and down in order to meet the load of incoming requests, including any HTTP connections to your application.
These HTTP connections can be requests that come from outside of your project, from other workloads that are running in your project, or from event producers that you might be subscribed to, regardless of where those producers are located.
Code Engine automatically replicates application instances and configures the network infrastructure to load balance the requests across all instances.
To observe application scaling from the Code Engine console, navigate to your specific application page. While the application is running, the number of running instances is 1 or greater based on the maximum number of instances that you specified. When the application is finished running, the number of running instances scales down to the minimum number of instances setting, even zero!
Steps
- Sign Up for a Pay-As-You-Go IBM Cloud Account
- Create a Code Engine App from a Container Image
- Add the App URL to the Load Generator Tool
- Observe the App Auto-Scale from the Code Engine Console!
Let's Build Something!
2. Create a Code Engine App from a Container Image
- use the sample HMO app container image
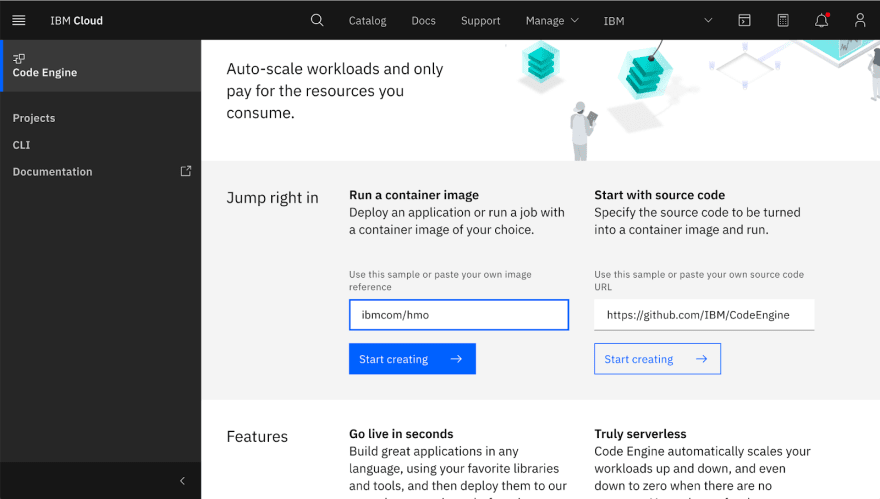
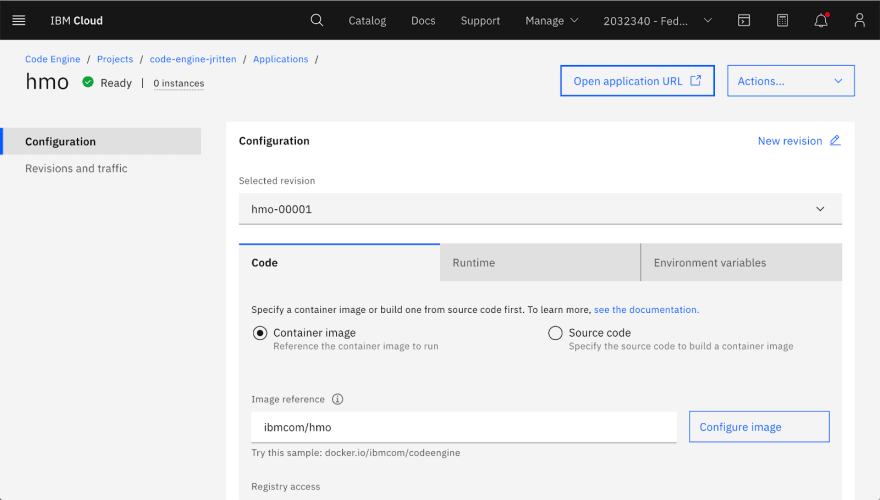
Type “ibmcom/hmo” in the "Run a container image" entry field.
Click the Start creating button.
- create a new application
By default Code Engine generates a random name, but let's call it something more meaningful, like "hmo".
- create a new project
Let's keep the default "Dallas" but give it a name of "code-engine-hmo".
We'll leave the rest of the options untouched and just hit Create.
- view the app status
With just one piece of data, the container image name, we've started the process of deploying our application.
- view the deployed app
Open the application URL in a new tab.
Click “Open application URL”.
3. Add the App URL to the Load Generator Tool
One of the features that Code Engine gives you is auto-scaling, so let's see that in action by going to a "load generator" tool we have.
Load Generator Tool : https://load.fun.cloud.ibm.com/
NOTE:This tool is just for demos, it is not part of Code Engine.
It's going to generate a load against our application to show what happens when we get a lot of traffic hitting it.
- paste the app's URL into the entry field and hit Generate Load
This tool will generate a continual load from 1200 clients for 30 seconds, and each time it hits the app it'll cause the creation of a new Customer.
- go back to the app's page
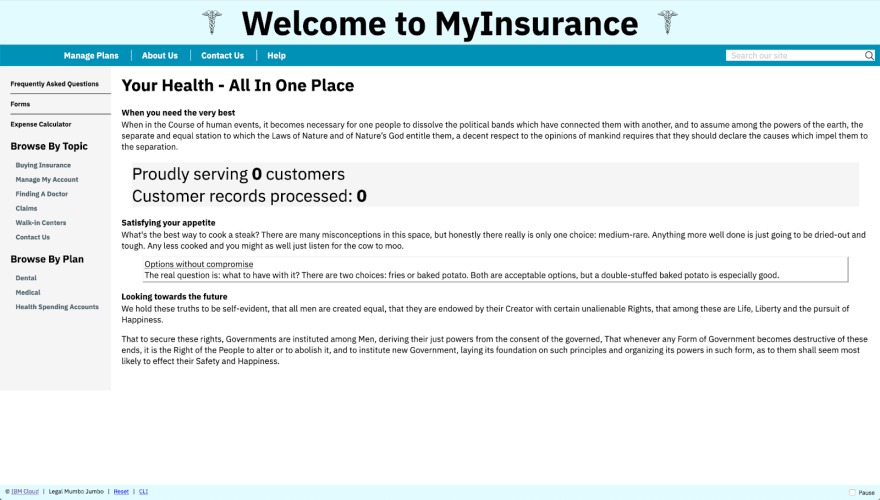
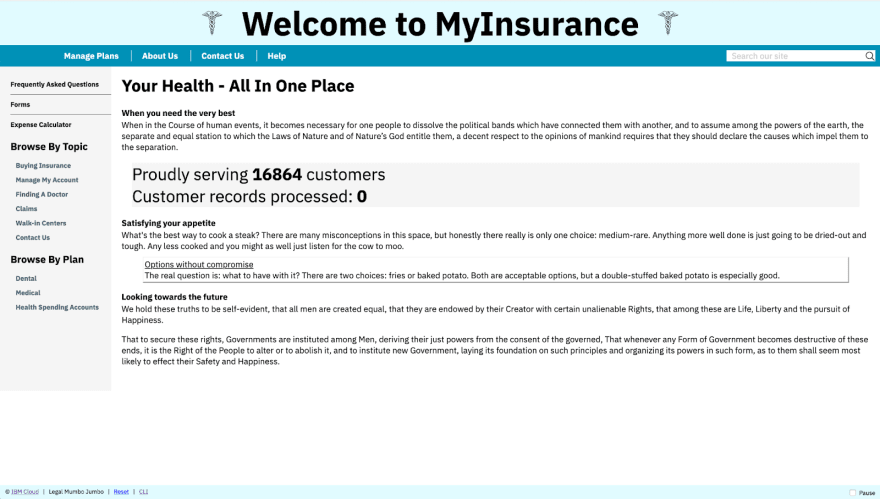
You'll see the # of “Proudly served” Customers increasing rapidly.
Wait for the # of Customers to stop changing.
- hit the "Pause" checkbox in the bottom right corner to stop the browser from trying to update
Without doing this, we'll ping the server every second and that'll force the app to never scale down completely because it's always busy.
4. Observe the App Auto-Scale from the Code Engine Console!
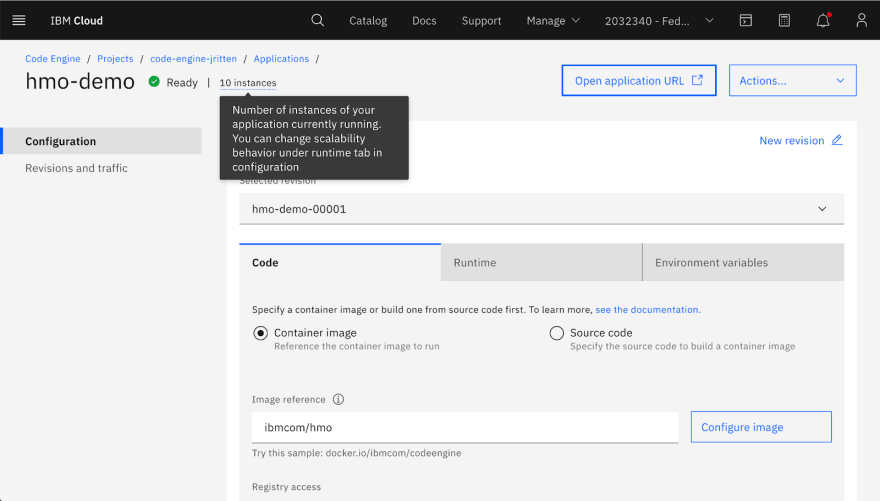
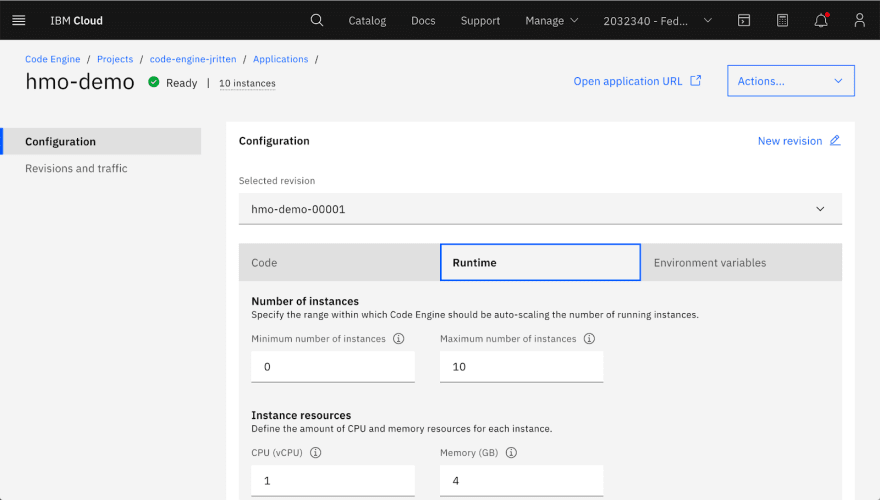
Notice that the # of instances is up to "10" now.
Why just 10? We have 1200 clients, shouldn't it be 1200 instances?
Well, let's look at the Runtime tab...
Go to the Runtime tab, and focus on the "Concurrency" field.
Notice we allow "100 concurrent requests."
This means that each instance of our app can handle 100 requests at a time.
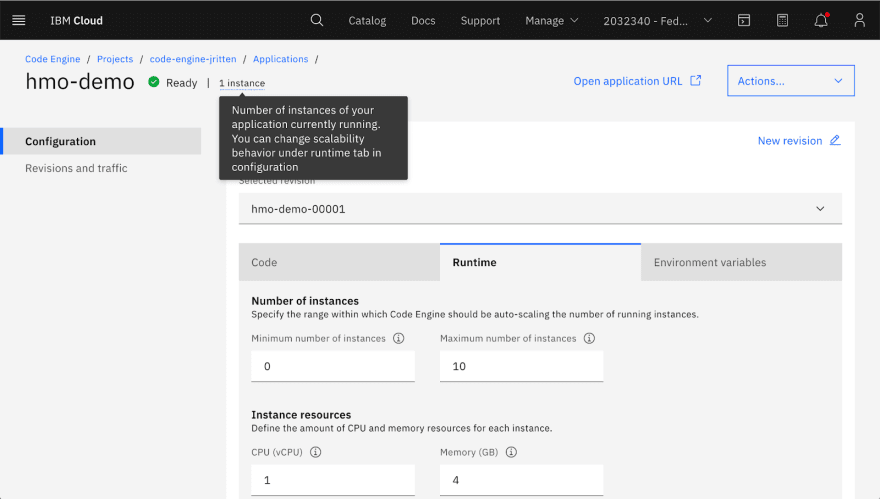
Look at the "Maximum number of instances" field.
By default it has 10 in there. This is why it stopped scaling at 10. Without this value it would have scaled higher. So, you can control your costs and avoid run-away scaling if needed.
Focus on the "Minimum number of instances" field.
Notice the "Min number" defaults to zero, so you can also control the lower bound of instances, too.
If you want one instance to always be up and ready for incoming requests, meaning you don't want any "cold start" delay then set this to "1".
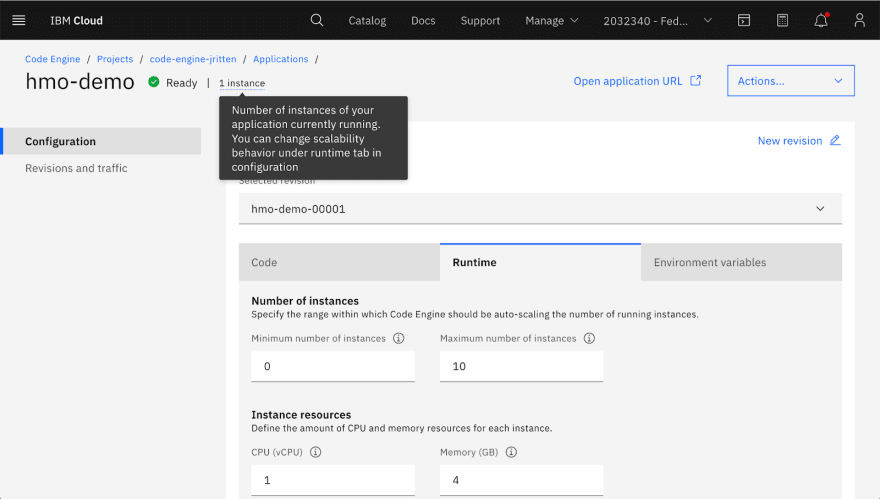
Focus on the top left corner - the # of instances running.
Notice that will all of our talking the number of instances has gone down... to zero!
No load == scale down - down to the "Min number"
You get automatic scaling of your app w/o doing anything!
Now, before we continue, let's go back to our app for second...
- go back to the App's page
Uncheck the "Pause" checkbox.
We'll unpause the app so that it'll update the # of Customers and "Records processed" automatically for us.
- go back to the console
When the UI decides to auto-refresh you'll see that the # of instances will go back to 1.
If the minimum number of instances is set to 0, the application scales to zero and the number of instances for the app reflects 0 instances. If the application is scaled to zero and a request is routed to the application, Code Engine scales the application up from zero and routes the request to the newly created application instance.
TUNE IN NEXT WEEK FOR SOME MORE CARAAAZY CONTENT!
Connect w Me!
https://linktr.ee/jritten










Top comments (0)