Hi,
This is a quick tutorial how to install and use TFS in Atelier. It is based on my self experience and some tricks that I 've noted.
If you are used to using visual studio maybe you feel that is a bit slow and heavy, but you have the same TFS panel as you have in Visual Studio, so don't need any special "training" to use it :)
It's important don't store the file .buildpath because it has the server definition that you are working in a team, each one have the personal configuration, so the name of the server could be different.
To prevent it, create a file called .tfignore with this content
# Add the files to ignore in TFS and folders
.buildpath
It's important to differenciate the workspace of TFS and the workspace of Atelier, it could be different. The first one is where the files will be stored in your computer from TFS, and the second one is where you store your Ensemble projects, only the definition.
I hope this tutorial could be helpful for anyone. If so, leave your comment and rate this article.
Now, I going to explain how to install and use TFS pluging
To install TFS plugin
- Open Atelier
- Select Help - Install new Software
- In this window "Available Software", press "Add" in "Work with"
- Add the new repository, Add a name and location "http://dl.microsoft.com/eclipse/tfs", then press Ok
- select the repository and press "Ok"
- Accept licenses to use and press "Finish"
- Close Atelier to apply the changes
To use TFS in Atelier
- Select Team Foundation Server Exploring perspective
- Select you TFS Server (a plug icon)
- And select your project
Import a project from TFS
- From Workspace. select "Import" option and select "Projects From Team Foundation Server"
- Select your project to import
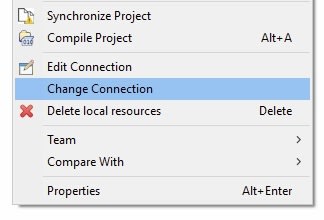
- The first time (if you haven't stored the .buildpath file in TFS), it asks you about the Ensemble server that you are using (change connection)
- Then syncronize your project with server


Top comments (0)