You can create a static website or portfolio, that looks like a terminal. But it’s much better if someone that visits the web page, can actually type some commands and get the output like in a real styled terminal. You can call it Fake Terminal because it will not give you what a real shell-like SSH gives you (unless you decide that you want that and explicitly code it). You will need to write each command yourself, but it’s fun and not that hard. You can even create an interactive game where users will input their commands and interact with the game like in a real terminal but from their browser.
Those real terminals, that I’ve mentioned, are usually used on GNU/Linux systems or Mac OSX but also Windows users can use PowerShell, cmd.exec, or on Windows 10 WSL console (Windows Subsystem for Linux) which is just Linux on Windows. It’s the most used tool for any system administrator or more advanced user and in the article, I will show you how to embed a JavaScript terminal into a website.
Creating such a styled console website or fake terminal website is easier if you have a library that will give you the look and feel of the real terminal emulator, with a nice API to create commands, so you don’t need to create it from scratch. We will use the JavaScript Terminal library: jQuery Terminal, which gives a simple, but powerful API to create interactive terminals on any website. The library doesn’t use any HTML5 features and uses ES5 so it will work on any Browser even in IE11.
This article will show you, how to create a simple web-based, interactive HTML terminal on any site.
Creating your first web-based terminal
First, you need to create a basic HTML page where you’ll include all dependencies:
<!DOCTYPE html>
<html>
<head>
<script src="https://code.jquery.com/jquery-3.3.1.min.js"> </script>
<script src="https://unpkg.com/jquery.terminal/js/jquery.terminal.min.js"></script>
<link rel="stylesheet" href="https://unpkg.com/jquery.terminal/css/jquery.terminal.min.css"/>
</head>
<body>
</body>
</html>
Then in the body tag, you can create your first terminal with the first command:
<script>
$('body').terminal({
    hello: function(what) {
        this.echo('Hello, ' + what +
                  '. Wellcome to this terminal.');
    }
}, {
    greetings: 'My First Web Terminal'
});
</script>
And this is a basic HTML template that you can use for a web-based terminal-like input.
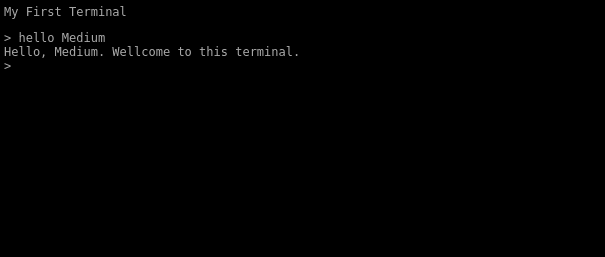
The output, if you type “hello Medium”, looks like this:
Simple Interactive Terminal Website
See Live Demo.
Sorry, but terminal said that you use invalid selector!
If you will get an error that the body is not a valid selector from the library. It means that you need to put your script inside the <body> tag. This is because the browser parses HTML while it read it and if your script is inside <head> tag your body is not defined yet.
<!-- rest of the HTML: from first code example -->
<body>
<script>
$('body').terminal({
    hello: function(what) {
        this.echo('Hello, ' + what +
                  '. Wellcome to this terminal.');
    }
}, {
    greetings: 'My First Web Terminal'
});
</script>
</body>
</html>
or you can use jQuery ready event, that runs your code when DOM (Document object model) is ready (your HTML is fully loaded).
<script>
$(function() {
    $('body').terminal({
        hello: function(what) {
            this.echo('Hello, ' + what +
                      '. Wellcome to this terminal.');
        }
    }, {
        greetings: 'My First Web Terminal'
    });
});
</script>
Displaying images on the Terminal
Another example of commands you can add to your terminal-themed website is to display an image. The following code will add the command “cat”, which will display an image of a kitten.
$('body').terminal({
    cat: function() {
        this.echo($('<img src="https://placekitten.com/408/287">'));
    }
});
You can also add arguments to the commands. You can add two arguments that will make the specific size of the image (that will, in turn, create a different image, this is how placekitten.com works).
$('body').terminal({
    cat: function(width, height) {
        const img = $('<img src="https://placekitten.com/' +
                      width + '/' + height + '">');
        this.echo(img);
    }
});
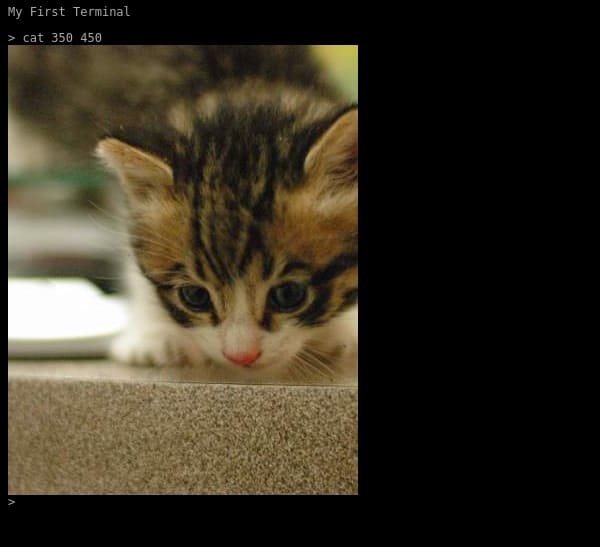
This will give you this output if you type the command “cat” with a specific size:
The terminal that shows the image of a cat
See Live Demo.
Note: make notice that there is jQuery $() call wrapper, you can’t echo just HTML text but you can echo jQuery object. This limitation is because of security reasons. You can also use, as a second argument to echo, the options object with {raw: true}.
JavaScript Terminal with asynchronous commands
Some commands are asynchronous and take a while to calculate. Loading of the image is not instant, especially on slow networks. So you can pause the terminal while the command is processing async requests.
$('body').terminal({
    cat: function(width, height) {
        const img = $('<img src="https://placekitten.com/' +
                      width + '/' + height + '">');
        img.on('load', this.resume);
        this.pause();
        this.echo(img);
    }
}, {
    greetings: 'My First JavaScript Terminal\\n'
});
Another option is to return a promise from the function:
function get_image(url) {
    return new Promise(function(resolve, reject) {
        const img = $('<img src="' + url + '"/>');
        img.on('load', () => resolve(img));
        img.on('error', reject);
    });
}

$('body').terminal({
    cat: function(width, height) {
        return get_image('https://placekitten.com/' + width +
                         '/' + height);
    },
    dog: function(width, height) {
        return get_image('https://placedog.net/' + width +
                         '/' + height);
    }
}, {
    greetings: 'My First JavaScript Terminal\n'
});
And you don’t need to echo anything, the terminal will handle the promise.
NOTE: From version 2.34.0 the images pause the terminal by default so you no longer need that get_image function. I’ve kept it just as a reference for using promises.
See Live Demo.
Because of this feature, you can use fetch and get an output of the AJAX call:
$('body').terminal({
    cat: function(width, height) {
        return $('<img src="https://placekitten.com/' +
                 width + '/' + height + '">');
    },
    title: function() {
        return fetch('https://terminal.jcubic.pl')
            .then(r => r.text())
            .then(html => html.match(/<title>([^>]+)<\/title>/)[1]);
    }
}, {
    greetings: 'My First JavaScript Terminal\n'
});
This command will display the library’s home page title. As you can see cat command is also changed it doesn’t echo the image only return it from the function. Returning value from a function works the same as an echo.
See Live Demo.
You can create your own Backend service in any language you want (e.g. Python with Django/Flask, Ruby and Ruby on Rails, PHP with any framework like Laravel, Symfony, CodeIgniter, or C# and dot Net or ASP.Net).
Terminal with backend using JSON-RPC service
With jQuery Terminal, you can also create a backend quickly if you create a JSON-RPC service. Here is the list (not complete) of JSON-RPC implementations.
If you have a backend created, all you have to do is to add a URL to the backend service.
$('body').terminal("service.py", {
    greetings: 'My First JavaScript Terminal\\n'
});
NOTE: if you want nice-looking ASCII Art as your welcome message you can use the figlet.js library to see this CodePen demo. If you generate ASCII art in different ways, like using a figlet Linux command, or if you will get some other ASCII art, note that to use it in a JavaScript file you will need to escape quotes and backslashes.
Parsing commands like on Unix terminal
If you want to have the same commands as in GNU/Linux or MacOSX terminal emulator, where you can add optional arguments and options, you can use a function that will parse options and return a nice object. The following code will show you how to do that.
$('body').terminal({
    title: function(...args) {
        const options = $.terminal.parse_options(args);
        return fetch(options.url || 'https://terminal.jcubic.pl')
            .then(r => r.text())
            .then(html => html.match(/<title>([^>]+)<\/title>/)[1]);
    }
}, {
    checkArity: false,
    greetings: 'My First JavaScript Terminal\n'
});
checkArity option is important. Without this option terminal will throw an error when the function has any number of arguments larger than zero (this is how ES6 variable arguments works, tree dots, terminal think that the function accepts 0 arguments).
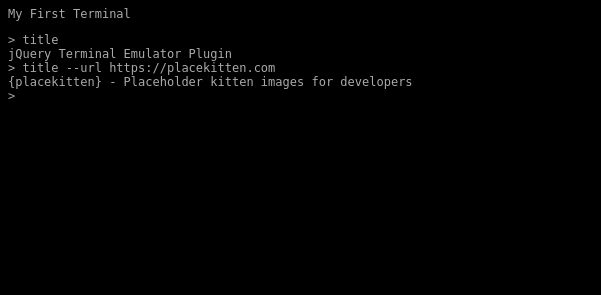
The output of this command looks like this:
An interactive Terminal session with a few commands using jQuery Terminal.
See Live Demo.
Of course, you don’t need to parse options if you have just one optional argument. In this case, you can just use one argument URL:
$('body').terminal({
    title: function(url) {
        return fetch(url || 'https://terminal.jcubic.pl')
            .then(r => r.text())
            .then(html => html.match(/<title>([^>]+)<\/title>/)[1]);
    }
}, {
    checkArity: false,
    greetings: 'My First JavaScript Terminal\n'
});
But parsing options are useful if you need more complex commands. You can use long options in GNU style like in the previous example but also short options like -u will be accessible in options.u variable. You can read more about parsing commands and options on this wiki page. Adding options make commands work more like real command-line applications, so it becomes less and less like a fake terminal.
One more feature that you want to add is tab completion. If you set up the terminal like this (there are other options that you can find in the documentation) all you need is one option:
$('body').terminal({
    title: function(...args) {
        const options = $.terminal.parse_options(args);
        return fetch(options.url || 'https://terminal.jcubic.pl')
            .then(r => r.text())
            .then(html => html.match(/<title>([^>]+)<\/title>/)[1]);
    }
}, {
    checkArity: false,
    completion: true,
    greetings: 'My First JavaScript Terminal\n'
});
Now when you type “t” and press the tab key on your keyboard it will complete the command “title” so you don’t need to type the whole command by hand.
You probably also want some “help” command that will list available commands.
See Live Demo.
Making font bigger
By default the font of the terminal is 14 pixels, you can make it larger with a bit of CSS.
<style>
:root {
   --size: 1.4;
}
</style>
:root means the whole document, and size is a CSS custom property also called CSS variable. jQuery Terminal allows you to also change some other things like color, background, cursor animation, or add a glow effect. More about Styling (including how to make font size better fit different screen sizes) on a Wiki.
What next when creating your own Terminal-like website
And this is it. With this as a base, you should be able to write a simple HTML Terminal of your own. Features of jQuery Terminal library not discussed in this article include:
- Formatting and Syntax Highlighting.
- Changing and making dynamic prompts.
- Masking passwords.
- Authentication.
- Combining commands with Pipe operator like in Unix terminal. See Demo.
- Keyboard shortcuts (list of build-in you can find here).
- Reading text from users.
- Handling Emoji (if the system doesn’t do that out of the box like Windows10), see Demo.
- ASCII forms elements.
- Animations and Typing Animations.
- Executing commands from JavaScript.
- Invoking commands and terminal methods from Server.
- Updating lines.
- Saving state in URL hash and executing saved commands. See command record start on library 404 Error page.
You can also take a look at the big list of creative examples and websites or single web pages that use the library in the Examples Page. That includes for example animations or a 404 page (mentioned above) that gives commands that you can explore (like Wikipedia articles or Jargon File: also known as Hacker Dictionary, when in printed form, or as hackers would say dead tree version). 404 error page also has a chat and some text-based games.
To see more information, that was not covered in this article, check the Getting Started Guide and more advanced stuff in Advanced Tutorial.
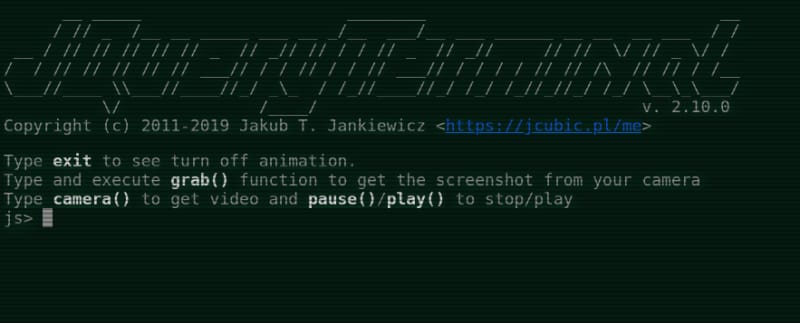
And at the end, I want to show you a demo, that gives you a vintage-looking console, like the old CRT displays from the beginning of computers. You can use it as a base for a retro terminal website.
You can find the code in this CodPen Demo. You can also create the terminal in the window, it doesn’t need to be full screen.
Gaiman Programming language
When I was working on one paid git I’ve come up with a kind of engine that was driven by a JSON file. It was a kind of interactive game or very poor text adventure game. I’ve asked the person for whom I created this project if I can publish the game so others can use it. It was very cool. Later I came up with something even better. My own programming language that compiles into JavaScript. The project is in Beta version and I still need to work on the playground and documentation. You can check it out. Here is Gaiman’s GitHub repo. If you want to create a complex project with user interaction, it may be easier to do this with Gaiman, since it simplifies things. The same code in JavaScript will be much more complex.
Paid Support
jQuery Terminal is Open Source, but I also give paid support if you have problems creating a Terminal website yourself. If you have a problem with the code you will pay only if the fix takes more than 15min of my time. The reason for paid support is to write the whole code for you, which may take more than an hour.
How you can help?
If you read this far, you can help this Open Source project by filling out this very short survey.
Conclusion
If you want to create a terminal emulator for any website that can be accessed in a web browser. jQuery Terminal Emulator is a great JavaScript library for this purpose. It gives your website a design that looks like a real terminal. You can even customize the colors of the output website with a little bit of CSS. The API is simple if you want just basic things, but it’s pretty big and allows for a great amount of flexibility. You should not worry that it uses jQuery as a base library. The reason why it was created with jQuery is that it’s a pretty old project (but it’s still actively maintained). Because of using jQuery, this web terminal library can be much shorter than if it would be written in Vanilla JavaScript.
Using jQuery Terminal you can easily create nice looking website that will look like a terminal, an example can be a resume, portfolio, or an interactive game that will give terminal-like input on a website. You can create a pretty advanced terminal application in JavaScript, just look at examples that will give you a lot of ideas for your next super cool-looking terminal-like application.
If you like this you can follow me on Twitter: @jcubic and check my home page.


Top comments (0)