Infragistics Reveal is a data visualization solution that simplifies the way you add embedded analytics and visualizations to your apps. Reveal supports connecting to OData APIs, but many enterprise APIs are not built using the OData standard. By combining Reveal with CData solutions, you can instantly build dynamic dashboards from live enterprise data sources like Salesforce.
With access to live data, you can build real-time, responsive dashboards that retrieve new data points with every refresh. CData Connect Cloud and API Server let you generate standard data APIs like OData for all your data, offering out-of-the-box connectivity to tools like Reveal.
In this article, we walk through how to connect to Salesforce to Infragistics Reveal to create a simple dashboard, leveraging CData Connect Cloud and CData API server to facilitate the connection.
Why CData?
Both CData Connect Cloud and CData API Server provide a single point of contact for all your enterprise data through standard data interfaces like SQL and OData. Instead of migrating data from dozens of sources to a static data store or writing your own integrations, simply point your tools to Connect Cloud or API Server and get instant, live access to all your data.
Why Connect Cloud?
As a cloud-based integration platform, Connect Cloud is ideal for working with cloud apps that have embedded Reveal visualizations. With no servers to configure or data proxies to set up, you can simply use the Web-based UI to create a virtual database for Salesforce, generate an OData API, and connect from Reveal to start building dashboards based on live Salesforce data.
Why CData API Server?
CData API Server can be installed on-prem or in a self-hosted environment enabling you to connect to data from on-prem or self-hosted apps built on Reveal dashboards. Create an OData endpoint for Salesforce using the straightforward point-and-click interface and connect from Reveal to create dynamic Salesforce visualizations.
Getting Started: Salesforce Connection Properties
To work with live Salesforce data in Reveal, you need to authenticate with Salesforce. There are several authentication methods available for connecting to Salesforce: Login, OAuth, and SSO. The Login method requires you to have the username, password, and security token of the user.
If you do not have access to the username and password or do not wish to require them, you can use OAuth authentication.
Use SSO (single sign-on) by setting the SSOProperties, SSOLoginUrl, and TokenUrl connection properties, which allow you to authenticate to an identity provider. See the "Getting Started" chapter in the help documentation for more information.
Using CData Connect Cloud
To connect to your Salesforce data in Connect Cloud and enable OData access, navigate to the web interface for your Connect Cloud instance (https://www.cdatacloud.net/myinstance). Follow the steps below to configure Connect Cloud. (Jump to building a dashboard.)
Add a Connect Cloud User
Create a User to connect to Salesforce from Reveal through Connect Cloud.
Click Users -> Add
Configure a User
- Click Save Changes and make a note of the Authtoken for the new user

Connect to Salesforce from Connect Cloud
CData Connect Cloud uses a straightforward, point-and-click interface to connect to data sources and generate APIs.
- Open Connect Cloud and click Databases
Select "Salesforce" from Available Data Sources
Enter the necessary authentication properties to connect to Salesforce (see above)

Click Test Database
Click Privileges -> Add and add the new user (or an existing user) with the appropriate permissions (SELECT is the only required permission for Reveal)
Add Salesforce OData Endpoints in Connect Cloud
After connecting to Salesforce, create OData Endpoint for the desired table(s).
- Click OData -> Tables -> Add Tables

- Select the Salesforce database

- Select the table(s) you wish to work with and click Next
(Optional) Edit the resource to select specific fields and more
Save the settings
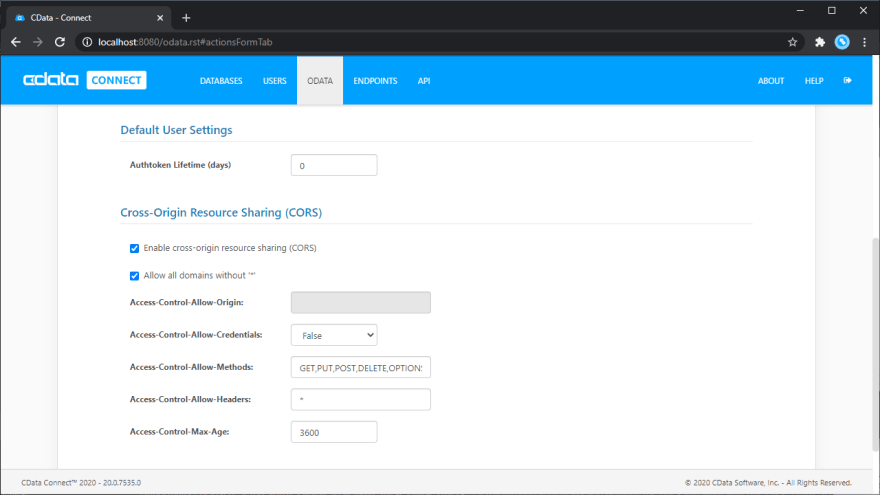
(Optional) Configure Cross-Origin Resource Sharing (CORS)
When accessing and connecting to multiple different domains from an application such as Ajax, there is a possibility of violating the limitations of cross-site scripting. In that case, configure the CORS settings in OData -> Settings.
Enable cross-origin resource sharing (CORS): ON
Allow all domains without '*': ON
Access-Control-Allow-Methods: GET, PUT, POST, OPTIONS
Access-Control-Allow-Headers: Authorization
Save the changes to the settings.
Using API Server
To connect to your Salesforce data in API Server and enable OData access, navigate to the web interface for your API Server instance (https://localhost:8153). Follow the steps below to configure the API Server. (Jump to building a dashboard.)
Connect to Salesforce from API Server
CData API Server uses a straightforward, point-and-click interface to connect to data sources and generate APIs.
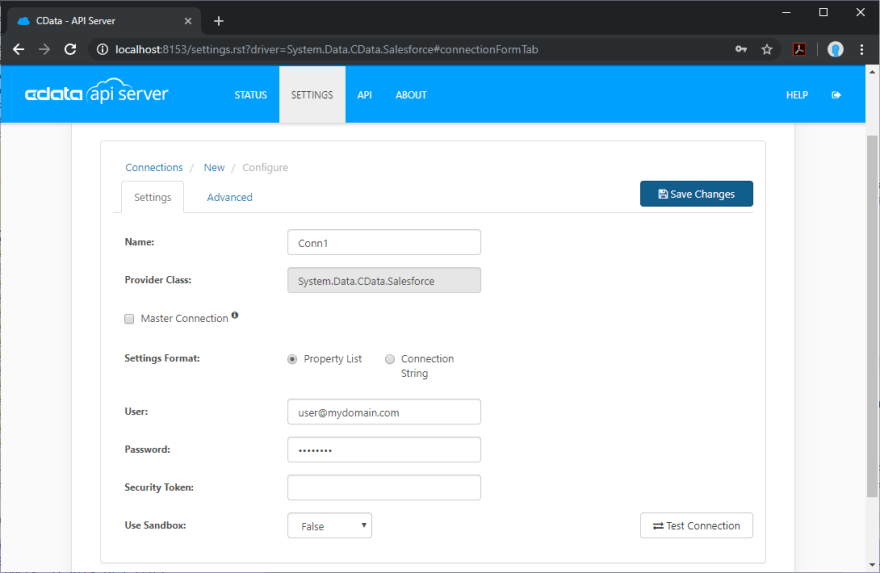
- Open API Server and click Settings -> Connection -> Add Connection

- Select "Salesforce"

- Enter the necessary authentication properties to connect to Salesforce (see above)
Add Salesforce Resource Definitions in API Server
After connecting to Salesforce, create Resources, which represent API endpoints for Salesforce data.
- Click Settings -> Resources -> Add Resource

- Select the Salesforce connection

- Select the table you wish to retrieve and click Next

(Optional) Edit the resource to select specific fields and more
Save the settings
Add an API Server User
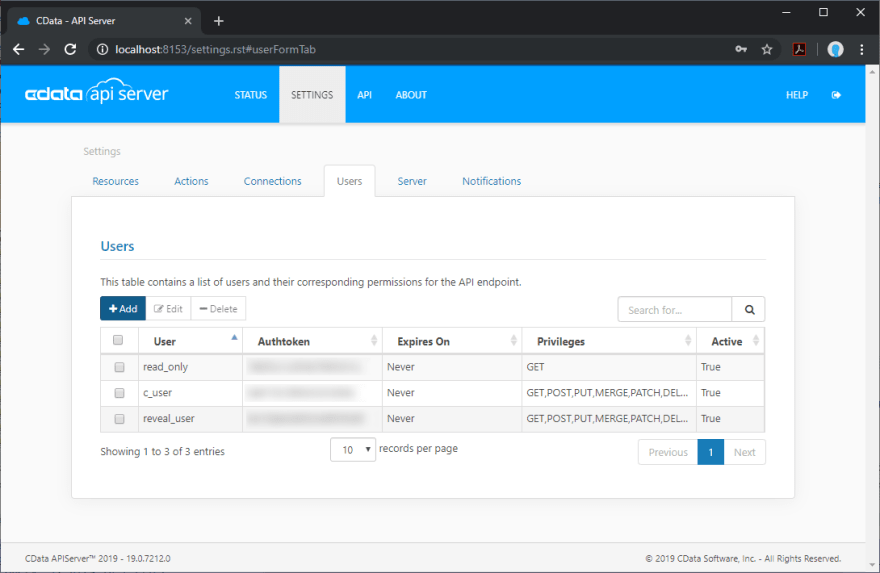
Create a User to connect to Salesforce from Reveal through API Server.
Click Settings -> Users
Click Add
Configure a User with access to the Salesforce Connection and Resource(s)

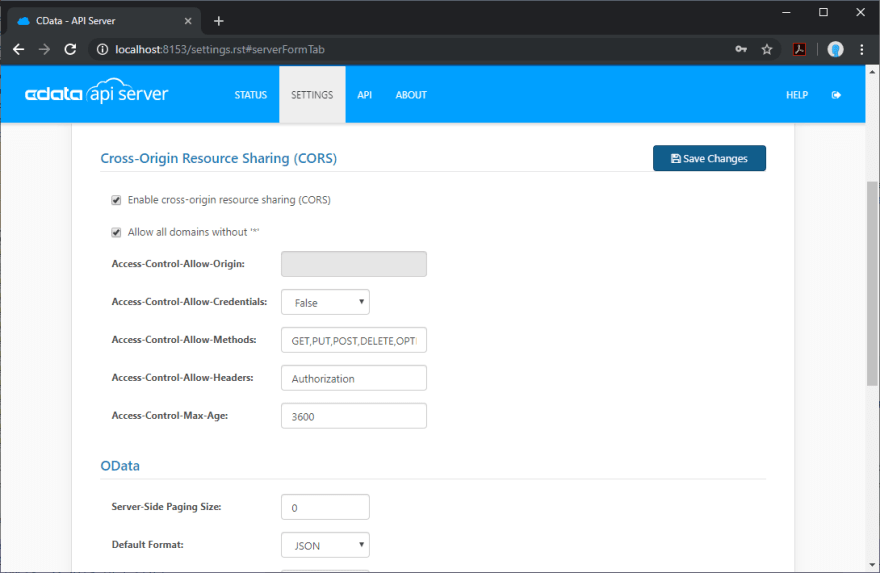
(Optional) Configure Cross-Origin Resource Sharing (CORS)
When accessing and connecting to multiple different domains from an application such as Ajax, there is a possibility of violating the limitations of cross-site scripting. In that case, configure the CORS settings in Settings -> Server.
Enable cross-origin resource sharing (CORS): ON
Allow all domains without '*': ON
Access-Control-Allow-Methods: GET, PUT, POST, OPTIONS
Access-Control-Allow-Headers: Authorization
Save the changes to the settings.
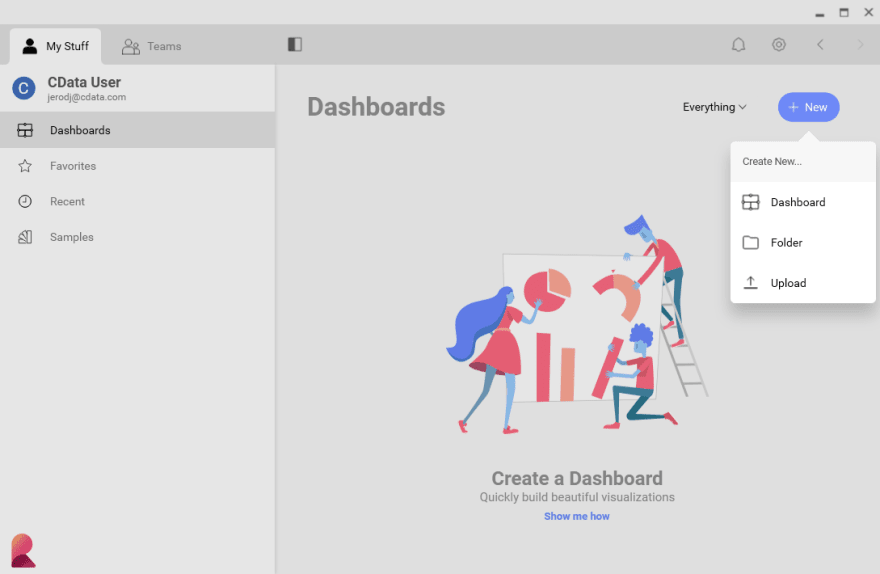
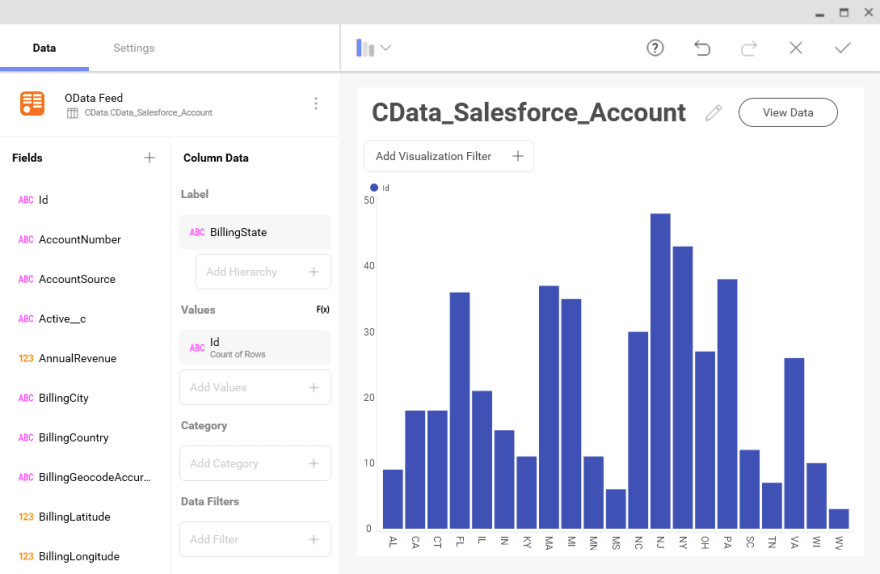
Create a Dashboard in Reveal
With the API Server configured, we can visualize Salesforce data in Reveal.
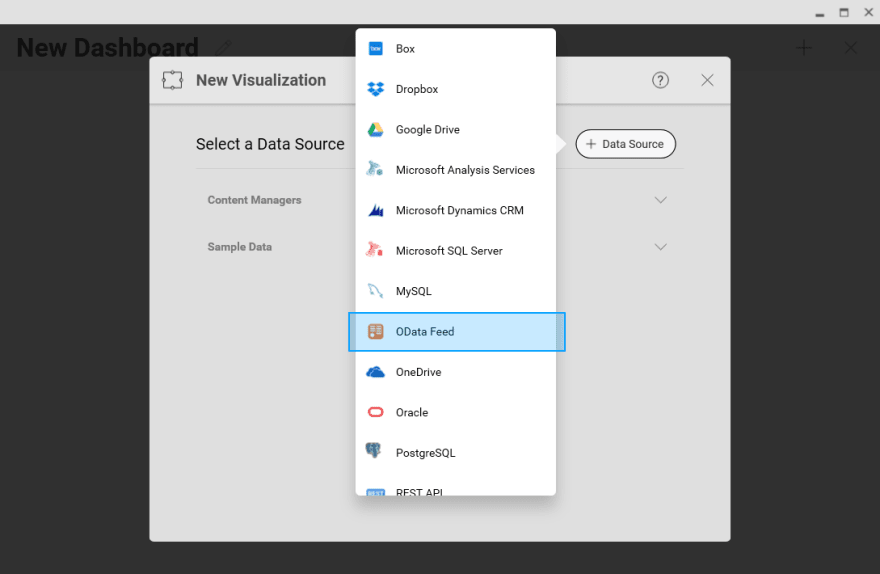
- Log into Reveal and click Dashboards -> New

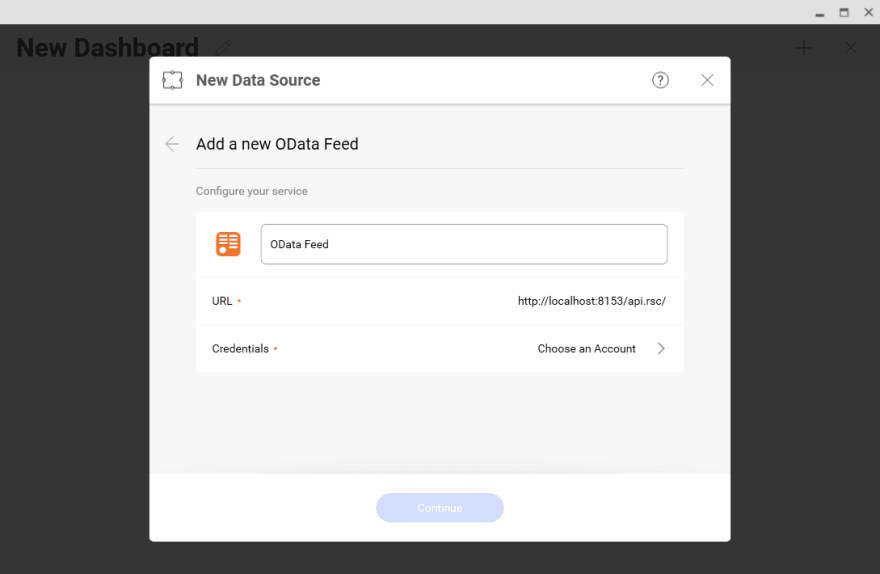
- Click Data Source -> OData Feed
- Specify the API Server or Connect Cloud API endpoint URL, for example, https://serverurl/api.rsc

- Select Generic Credentials and specify the API Server username and authentication token

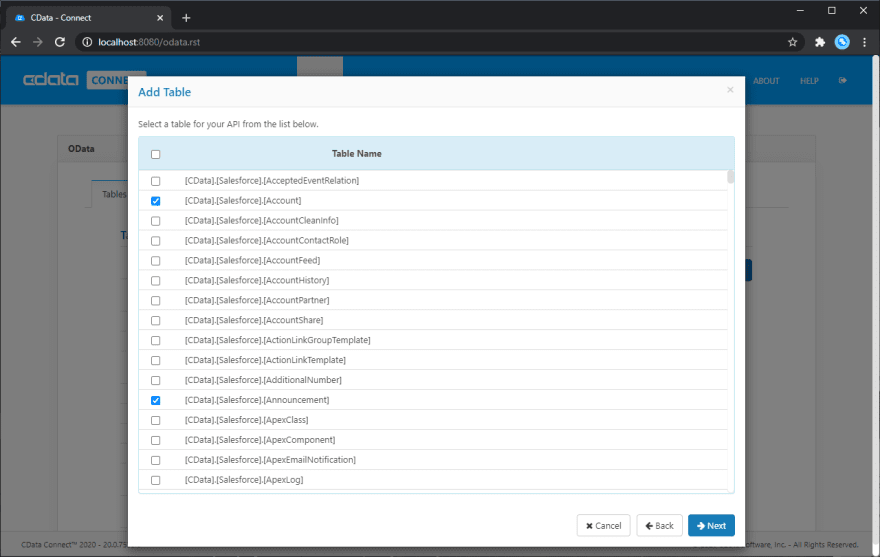
- Select the entity you wish to visualize

- Select fields and choose a chart type
More Information
Companies everywhere are looking to leverage their data to make effective decisions and grow their businesses.
By providing industry-standard connectivity, both CData Connect Cloud and CData API Server democratize Salesforce access. Now everyone in the organization, from IT professionals & app developers to citizen analysts & data scientists can work with and find value from the entire Salesforce platform.

Top comments (0)