A space odyssey ….
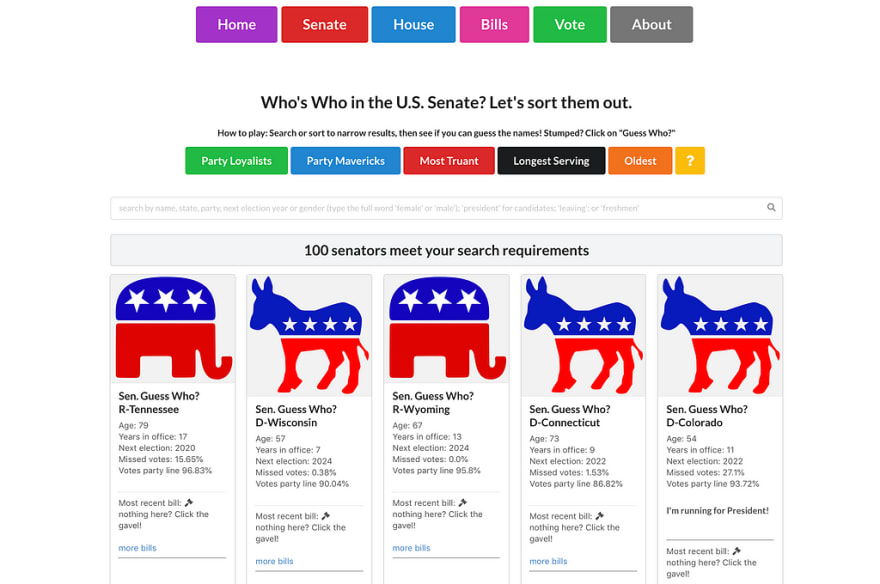
I just graduated from the Flatiron School, and I’m pretty happy with my final project, a Congress Who’s Who app — an educational game. For the longest time, it was stuck on my computer. People who saw it wanted to know how they could use it. Could they download it? (Why yes, if you want to follow these 20 steps to create a Git account and fork and clone two repos, bundle them and run them on the right servers ….)
What I wanted to say was YES, here’s the link! And now I have one. My app lives here: https://congress-front-end.herokuapp.com/.
If you’re having trouble deploying your React-on-Rails app to Heroku, especially if yours makes calls to an external API (application programming interface), read on, and learn from my mistakes!
Note: there are a few blog posts on how to do this, plus the Heroku documentation itself. Some parts of both worked for me, some didn’t. I’m this combination of steps, in this order, works for you!
Assumptions (pre-requisites!)
https://medium.com/media/255d34d133519651a4668449fec9e1b1/href
This blog post assumes:
- You have a working Rails API back-end.
- Your Rails API back-end database is Postgres.
- You have a working React front-end.
- Both are tracked in separate Github repositories.
- You have a Heroku account. (If not, followsimple sign-up directions here)
- You have installed the Heroku CLI (if not follow these steps)
PART ONE: Deploy your Rails API back-end
Step 1. Create a separate branch on Github for this effort.
My back-end was named congress-api. I created a new branch called deploy_to_heroku. After creation, github automatically moved me to my new branch.
// ♥ git co -b deploy\_to\_heroku

[**10:03:55**] (deploy\_to\_heroku) congress\_api

// ♥
Now, if everything goes wrong, you can at least revert back to your previous branch.
Step 2. If this is your 2nd, 5th or … 20th attempt … clean up your previous mess.
(skip this step if this is your first effort to deploy to Heroku)
https://medium.com/media/59b26ad2e0dd7cb3096055d9f96d810d/href
I tried and tried many times before I succeeded! During those previous efforts, I created and re-created the app on Heroku. Those previous efforts were done incorrectly and derailed my subsequent efforts. If you are in the same boat, go to your Heroku dashboard, and get rid of any previous attempts to create this particular app on Heroku. In my case, I had multiple copies of my app under different names.
AND … if along the way, you followed advice like I did to run a ‘yarn build’ of your project, you will need to delete your yarn.lock file from the root of your file tree. Heroku does not use yarn.lock.
Step 3. Add a Procfile
What’s a procfile? It tells Heroku which commands to run to start your app!
Call it “Procfile” with no extension and add it to your root directory.
I followed Heroku’s documentation to the letter and made mine look exactly like their sample code for Rails:
web: bundle exec rails server -p $PORT
worker: bundle exec rake jobs:wor
Step 4. Configure PUMA server
I followed these steps from the Heroku documentation, but I am not sure they are enabled, since I do not call Puma in my Procfile (with a line like this `web: bundle exec puma -C config/puma.rb)
I’ll update this post when I have time to experiment with removing my Puma.rb file to see what happens.
Step 6. Create a Heroku remote.
In terminal, navigate to your app’s root directory and follow these instructionsfrom Heroku documentation.
Step 7. Add Heroku Postgres to your App
Follow these steps from Heroku documentation
Then, in terminal run Heroku config. This will bring up the url for your new Heroku Postgres add-on. (it’s very long. I’m just showing the first part of mine below).

Important!
Grab that database url (“postgres:// etc”) and in your database.yml file, set DATABASE_URL = <”postgres:// etc”>
Step 6. Deploy!
From the Heroku documentation:

Then navigate to the url for your new app. (If you can’t find it, go to your Heroku dashboard, click on the name of your new app, then click on “Open App” at the right. )

Grab that url, you will need it for Part Two!
Step 7. See ….. nothing?
https://medium.com/media/2704ed6a06c6106b65eb5a0353d5b4c8/href
Unless you found and followed steps to import your Postgres database as is, you deployed your app with an empty database like I did. So, after my ‘successful’ deploy, I was expecting to see the same thing I saw on my back-end page during development: lots of JSON data. Like so:

But instead, I saw:
[]
Why? Because I deployed an app with an empty database.
If you aren’t making calls to an external database, you can fix this by running:
heroku rake db:create

heroku rake db:migrate

heroku rake db:seed
(Heroku does not support heroku rake:db reset.) See documentation.
BUT, if your app makes calls to an external API, this won’t work! Why not? Read on …
Step 8. If your app makes calls to an external API you must ….
…use Heroku to configure envrionment variables.
OK, so this is the step that just about killed me. After doing lots of Googling and reading lots of documentation and Stack Overflow posts, I managed to get to the point where all I had to do was seed my database. But when I ran Heroku rake db:seed, I got a fail.

So the big hint was, check out /app/db/seeds.rb:9
What was there? The results of my API call, which by the way, worked perfectly in development.

I tried sticking a pry into my production code, and could not hit it. Then, much Googling later, I discovered that Heroku does NOT recognize ENV variables, at least not in API calls. If you want to use your API key in an app you are deploying to Heroku, you must configure those variables in the Heroku CLI.
These, my friends, are the magic steps.
For me, they looked like this:

etc.
After I got that straight, I ran heroku rake db:seed
and was THRILLED to see my database actually loading.
If you’re following along, take a break, do a little dance, and take heart! You have just finished the hardest part. Part Two is way way easier, I promise.
https://medium.com/media/d594902b7f42e974ad45508f599e87c5/href
PART TWO: Deploy your React Front End
(way easier than part one!)
I followed these directions from Shakhor Smith (thx Shakhor!). The following is a distillation of his directions plus a few of my own observations and screenshots.
These instructions assume that you created your React front-end with create-react-app. Before you continue, go into terminal and navigate to the root directory of your React front end.
Step 1. Set up your front end to call the new url for your back end.
During development, I ran my rails back end on http://localhost/3000. So all my fetches to my back end used http://localhost/3000 as a base URL. But with my back end actually up and running on Rails, I had to update those urls — um, all 10 of them.
When I set up those fetch calls, I typed the urls out like so:
fetch(http://localhost/3000/search/senators)
That’s fine for one or maybe two fetches, but I had more than 10. So to prepare for my Heroku deploy, I did what I should have done in the first place. I abstracted the base url into its own constant:
`
const API_BASE_URL="http://localhost/3000"
...
fetch(API_BASE_URL+’/search/senators’)
`
I did that for 16 fetches in two files. (command D comes in handy! — select the first instance of a string, hit command D repeatedly to select subsequent instances, then type the replacement string, and voila!)
Step 2. Figure out which versions of node and npm you are running.
Run npm -v
and node-v

Step 3. Add an engines object to package.json

following Shakhor’s lead, I put mine right above dependencies (I don’t know if order matters, let me know if you know it does!)

Step 4. Create a remote Heroku repository the easy way.
Open up your Heroku dashboard in your browser. Click ‘New’ and select “Create new App”

You’ll see a dashboard for the app you just created. Go to the deploy tab and follow directions to connect your app to Github, enable automatic deploys, and choose the branch you are deploying (in my case it was deploy_to_github). Don’t forget to click the deploy branch when you are done!
If you get fail message the deploy tab, plus a log of what went wrong. The messages are very clear, and include clear instructions on how to fix what went wrong.
My deploy failed because of conflicting yarn.lock and package.json file; the error message clearly told me to delete yarn.lock. Then you have to save that change and re-run git push heroku master to push that change to Heroku.
After fixing two such errors, success! I finally got my React and Rails App running on Heroku!!!
Here’s hoping this reduces your deployment time to less than one hour!!!

Top comments (0)