This tutorial will show you how to build an availability search with Elasticsearch.
It will cover the following:
- How to index availability data using nested documents
- How to build a Search UI with React, Instantsearch and Searchkit
In this example we are imagining a booking site for cabins.
Prerequisites
- Elasticsearch (preferably 7.x or higher)
Setting up Elasticsearch
The easiest way to get started with Elasticsearch is to use the Elastic Cloud service. You can also run Elasticsearch locally using Docker.
For this tutorial, we will use Docker to run Elasticsearch locally. We are going to disable security for simplicity. You can enable security if you want to.
Pull the Elasticsearch Docker image:
docker pull docker.elastic.co/elasticsearch/elasticsearch:8.6.2
Create a docker network for Elastic:
docker network create elastic
Start Elasticsearch:
docker run --name elasticsearch --net elastic -p 9200:9200 -p 9300:9300 -e "discovery.type=single-node" -e "xpack.security.enabled=false" docker.elastic.co/elasticsearch/elasticsearch:8.6.2
Indexing availability data
For this tutorial, we will use the Elasticsearch REST API to index and search data. You can use any of the Elasticsearch clients to do the same.
Create an index
Our data model will have the following structure:
- A
listinghas manyavailabilityobjects - Each
availabilityobject has astart date,end date,typeand aprice - Each
listinghas a number of attributes likename,description,categoriesetc.
We will use nested documents to model this data. This means that each availability object will be indexed as a nested document under the listing document.
Let's create an index called listings with a mapping for the listing document:
curl --location --request PUT 'http://localhost:9200/listings' \
--header 'Content-Type: application/json' \
--data-raw '{
  "mappings": {
    "properties": {
      "name": {
        "type": "text"
      },
      "description": {
        "type": "text"
      },
      "categories": {
        "type": "text",
        "fields": {
          "keyword": {
            "type": "keyword"
          }
        }
      },
      "availability": {
        "type": "nested",
        "properties": {
          "start_date": {
            "type": "date"
          },
          "end_date": {
            "type": "date"
          },
          "type": {
            "type": "keyword"
          },
          "price": {
            "type": "float"
          }
        }
      }
    }
  }
}'
Highlights:
- The
availabilityfield is of typenested. This means that eachavailabilityobject will be indexed as a nested document under thelistingdocument. - The
availability.start_dateandavailablity.end_datefields are of typedate. This allows us to filter for availability within a date range. - The
availability.typefield is of typekeyword. This allows us to generate facet options and filter for availability by type. - The
availability.pricefield is of typefloat. This allows us to filter for availability by price. - The
categoriesfield is of typetextwith akeywordsub-field. This allows us to search on categories and use as a facet for listings by category.
Add documents
Let's add a couple of documents to the listings index:
curl --location --request POST 'http://localhost:9200/listings/_doc' \
--header 'Content-Type: application/json' \
--data-raw '{
  "name": "Cabin in the woods",
  "description": "A cozy cabin in the woods",
  "categories": ["cabin", "wood", "nature"],
  "availability": [
    {
      "start_date": "2021-01-01",
      "end_date": "2021-01-10",
      "type": "nightly",
      "price": 100
    },
    {
      "start_date": "2021-01-11",
      "end_date": "2021-01-20",
      "type": "nightly",
      "price": 150
    },
    {
      "start_date": "2021-01-21",
      "end_date": "2021-01-31",
      "type": "nightly",
      "price": 200
    }
  ]
}'

curl --location --request POST 'http://localhost:9200/listings/_doc' \
--header 'Content-Type: application/json' \
--data-raw '{
  "name": "Cabin in the mountains",
  "description": "A cozy cabin in the mountains",
  "categories": ["cabin", "mountain", "nature"],
  "availability": [
    {
      "start_date": "2021-01-01",
      "end_date": "2021-01-10",
      "type": "nightly",
      "price": 100
    },
    {
      "start_date": "2021-01-11",
      "end_date": "2021-01-20",
      "type": "nightly",
      "price": 150
    },
    {
      "start_date": "2021-01-21",
      "end_date": "2021-01-31",
      "type": "nightly",
      "price": 200
    }
  ]
}'
Build a search UI
We will use React, Next.JS, Instantsearch and Searchkit to build a search UI.
Let's create a new Next.JS app:
npx create-next-app searchkit-tutorial
Install Searchkit:
cd searchkit-tutorial
npm install searchkit @searchkit/api @searchkit/instantsearch-client react-instantsearch-dom
update file called pages/index.js and add the following code:
import React from "react";
import Client from "@searchkit/instantsearch-client";
import { InstantSearch, SearchBox, Hits, RefinementList } from "react-instantsearch-dom";

const searchClient = Client({
  url: "/api/search"
});

const App = () => (
  <InstantSearch indexName="listings" searchClient={searchClient}>
    <SearchBox />
    <Hits />
  </InstantSearch>
);

export default App;
then add a new file called pages/api/search.js and add the following code:
import Client from "@searchkit/api";

const client = Client({
  connection: {
    host: "http://localhost:9200"
  },
  search_settings: {
    search_attributes: ["name", "description"]
  },
});

// example API handler for Next.js
export default async function handler(req,res) {
  const results = await client.handleRequest(req.body);
  res.send(results);
}
and finally, run the app:
npm run dev
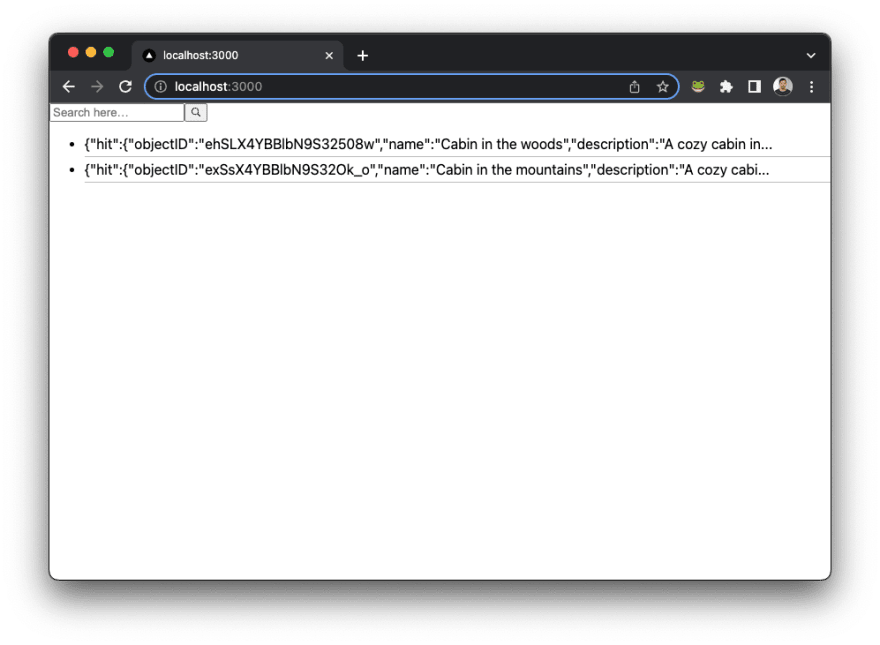
You should see the following search UI:
Adjust search attributes
Let's adjust the search attributes to include the categories field.
Update the pages/api/search.js file and add the following code:
import Client from "@searchkit/api";

const client = Client({
  connection: {
    host: "http://localhost:9200"
  },
  search_settings: {
    search_attributes: ["name", "description", "categories"]
  },
});

// example API handler for Next.js
export default async function handler(req,res) {
  const results = await client.handleRequest(req.body);
  res.send(results);
}
Now, when you search for cabin, you should see the following results:

Add facets
Let's add a facet for categories and for the nested field availabilities.type.
Update the pages/index.js file and add the following code:
import React from "react";
import Client from "@searchkit/instantsearch-client";
import { InstantSearch, SearchBox, Hits, RefinementList } from "react-instantsearch-dom";

const searchClient = Client({
  url: "/api/search"
});

const App = () => (
  <InstantSearch indexName="listings" searchClient={searchClient}>
    <SearchBox />
    <RefinementList attribute="categories" />
    <RangeInput attribute="price" />
    <RefinementList attribute="type" />
    <Hits />
  </InstantSearch>
);

export default App;
Then update the pages/api/search.js file and add the following code:
import Client from "@searchkit/api";

const client = Client({
  connection: {
    host: "http://localhost:9200"
  },
  search_settings: {
    search_attributes: ["name", "description", "categories"],
    facet_attributes: [
      { field: "categories.keyword", type: "string", attribute: "categories" },
      { field: "price", type: "numeric", attribute: "price",  nestedPath: "availability" },
      { field: "type", type: "string", attribute: "type", nestedPath: "availability" }
    ]
  },
});

// example API handler for Next.js
export default async function handler(req,res) {
  const results = await client.handleRequest(req.body);
  res.send(results);
}
you should see the following UI:

Add Date Filtering
Let's add a date range filter to the search UI on the nested field availability.start_date & availability.end_date.
Update the pages/index.js file and add the following code:
import React from "react";
import Client from "@searchkit/instantsearch-client";
import { InstantSearch, SearchBox, Hits, RefinementList, RangeInput, createConnector } from "react-instantsearch-dom";

const searchClient = Client({
  url: "/api/search"
});

const defaultAvailabilityDates = ['2021-01-01', '2021-01-10']
const AvailabilityDatesConnector = createConnector({
  displayName: 'AvailabilityDates',
  getProvidedProps: (props, searchState) => {
    return {
      availabilityDates: searchState.availabilityDates || defaultAvailabilityDates
    }
  },
  refine: (props, searchState, nextValue) => {
    return {
      ...searchState,
      availabilityDates: nextValue
    }
  },
  getSearchParameters(searchParameters, props, searchState) {
    const { availabilityDates = defaultAvailabilityDates } = searchState;
    return searchParameters.addNumericRefinement('availability.start_date', '<=', (new Date(availabilityDates[0])).getTime()).addNumericRefinement('availability.end_date', '>=', (new Date(availabilityDates[1])).getTime());
  },
})

const AvailabilityDates = AvailabilityDatesConnector(({ availabilityDates, refine }) => {
  return (
    <div>
      <input type="date"
        value={availabilityDates[0]} onChange={(e) => {
          refine([e.target.value, availabilityDates[1]])
        }}
        ></input>
        <input type="date"
        value={availabilityDates[1]}
        onChange={(e) => {
          refine([availabilityDates[0], e.target.value])
        }}
        ></input>
    </div>
  )
})


const App = () => (
  <InstantSearch indexName="listings" searchClient={searchClient}>
    <SearchBox />
    <RefinementList attribute="categories" />
    <RangeInput attribute="price" />
    <RefinementList attribute="type" />
    <AvailabilityDates />
    <Hits />
  </InstantSearch>
);

export default App;
and then update the pages/api/search.js file and add the following code:
import Client from "@searchkit/api";

const client = Client({
  connection: {
    host: "http://localhost:9200"
  },
  search_settings: {
    search_attributes: ["name", "description", "categories"],
    facet_attributes: [
      { field: "categories.keyword", type: "string", attribute: "categories" },
      { field: "price", type: "numeric", attribute: "price",  nestedPath: "availability" },
      { field: "type", type: "string", attribute: "type", nestedPath: "availability" }
    ],
    filter_attributes: [
      { field: "start_date", type: "date", attribute: "availability.start_date", nestedPath: "availability" },
      { field: "end_date", type: "date", attribute: "availability.end_date", nestedPath: "availability"  }
    ]
  },
});

// example API handler for Next.js
export default async function handler(req,res) {
  const results = await client.handleRequest(req.body);
  res.send(results);
}
In this example, we have added a date range filter to the search UI on the nested field availability.start_date & availability.end_date as filters.
You should see the following UI. The default date range is 2021-01-01 to 2021-01-10 which brings back one listing which has an availability entry matching time span.

You can change the date range and see the results change.

Highlighting Availability Dates
When you filter by availability dates & price, you are matching a number of availability entries. You can show the availability entries that match the filter by highlighting them in the search results.
Update the pages/index.js file and add the following code:
import React from "react";
import Client from "@searchkit/instantsearch-client";
import { InstantSearch, SearchBox, Hits, RefinementList, RangeInput, createConnector } from "react-instantsearch-dom";

const searchClient = Client({
  url: "/api/search"
});

const defaultAvailabilityDates = ['2021-01-01', '2021-01-10']
const demo = createConnector({
  displayName: 'AvailabilityDates',
  getProvidedProps: (props, searchState) => {
    return {
      availabilityDates: searchState.availabilityDates || defaultAvailabilityDates
    }
  },
  refine: (props, searchState, nextValue) => {
    return {
      ...searchState,
      availabilityDates: nextValue
    }
  },
  getSearchParameters(searchParameters, props, searchState) {
    const { availabilityDates = defaultAvailabilityDates } = searchState;
    return searchParameters.addNumericRefinement('availability.start_date', '<=', (new Date(availabilityDates[0])).getTime()).addNumericRefinement('availability.end_date', '>=', (new Date(availabilityDates[1])).getTime());
  },
})

const AvailabilityDates = demo(({ availabilityDates, refine }) => {
  return (
    <div>
      <input type="date"
        value={availabilityDates[0]} onChange={(e) => {
          refine([e.target.value, availabilityDates[1]])
        }}
        ></input>
        <input type="date"
        value={availabilityDates[1]}
        onChange={(e) => {
          refine([availabilityDates[0], e.target.value])
        }}
        ></input>
    </div>
  )
})

const ResultView = ({ hit }) => {
  const availabilities = hit.inner_hits?.availability || { hits: { hits: [] }}
  return (
  <div>
    <h2>{hit.name}</h2>
    <p>{hit.description}</p>
    <p>{hit.categories.join(", ")}</p>
    <div>
      {availabilities.hits.hits.map((a, i) => (
        <div key={i}>
          <p>{a._source.start_date} - {a._source.end_date}</p>
          <p>{a._source.price}</p>
          <p>{a._source.type}</p>
        </div>
      ))}
    </div>
  </div>
  )
}

const App = () => (
  <InstantSearch indexName="listings" searchClient={searchClient}>
    <SearchBox />
    <RefinementList attribute="categories" />
    <RangeInput attribute="price" />
    <RefinementList attribute="type" />
    <AvailabilityDates />

    <Hits hitComponent={ResultView} />
  </InstantSearch>
);

export default App;
Recap of Changes:
- We have added a new component
ResultViewwhich is used to render the search results. This component shows the name, description, categories, and the availability entries that match the filter. - We are accessing the availability entries from the
inner_hitsproperty of the listing document. Theinner_hitsproperty is populated by Elasticsearch when the search query matches a nested document.
You should see the UI:

Expanding the search experience
Now that you have a basic search UI, you can expand the search experience by adding more features like sorting, pagination, and query rules.
- Styling Components: Instantsearch has a huge number of components that you can use with Searchkit.
- Query Rules: Query rules allow you to customize the search experience by adding custom logic to the search query. For example, you can add a rule to boost listings that have availability entries matching the current date.
- Search Relevance: Adjust the search relevance by overriding the default organic match query.
- Geo Search Components: Build map based search experiences
Thanks for following!
Remember to star Searchkit! or visit our demo site https://www.searchkit.co/demos to see more examples.

Top comments (0)