Kubectl
Kubernetes is actually a one big API server and kubectl is the command-line client tool to manage Kubernetes clusters. Kubectl is also the new SSH for Kubernetes. Kubectl reads the cluster context from the config file present inside $HOME/kube directory.
Here is Hightower's word on kubectl,
Syntax structure
Kubectl has the following syntax,
Kubectl [operation] [resource] [name] [options]
operations are the tasks that you want to perform such as create, get, describe, delete, apply -f, exec -it
resource is the Kubernetes resource kinds like deployment, pods, connfigmap, daemonset etc.
name specifies the name of the resource such as POD name, deployment name etc.
options are the various choices available for the operations and the resources. Some of the common options are
* -o yaml - outputs in yaml format
* -o json - outputs in json format
* --watch
* --show-labels
* --namespace
How Kubectl works?
kubectl works on REST apis. Whenever a command is entered using kubectl, it's translated into a REST API call and hits the Kubernetes API server. Now based on the kubectl command, the API server either refers kubelet or the etcd database to retrieve or modify the data.
Get documentation using Kubectl
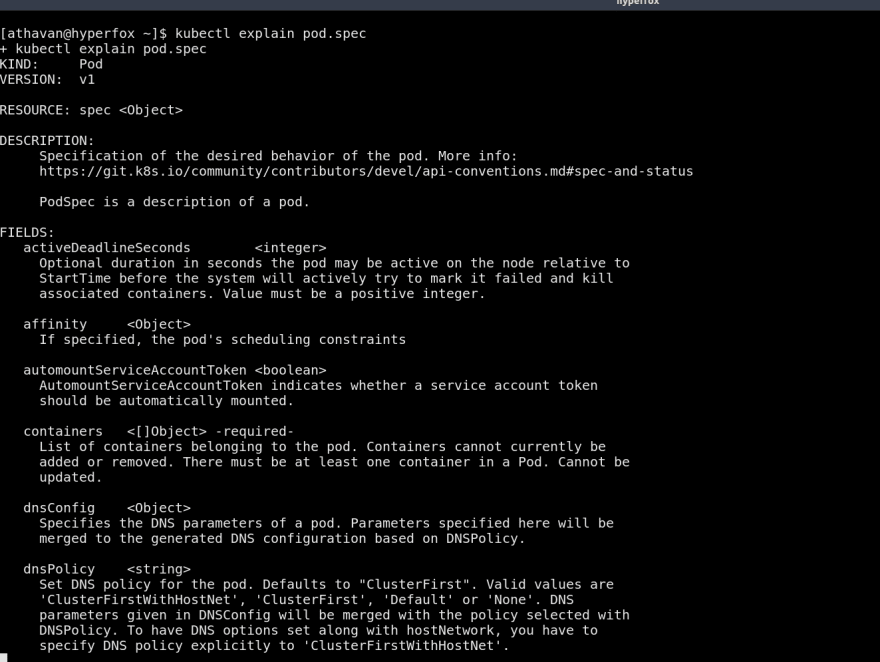
Kubernetes has a lot of resources and custom resource definitions. Kubectl has a wonderful feature to read all the documentation about these resources from the command line. It's pretty useful while writing the Kubernetes manifest yamls. For example, to view the options of the Pod resource, just run kubectl explain pod
The explain command also works to explain any inner field of a resource. For example, to know about the spec of a POD resource, just call the explain API with dot notation like kubectl explain pod.spec
kubectl - an alternative to SSH for containers
The kubectl exec is a valuable command for those who are working with the pods. It helps to get into the containers and allows us to execute commands.
Say, for example when we run the exec command to a running nginx POD, the following happens,
From the above image, the following can be noted,
- A GET request is called to fetch the POD nginx
- A POST request to the
execsubresource of the POD - Finally, the server responds with the Response status 101 and switches to SPDY protocol to serve the content. Now technically we've logged-in to a pod and can run any commands.
kubectl - For Local debugging of the remote services
One of the top features of kubectl is the port-forward command. This allows forwarding one or more local ports to the remote service/pod running in the cluster and allows debugging of a remote service locally.
The following is an example where we port forward the local 8080 port to the remote 80 port of an nginx POD and we can access the remote nginx server using localhost:8080 for the terminal.
Common Useful kubectl commands
apply -
kubectl apply -f FILENAME.yamlwill create/apply all configurations specified in the file.applyalso takes input from STDINannotate -
kubectl annotate (-f FILENAME.yaml | RESOURCE NAME) KEY1=VAL1 KEY2=VAL2. This adds or updates annotations on one or more resources.delete -
kubectl delete (-f FILENAME | RESOURCE NAME). This deletes the specified resources from the clusterdescribe -
kubectl describe RESOURCE NAMEdisplays all the detailed state of the specified resource.diff -
kubectl diff FILENAME [flags]shows the diff between resources specified in the file against the live server configurations.edit -
kubectl edit ( FILENAME | RESOURCE NAME)edits or updates the resources specified. This helps to dynamically change the server resources.get -
kubectl get RESOURCE NAMEretrieves the specified resource information from the server.logs -
kubectl logs -f RESOURCE NAME. This is an equivalent oftail -f. This tails the logs of a resource directly from your terminal
The complete reference of kubectl commands with examples can be found in the kubectl reference document.
Thanks for Reading ! See you soon again with another post :)


Top comments (0)