I recently found out that I could use processing in a react native app and started to play around with it.
Processing is a visual programming language that makes data visualisations, interactive art and more. To find out more about it you can find it at this link.
To start with I created a simple bouncing ball, to do this a new project will have to be created and processing js will need to be installed.
create-react-native-app BouncingBall
npm install --save processing-js expo-processing
Next I set up App.js in preparation for the sketch.
import React from 'react'; | |
import { ProcessingView } from 'expo-processing'; | |
export default class App extends React.Component { | |
render() { | |
return ( | |
<ProcessingView style={{ flex: 1 }} sketch={this._sketch} /> | |
); | |
} | |
_sketch = (p) => { | |
// Sets up the sketch | |
p.setup = () => { | |
} | |
// Called every frame | |
p.draw = () => { | |
} | |
} | |
} |
Processing has two methods that are necessary for every sketch, setup() and draw(). Setup is where you put all the code needing in setting up the app and draw is the method that is called every frame of your app.
First I set up some variables needed for the ball i.e velocity, position and gravity. These variables will be Vectors which will hold a 2D x and y value.
import React from 'react'; | |
import { ProcessingView } from 'expo-processing'; | |
export default class App extends React.Component { | |
render() { | |
return ( | |
<ProcessingView style={{ flex: 1 }} sketch={this._sketch} /> | |
); | |
} | |
_sketch = (p) => { | |
let location= null | |
let velocity = null | |
let gravity = null | |
p.setup = () => { | |
// Create new Vector with location of the ball | |
location = new p.PVector(100,100) | |
// Creates a vector that has the x and y velocity of the ball | |
velocity = new p.PVector(1.5,2.1) | |
// creates a vector that has the gravity that will act on the ball | |
gravity = new p.PVector(0,0.2) | |
// gives the screen a white background equivalent to an rgb(255,255,255) | |
p.background(255); | |
} | |
p.draw = () => { | |
} | |
} | |
} |
Finally I added the code that will draw the ball too the screen and handle it's collisions with the edges of the screen.
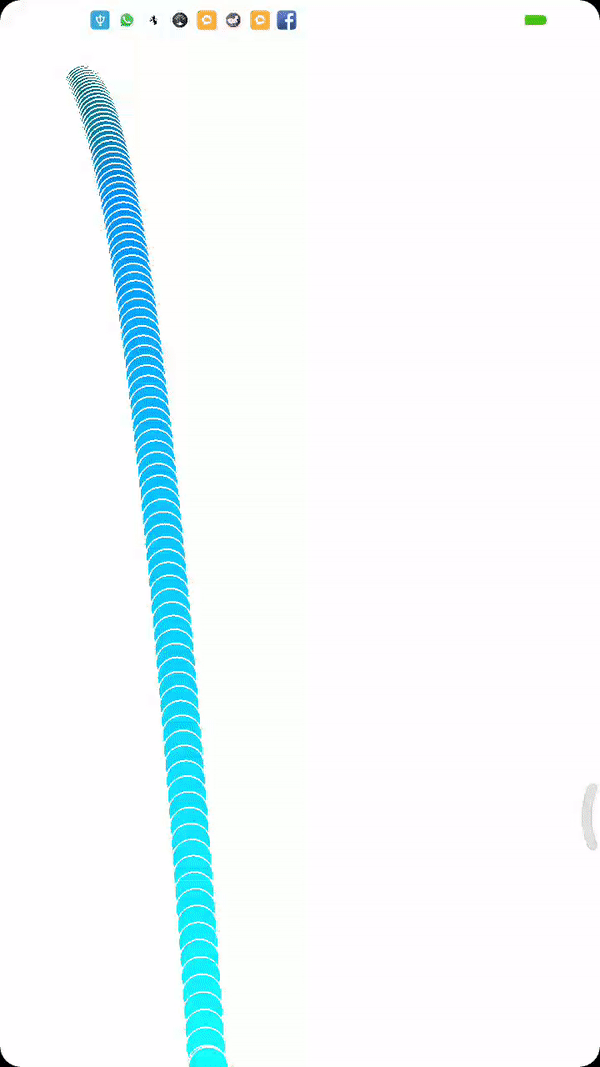
import React from 'react'; | |
import { ProcessingView } from 'expo-processing'; | |
export default class App extends React.Component { | |
render() { | |
return ( | |
<ProcessingView style={{ flex: 1 }} sketch={this._sketch} /> | |
); | |
} | |
_sketch = (p) => { | |
let location= null | |
let velocity = null | |
let gravity = null | |
p.setup = () => { | |
location = new p.PVector(100,100) | |
velocity = new p.PVector(1.5,2.1) | |
gravity = new p.PVector(0,0.2) | |
p.background(255); | |
} | |
p.draw = () => { | |
// Add velocity to the location. | |
location.add(velocity); | |
// Add gravity to velocity | |
velocity.add(gravity); | |
// Bounce off edges by reversing velocity when it hits the edge | |
if ((location.x > p.width) || (location.x < 0)) { | |
velocity.x = velocity.x * -1; | |
} | |
if (location.y > p.height) { | |
// reduces velocity of the ball slightly when it hits the bottom of the screen | |
velocity.y = velocity.y * -0.95; | |
location.y = p.height; | |
} | |
// Display circle at location vector | |
// Border color of circle to white | |
p.stroke(255); | |
p.strokeWeight(2); | |
// Changes the color of the circle based on its velocity and location | |
p.fill(Math.abs(velocity.y), Math.abs(location.x), Math.abs(location.y)); | |
// Draws a circle of radius 24 | |
p.ellipse(location.x,location.y,48,48); | |
} | |
} | |
} |
The end result:
Top comments (2)
Nice example!
There is wrong github code example link after "Finally I added..." sentence. It should be linked to
App_2.js
Thanks for the feedback, I fixed the link.