Introduction

One of the most important tasks while building a react native app that needs some navigation is selecting the perfect navigation library for your project. React Navigation is a standalone library that allows a developer to implement this functionality easily.
At the end of the tutorial, you should have a pretty good knowledge on the various navigators from React Navigation and how to implement them.
Project Setup
Assuming that you have Node 10+ installed, you can use npm to install the Expo CLI command line utility:
npm install -g expo-cli
Then run the following commands to create a new React Native project called "NavOptions":
expo init NavOptions
cd NavOptions
npm start # you can also use: expo start
This will start a development server for you.
The next step is to install the react-navigation library in your React Native project:
yarn add react-navigation
We will be exploring three Navigation options:
- Stack Navigation
- Tab Navigation
- Drawer Navigation
Using Stack Navigator
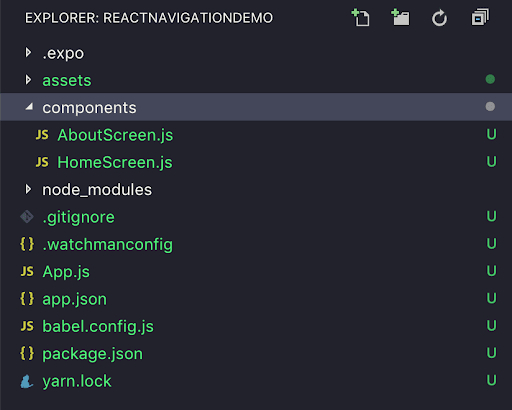
First let's create a new folder, components in our root directory. After that, create two files, Homescreen.js and Aboutscreen.js . Our project folder should look like the image below:
Add the block of code below to Homescreen.js
//With ES7 syntax, you could type 'rcn" to bootstrap a react native component skeleton
import React, { Component } from 'react'
import { Text, View, Button } from 'react-native'
import { createStackNavigator, createAppContainer } from 'react-navigation';


export default class Homescreen extends Component {
    render() {
        return (
            <View style={styles.container}>
                <Text> Welcome To Home Screen </Text>
                <Button
                    title = "Go to About Page"
                    onPress={() => this.props.navigation.navigate('About')}
                    />
            </View>
        )
    }
}

const styles = StyleSheet.create({
    container: {
      flex : 1,
      alignItems: 'center',
      justifyContent: 'center'
    },
  });
//Aboutscreen.js
import React, { Component } from 'react'
import { Text, View, Button } from 'react-native'
import { createStackNavigator, createAppContainer } from 'react-navigation';

export default class Aboutscreen extends Component {
  render() {
    return (
      <View style = {styles.container}>
        <Text> This is the About Screen. </Text>
      </View>
    )
  }
}

const styles = StyleSheet.create({
    container: {
      flex : 1,
      alignItems: 'center',
      justifyContent: 'center'
    },
  });
Now, let's also make some changes to App.js. We’ll import what we need from react-navigation and implement our navigation there.
It is useful to implement our navigation in the root App.js file because the component exported from App.js is the entry point (or root component) for a React Native app, and every other component is a descendant.
As you will see, we will encapsulate every other component inside the navigation functions.
//App.js
import React from 'react';
import { StyleSheet, Text, View } from 'react-native';
import { createStackNavigator, createAppContainer } from "react-navigation";

import HomeScreen from './components/HomeScreen';
import AboutScreen from './components/AboutScreen';

export default function App() {
  return (
    <AppContainer />
  );
}

const AppNavigator = createStackNavigator({
  Home : {
    screen : HomeScreen
  },
  About: {
    screen: AboutScreen
  }
});

const AppContainer = createAppContainer(AppNavigator);

const styles = StyleSheet.create({
  container: {
    flex: 1,
    backgroundColor: '#fff',
    alignItems: 'center',
    justifyContent: 'center',
  },
});
createStackNavigator provides a way for our app to transition between screens, where each new screen is placed on top of a stack. It is configured to have the familiar iOS and Android look and feel: new screens slide in from the right on iOS and fade in from the bottom on Android.
Above we passed in a route configuration object to the createStackNavigator function. The Home route corresponds to the HomeScreen, and the About route corresponds to AboutScreen.
If we wanted to indicate which is the initial route(first screen to be shown), we can add a separate object:
//Aboutscreen.js
const AppNavigator = createStackNavigator({
  Home: {
    screen: HomeScreen
  },
  About: {
    screen: AboutScreen
  }
},{
        initialRouteName: "Home"
});
Note that the Home and About route name-value pairs are enclosed by an overall route object.
To run our app, you’ll need to download the Expo client app, make sure your command line is pointed to the project folder, and your computer and phone is connected to the same network, then run the following command: npm start
Using Tab Navigator
One of the most common style of navigation in mobile apps is tab-based navigation. This can be tabs on the bottom of the screen or on the top below the header (or even instead of a header).
Here we will focus on how to implement tab navigation using createBottomTabNavigator.
Let’s add another screen in our app by creating a ProductScreen.js file under /components. Add the following to your ProductScreen.js
//ProductScreen.js
import React, { Component } from 'react'
import { Text, View } from 'react-native'

export default class ProductScreen extends Component {
    render() {
        return (
            <View style = {styles.container}>
                <Text> Welcome to Product's page </Text>
            </View>
        )
    }
}

const styles = StyleSheet.create({
    container: {
      flex : 1,
      alignItems: 'center',
      justifyContent: 'center'
    },
  });
Next, we will import our ProductScreen into App.js. Also, we will implement our Tab Navigation by importing createBottonTabNavigation. Replace createStackNavigator with createBottomTabNavigator in the AppNavigator object.
Our App.js should be looking like this now:
//App.js
import React from 'react';
import { StyleSheet, Text, View } from 'react-native';
import { createBottomTabNavigator, createAppContainer } from "react-navigation";

import HomeScreen from './components/HomeScreen';
import AboutScreen from './components/AboutScreen';
import ProductScreen from './components/ProductScreen';

export default function App() {
  return (
    <AppContainer />
  );
}

const AppNavigator = createBottomTabNavigator({
  Home : {
    screen : HomeScreen
  },
  About: {
    screen: AboutScreen
  },
  Product: {
    screen: ProductScreen
  }
}, {
  initialRouteName: "Home"
});

const AppContainer = createAppContainer(AppNavigator);

const styles = StyleSheet.create({
  container: {
    flex: 1,
    backgroundColor: '#fff',
    alignItems: 'center',
    justifyContent: 'center',
  },
});
If we run our app, we should see our new navigator tabs.
Drawer Navigation
Like we did while implementing Tab Navigation, we will replace createBottomTabNavigator in our App.js with createDrawerNavigator, but first we will import the Navigator:
import { createDrawerNavigator, createAppContainer } from "react-navigation";
Then update our AppNavigator variable:
const AppNavigator = createDrawerNavigator({
  Home: {
    screen: HomeScreen
  },
  About: {
    screen: AboutScreen
  },
  Contact: {
    screen: ContactScreen
  }
}, {
    initialRouteName: "Home"
  });
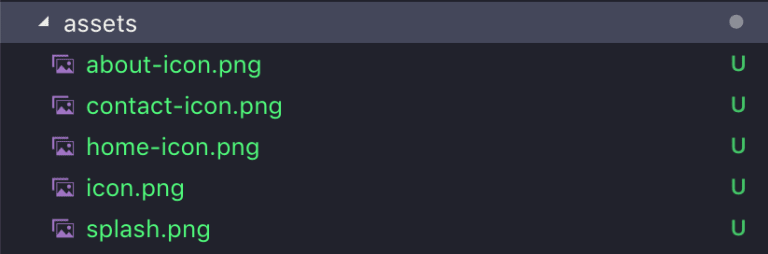
We can also decide to add icons beside the route names, to do this i added a few images to our assets folder, then added navigationoptions to the different screens/routes.
Make the following changes to our HomeScreen.js:
//With ES7 syntax, you could type 'rcn" to bootstrap a react native component skeleton
import React, { Component } from 'react'
import { Text, View, Button, Image, StyleSheet } from 'react-native'
import { createStackNavigator, createAppContainer } from 'react-navigation';


export default class Homescreen extends Component {
    static navigationOptions = {
        drawerLabel: 'Home',
        drawerIcon: ({tintColor}) => (
            <Image
                source = {require('../assets/home-icon.png')}
                style= {[styles.icon, {tintColor: tintColor}]}
                />
        )
    }
    render() {
        return (
            <View style={styles.container}>
                <Text> Welcome To Home Screen </Text>
                <Button
                    title = "Go to About Page"
                    onPress={() => this.props.navigation.navigate('About')}
                    />
            </View>
        )
    }
}

const styles = StyleSheet.create({
    container: {
      flex : 1,
      alignItems: 'center',
      justifyContent: 'center'
    },
    icon: {
        width:24,
        height:24,
    }
  });
Make the same changes to our AboutScreen.js and ProductScreen.js, make sure to use the appropriate icon directory path.
The tintColor prop lets us apply any color based on active or inactive states of navigation tabs and labels. For example, we can change the active state color for our nav drawer labels. Go to the AppNavigator variable and add to the options object:
const AppNavigator = createDrawerNavigator({
  Home: {
    screen: HomeScreen
  },
  About: {
    screen: AboutScreen
  },
  Product: {
    screen: ProductScreen
  }
}, {
    initialRouteName: "Home",
      contentOptions: {
        activeTintColor: '#136207'
     }
  });
Conclusion
I hope you you were able to learn a few things from this article, you can as well leave some claps and spread some love. Next, we will be building a full application and will be centering on exploring React Navigation to the fullest. You can also check out the final code on my github repo.

Top comments (0)