AWS Database Migration Service (DMS) is used to transfer data and database applications between different database instances. When migrating data the source and the target databases can use the same database engine, or they can be different engines. The primary use-case for DMS is to enable and support one-time large-scale migration activities.
A secondary use-case is for frequent or long-term replication tasks. Using DMS, a migration process that would previously have involved an outage or a risky and sudden switching of instances can be avoided. Instead, setting up real-time replication across different database instances allows for migration activities to happen more slowly, in smaller steps, and with validation being performed at each stage.
In addition, DMS can also be used for indefinite backup tasks. This is usually more costly than traditional database backup strategies (periodic snapshotting for example), but when the volume of data is very big, or real-time backups are a requirement, DMS is often the most effective and efficient solution.
In this blog we will use DMS to migrate data from a database instance running the MySQL engine to an instance running the Aurora PostgreSQL engine.
Learning Objectives
This is a beginner level blog, upon completion of this blog you will be able to:
- Configure source and target endpoints in DMS
- Run a migration task in DMS
- Connect to MySQL and PostgreSQL databases from the command-line
- Generate a pre-migration task assessment in DMS.
Prerequisites
You should have a conceptual understanding of:
- Amazon RDS
- SQL and Databases
Steps:
In the AWS Management Console search bar, enter Database Migration Service, and click the Database Migration Service result under Services
In the left-hand menu, click Endpoints.
Click Create endpoint.

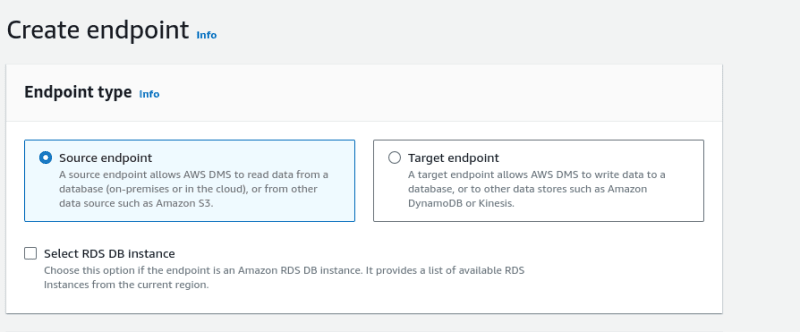
- In the Endpoint type section of the Create endpoint form, ensure Source endpoint is selected:
- Check the Select RDS DB instance checkbox, and in the drop-down box that appears, select mysqlsource: (have created this database in advanced)
This will populate the Endpoint configuration section of the form with values for Server name, Port, and User name.
- In the Endpoint configuration section of the form, select Provide access information manually.
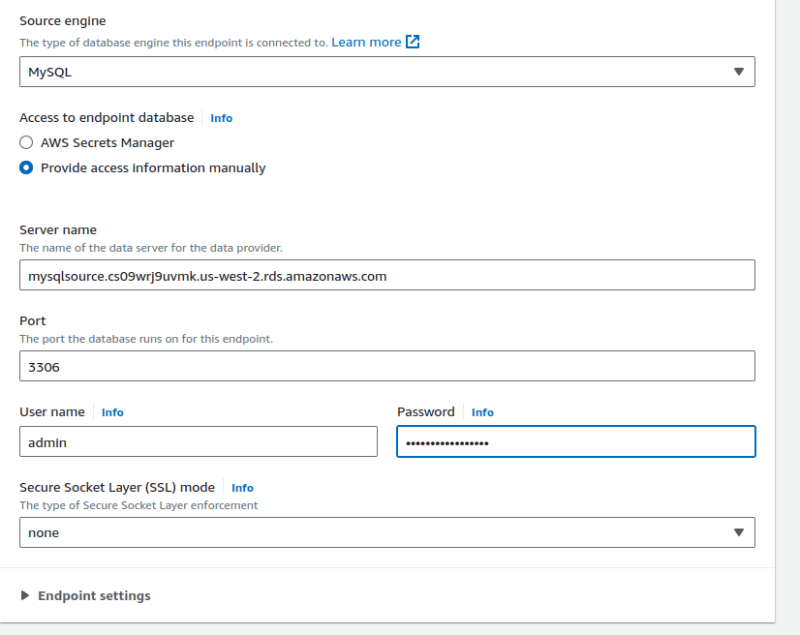
- In the Password textbox, enter testpass.
By entering the password here you are explicitly giving the Database Migration Service access to the source database.
In the Test endpoint connection section of the form, in the VPC drop-down menu, select the VPC test. (your VPC):
In the Replication instance drop-down, ensure lab-replication-instance is selected:
To create your source endpoint, click Create endpoint:
In the Endpoints list, select the mysqlsource endpoint:
To open the Test endpoint connection form, click Actions, and Test connection:
To test the source endpoint connection, click Run test:

The test will take up to a minute to complete.
Once complete you will see Status field change to successful:
If you don't see a successful connection, it is likely that the password stored in the endpoint is incorrect. Use the management console to modify it and re-enter the password.
Connecting to the Virtual Machine using EC2 Instance Connect
In the AWS Management Console search bar, enter EC2, and click the EC2 result under Services:

To see available instances, click Instances in the left-hand menu:

(will use this instance console later in this blog)
Populating the Source Database
Steps
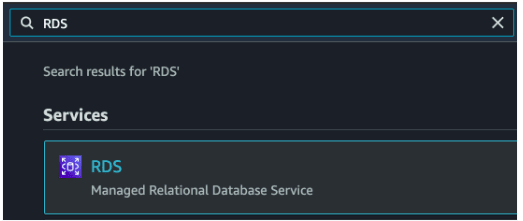
- In the AWS Management Console search bar, enter RDS, and click the RDS result under Services:
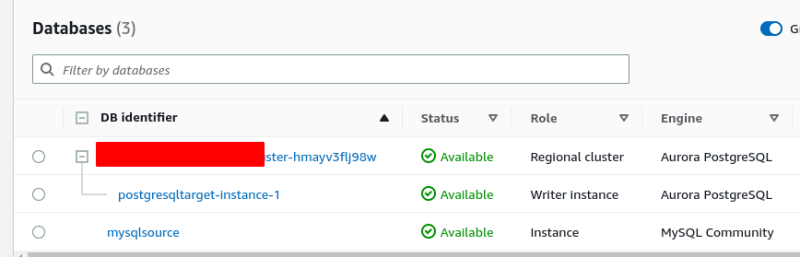
In the left-hand side menu, click Databases:
In the list of databases, select mysqlsource:
- Under the Connectivity & security heading, make a note of the Endpoint, it will be similar to the following:
You will use this endpoint in a moment to connect to the database from the Linux host.
To avoid confusion, an endpoint resource in DMS is not the same as an endpoint in RDS:
In RDS an endpoint is the hostname of the RDS instance
In DMS an endpoint is a resource that contains information about the type of database and also includes the hostname, and other connection details
- In the shell browser window you accessed in the previous Step, enter ls.
You will see the following: (have created small test database files)
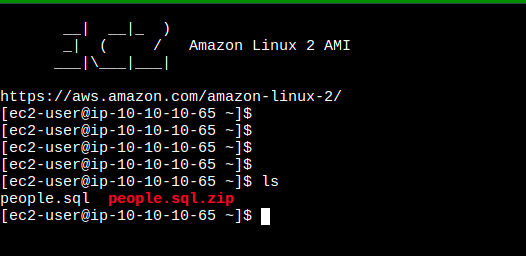
people.sql is a file containing sample data to be loaded into the source database. The dataset contains one table called people that has six columns.
- To load the people.sql data into the source database, enter the following command, replacing source-mysql-endpoint with the endpoint you noted down earlier from RDS:
mysql -P 3306 -u admin -p -h "source-mysql-endpoint" < people.sql
You will be asked to enter a password, enter testpass, this password i have used. Please note that the password is case-sensitive.
You will see output similar to the following:
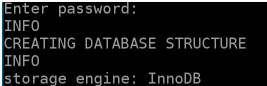
This command has two parts, the first part is from the start of the command up to the < symbol. It tells the MySQL command-line client to create a connection to the source database:
-P 3306 specifies the port to connect to
-p specifies that a password is required
-u admin specifies the username to use when connecting
-h source-mysql-endpoint specifies the hostname to connect to
The second part, < people.sql, uses a feature of the Linux Bash shell called redirection. This part of the command is feeding the contents of the people.sql file into the MySQL client's connection.
- To connect to the database enter the following command, replacing source-mysql-endpoint with the endpoint you retrieved from RDS previously:
mysql -P 3306 -u admin -p -h "source-mysql-endpoint" people
You will be asked for a password, enter testpass.
This command is similar to the one you used to load the people.sql file. This time your command is not redirecting a file, instead, it is connecting to the people database you created.
A MySQL client command prompt will open.
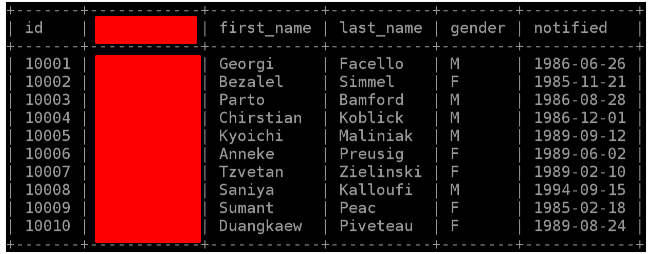
- To verify the data has been populated, enter the following SQL query in the MySQL command prompt:
SELECT * FROM people LIMIT 10;
This query selects the first 10 records from a table called people.
You will see output similar to the following:
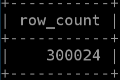
- To see how many rows there are in total in the people table, enter the following SQL query into the MySQL command prompt:
SELECT COUNT(*) AS row_count FROM people;
You will see the following output:
- To exit the MySQL command prompt and return to the bash shell, enter quit.
Creating the Migration Task
Navigate to the AWS Database Migration Service.
In the left-hand menu, click Database migration tasks:
Click Create task:
In the Task configuration section of the Create database migration task form, in the Task identifier textbox, enter test-task:
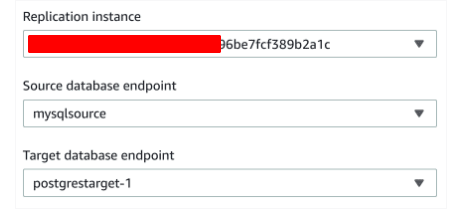
Select the following values for these drop-down fields, accepting the defaults for fields not specified:
Replication instance: Instance beginning with lab-replication-instance
Source database endpoint: mysqlsource
Target database endpoint: postgrestarget-1
- In the Migration type drop-down, ensure Migrate existing data is selected:
The Migration type field allows you to specify different kinds of migration:
Migrate existing data: This type is the simplest, it migrates data from the source to the target and finishes. Using this type will usually require an outage for the duration of the migration.
Migrate existing data and replicate ongoing changes: This type will capture changes to the source during the migration and apply them. With this type outages can be minimized or avoided.
Replicate data changes only: This type assumes you have already performed an initial migration of data from source to target, and want to migrate changes in the source that have occurred since. This allows for more complex migration scenarios, such as the initial migration happening outside of the AWS Database Migration Service.
- Scroll down to the Table mappings section of the form, and click Add new selection rule:
Selection rules allow specifying which parts of a database to export. You can create include and exclude rules.
As an example where you would use this, imagine you have a group of one or more database tables that don't have relationships with other tables. Selection rules can be configured to migrate those tables separately from the rest of the database, enabling you to migrate your database in parts. This approach may be less risky and easier to manage than migrating the entire database in one task.
In the Schema drop-down, select Enter schema:
In the Source name field, enter people:

- In the Source Table name field, enter people:

You have specified an include selection rule that will migrate the people table from the people database schema.
Scroll down to the Premigration assessment section, and check Enable premigration assessment run:
Under Assessments to run, leave the options at their defaults.
Under Assessment report storage, click Browse S3:
An S3 bucket choose dialog will open.Select the bucket by clicking the radio button:
You have to selecte a bucket where the pre-migration task assessment data will be stored.

- Under IAM role, select the role called s3-access-for-tasks:
This role should allows DMS to access S3.
To create your migration task, at the bottom of the page, click Create task:
To start your task, in the top right, click Actions and click Restart/Resume.


Top comments (0)