aug·ment
(verb)
- make (something) greater by adding to it; increase.
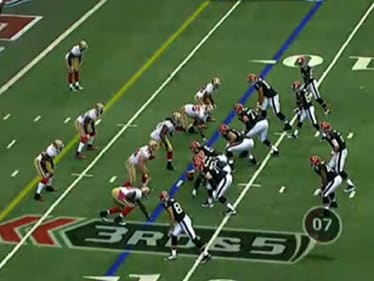
Augmented Reality is an evolving set of technologies with the potential to improve our lives in a variety of ways. To define it succinctly, AR is the rendering of digital information superimposed onto one's view of the physical world. You've seen it before; a prime example being the down markers on football TV broadcasts.
Why care about AR?
Until recently, the prospect of seamlessly blending the physical and digital anywhere you want has remained in the realm of Science Fiction. AR has in fact existed in various forms dating back to the 1960s, but none of the implementations of the past have been portable or very practical for consumer use. However, we are now witnessing this technology become mainstream, due primarily to the proliferation of mobile hardware. The successive iterations of the smart phone market have driven us towards having a compact, low cost, powerful set of sensors and display residing in nearly everyone's pocket. We are at an unprecedented level of hardware saturation, enabling some really compelling AR applications, and we haven't even seen the endgame yet. Will wearables replace all our smartphones? What does the next generation of mobile computing look like?
Unwinding the future possibilities is endless and entertaining, but I digress. Right now in the current mobile app landscape, AR is getting big! Lots of cool apps exist today that utilize computer vision and tracking algorithms to do all manner of neat things. If you haven't seen these, take a few moments to check out some links:
- IKEA Catalog App - place and view furniture pieces in your living room
- Snapchat - face tracking with fun meme-ery
- HoloLens - featured at the 2016 Build conference running a Vuforia app
Just to name a few standout examples. While there are many apps already applying this technology, there is still plenty of room left for innovation and creative new ideas.
Diving into AR Development
I first became interested in AR when I attended the M3 Conference a few years ago, and heard a keynote presentation from Trak Lord of Metaio. I was inspired, so I looked around and found a plethora of platform options for building AR apps. From my own research, I can assert that the Vuforia SDK has the easiest learning curve today. I have used this toolkit to build one demo application for a paying client, a few internal company prototype apps, and many just-for-fun personal projects as well.
Looking back I am glad I didn't invest much time learning the Metaio SDK. They were acquired by Apple in 2015, and have since shut down all public support. Apple has been very quiet about the acquisition, not releasing any news about what they are doing with the technology. Clearly they are looking to innovate in the AR space and are doing some internal R&D right now. Personally, I am excited to see what they come up with, and wonder what built in AR features the next iPhone may have!
Vuforia History
Vuforia began as an in-house R&D project at Qualcomm, a telecommunication and chip-making company. At the time, the company was looking for computationally intensive apps to showcase the prowess of their Snapdragon mobile processors. Nothing flashy enough for them existed on the app market, so they decided to push the boundary and create some new software on their own. They built the Vuforia base SDK and launched it as an open source extension of the AR Toolkit.
Since the initial inception, Qualcomm augmented their base SDK with a variety of tracking enhancements and other proprietary features. To sustain the project long term, they migrated away from the open source model, and they eventually sold ownership of the library to software company PTC. Unlike the sale of Metaio's SDK to Apple, this transfer kept support very much alive for its development community. Since then, Vuforia has grown to be (one of) the premier Augmented Reality SDKs, used by hundreds of thousands of developers worldwide.
Using the Tools
Apps using the Vuforia framework today require a license key. Deployment licensing options start at a reasonably low price, and prototype "Starter" apps can be developed free of charge! You can create an unlimited number of prototype applications at no cost via their Developer Portal.
Building custom AR experiences necessitates thinking in 3D, and having great tools goes a long way in easing that burden of complexity. The Unity 3D game engine is a very intuitive environment for editing scenes in 3D, and it's scripting engine uses C#, making it a fantastic choice for developers who are versed in .NET. To me, the best part of the Vuforia SDK is the Unity plug-in. It enables you to build AR applications, without writing any code at all, that can run on pretty much any mobile phone or tablet.
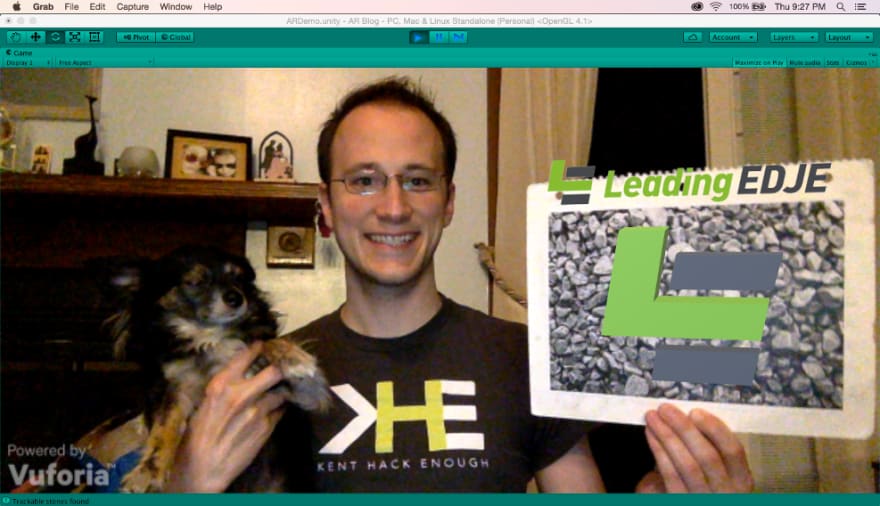
Putting together a marker-based AR app is incredibly easy with these tools. If you have no experience working in Unity, there will be a learning curve involved. A good primer for understanding the Project, Hierarchy, Scene, and Inspector panels can be found here. Once you are familiar with the tools, building AR apps is easy and a lot of fun! Below is a short list of steps to exemplify how quickly you can get an AR app up and running on a webcam enabled machine. Not included here are the steps for deployment to a mobile device (a topic for another day).
- Create New Project in Unity (use 3D settings).
- Delete Main Camera from the scene.
- Import Vuforia Unity Package (downloaded from the Developer Portal).
- Import target database (downloaded from the Developer Portal).
- Add two prefabs to the scene from Vufora Assets: ARCamera and ImageTarget.
- Select ARCamera in the scene hierarchy. In the Inspector Panel, paste in the App Key (created via Developer Portal), then Load and Activate image target database (two checkboxes).
- Select ImageTarget in the scene hierarchy. In the Inspector Panel, select from the dropdowns for Database and Image Target (stones).
- Import a 3D model asset to the project (drag and drop from file system into Unity).
- Add the model asset to the scene as a child object of the Image Target.
- Center and resize model as needed to cover the Image Target.
You can download my completed example Unity project from Github.


Top comments (0)