
Written by Nwani Victory✏️
When it comes to deploying a Next.js application, there are many hosting platforms available to choose from. Among these options, deploying on AWS offers several advantages, whether you’re already invested in the AWS ecosystem or considering a move.
However, it can be tricky integrating your Next.js app smoothly with AWS services like Lambda. In this tutorial, we’ll demonstrate how to use OpenNext, an open source adapter for the Next.js framework, to deploy a Next.js app on AWS Lambda.
Jump ahead:
- Understanding how SST and OpenNext work
- Setting up our Next.js application
- Initializing SST in your Next.js project
- Defining your AWS services
- Using SST constructs within a Next.js app
- Deploying SST apps to AWS with OpenNext
We’re going to use a pre-built demo Next.js application called JuiceBox in this tutorial. This application renders an imaginary juice-selling service’s “Coming Soon” page styled with Tailwind CSS.
Our goal for this project is to implement a waitlist feature for potential customers visiting the site. They should be able to input an email address and get notified when the service starts selling.
To do so, we will leverage SST and OpenNext to run JuiceBox on AWS. SST will use OpenNext to run the Next.js app within AWS Lambda functions. Then, we’ll extend SST’s capabilities to store the details of visitors who subscribe to the waitlist in a DynamoDB table.
You’ll need an AWS account, the AWS CLI installed and configured, and some experience with JavaScript and Next.js to follow along with the hands-on steps in this tutorial. Let’s get started.
Understanding how SST and OpenNext work
SST, formerly known as Serverless Stack, abstracts away the complexities of deploying full-stack serverless applications to AWS.
Previously, deploying a scalable serverless application meant provisioning its underlying resources, such as the Lambda functions and storage buckets. SST simplifies that process to provision and update the services you need automatically.
SST leverages the AWS Cloud Development Kit (CDK) for automation. It includes several CDK components and concepts — such as Constructs, which represent a cloud service within an application. SST provides Constructs covering primary AWS services, such as Bucket for S3 or Table for DynamoDB.
To run your Next.js apps within Lambda functions, SST relies on OpenNext. OpenNext generates a build output and converts it into a package for SST to deploy to the AWS Lambda or S3 services.
Setting up our Next.js application
To get started, launch the terminal or command prompt application on your computer. Then, follow along below as we set up, test, and deploy the JuiceBox application.
Run the following Git command to clone the JuiceBox application from its GitHub repository:
git clone https://github.com/vickywane/Nextjs-SST-Template
You can also download the project manually. The complete code for this tutorial is in the SST-deployment branch of the GitHub repository.
Run the following command to change your directory into the cloned project and install its dependencies:
# change directory
cd Nextjs-SST-Template

# install dependencies
npm install
Run the JuiceBox application to view it in your web browser at port 3000 before you begin modifying it:
npm run dev
As the image below shows, the landing page contains static text alongside a form containing input and button elements. The purpose of the input is to collect a visitor’s email, while the button starts an operation to store the email: 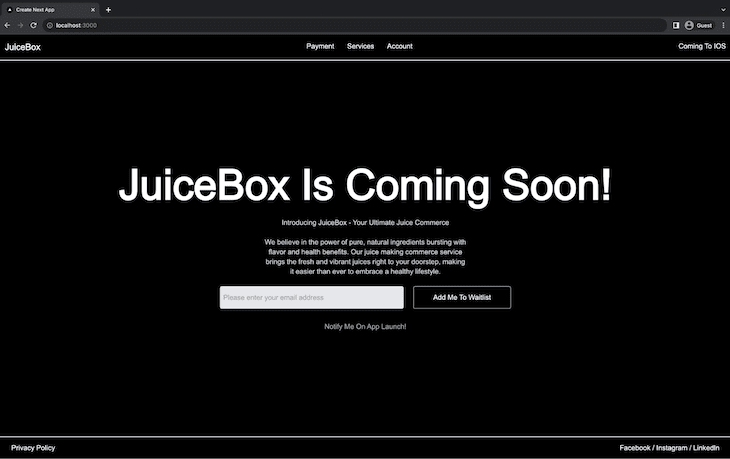 Now you have a demo Next.js application for subscribing visitors to a waitlist. You will proceed to add SST into the project to use AWS services.
Initializing SST in your Next.js project
To use SST features, you need to initialize it within your project. The SST CLI simplifies the initialization process by generating the boilerplate configuration files.
Run the command below to initialize SST within your project through the SST CLI:
npx create-sst
You should see the following in your terminal:  Running the
 create-sst command will make the following changes to the JuiceBox project:
- Creates
sst-env.d.tsandsst.config.tsconfiguration files. Thesst.config.tsfile contains a boilerplate S3 bucket that you’ll later replace with a DynamoDB table - Lists the
sst,aws-cdk-lib, andconstructspackages as development dependencies within thepackage.jsonfile - Modifies the
devscript within thepackage.jsonfile to use thesst bindcommand to bind the JuiceBox app with your AWS resources
Next, install the three dependencies that SST added to the package.json file using this npm command:
npm install
With SST set up in your project, the next step is to start your development environment.
Run the following command to start the Live Lambda Dev environment using the modified dev script. This allows you to test and debug your lambda functions from your local terminal:
npm run dev
If you’re running this for the first time, the SST CLI will ask you to provide a name for the default stage: 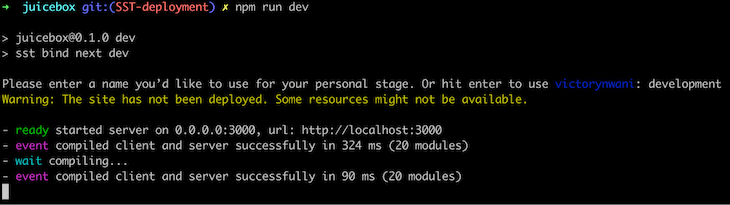 The stage name identifies the environment and allows multiple versions of the same application, such as dev, staging, or prod. The SST stage feature enables you to implement temporary deploy previews.
By default, the SST CLI uses access credentials from your AWS CLI to connect and provision resources within your AWS account: 
Defining your AWS services
Open your preferred text editor as you will begin to edit the files within the JuiceBox application.
Open the Nextjs-SST-Template/sst.config.ts file and replace its content with the code block below:
# Nextjs-SST-Template/sst.config.ts
import { SSTConfig } from "sst";
import { NextjsSite, Table } from "sst/constructs";

export default {
config(_input) {
return {
name: "juicebox",
region: "us-east-2",
};
},
stacks(app) {
app.stack(function Site({ stack }) {
const table = new Table(stack, "waitlist", {
fields: {
id: "string",
email: "string",
createdAt: "number"
},
primaryIndex: { partitionKey: "email" },
})

const site = new NextjsSite(stack, "site", {
bind: [ table ]
});

site.attachPermissions([table])

stack.addOutputs({ SiteUrl: site.url });
});
},
} satisfies SSTConfig;
The code above creates a table construct for DynamoDB with an id, email, and createdAt field. It then binds it to the NextjsSite stack. By binding the table construct, Lambda functions running the application will have the necessary IAM role to interact with the DynamoDB table.
An interesting note about the code above is the environment object in the NextjsSite stack that uses the site.addPermission method. This gives the Next.js server components access to the DynamoDB table to access the name value.
To create the stacks for the DynamoDB table using SST, run this command:
npx sst dev
As shown in the image below, this dev command will start the SST Console application, which provides you with a web-based management interface: 
The SST Console will synchronize with the application running locally to list the necessary serverless resources within the application. Below, you can see the Table and NextjsSite stacks listed in the SST console for the JuiceBox application: 
Now, you have SST set up with a DynamoDB table within the Juicebox application. The next step is to interact with the DyanmoDB table on the server side through a Next.js route handler.
Using SST constructs within a Next.js application
First, install the Node.js SDK and uuid package:
npm install @aws-sdk/client-dynamodb @aws-sdk/lib-dynamodb uuid
The SDK is for interacting with your DynamoDB table, while the uuid package generates an ID for each document in a UUID format.
Creating a Next.js route handler
Route handlers are a new feature in Next.js 13. They enable developers to create custom request handlers for a route using the Web Request and Response APIs. For this application, you will use a route handler to interact with the DynamoDB service through its NodeJS SDK.
Create a nested api/waitlist directory within the Nextjs-SST-Template/src directory to generate an /api/waitlist route handler.
After creating the api/waitlist directory, your src/ directory should have the following structure:
src/
└── app
    ├── 📂 api
    │   └── 📂 waitlist
    │       └── 📜 route.ts
    ├── 📂 components
    │   ├── 📜 banner.tsx
    │   ├── 📜 footer.tsx
    │   └── 📜 header.tsx
    ├── 📜 favicon.ico
    ├── 📜 globals.css
    ├── 📜 layout.tsx
    ├── 📜 page.tsx
    └── 📜 pages
Create a route.ts file within the api/waitlist directory and add the code block's content below into the route.ts file to create a route handler for POST requests. This will subscribe a visitor to the waitlist:
# Nextjs-SST-Template/src/api/waitlist/route.ts
import { NextResponse } from "next/server";

import { DynamoDBClient } from "@aws-sdk/client-dynamodb";
import { DynamoDBDocumentClient, PutCommand, GetCommand } from "@aws-sdk/lib-dynamodb";
import { v4 as uuidv4 } from "uuid";
import { Table } from "sst/node/table"

export async function POST(req: Request) {
const body = await req.json();

if (!body?.email || body?.email === "")
  NextResponse.json("Waitlist subscriber email is missing!", { status: 400 });

try {
const db = DynamoDBDocumentClient.from(new DynamoDBClient({}));

// Find existing subscribed email
const getCommand = new GetCommand({
TableName: Table.waitlist.tableName,
Key: {
email: body?.email,
},
});

const { Item } = await db.send(getCommand);

if (Item) NextResponse.json(`${body.email} is already subscribed`, {
status: 409,
});

// Add new email to waitlist
const putCommand = new PutCommand({
TableName: process.env.NEXT_PUBLIC_TABLE_NAME,
Item: {
id: uuidv4(),
email: body?.email,
createdAt: new Date().toLocaleDateString(),
},
});

await db.send(putCommand);

return NextResponse.json(`${body.email} has been subscribed!`, {
status: 201,
});
} catch (e) {
console.log("CREATE ERROR:", e);
}
}
This code inserts a new document into the DynamoDB table. Here’s what it does:
- Stores the request body object in the
bodyvariable and checks if a valid email property exists. It terminates the POST request with a 400 Bad Request status code and an error message if none exists - Creates the DynamoDB SDK client, which authenticates with the DynamoDB service on AWS through the IAM resources associated with the stack
- Uses the DynamoDB SDK
GetCommandto attempt to retrieve a document having the same email value in the request body. If it finds a document, it will terminate the POST request with a 409 Conflict status code, as there’s no need to insert duplicate values into the table - Uses the DynamoDB
PutCommandto insert a document containing the visitor’s email into the table. Theuuidpackage generates a UUID for the document's ID and uses theDate.now()method for thecreatedAttimestamp
Next, launch a new terminal window and run the cURL command below to make a POST request against the /waitlist route handler within the running application. The POST request contains a sample email address within its request body for the route handler to add to the waitlist:
curl -X POST http://localhost:3000/api/waitlist -d '{"email": "johndoe@gmail.com"}'
The following image shows two terminals: one for the Next.js server running the JuiceBox application, and the other executing the cURL command to send a POST request to the /waitlist route handler: 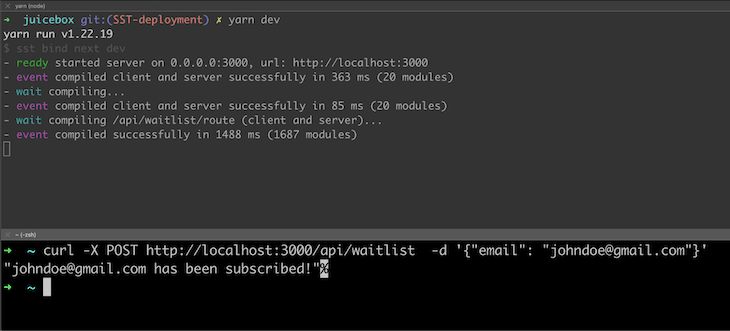
Interacting with DynamoDB from the banner component
Open the Nextjs-SST-Template/src/app/components/banner.tsx file to modify the banner component to interact with the waitlist route handler.
Replace the subscribeUser() function within the banner component with the following code:
# Nextjs-SST-Template/src/app/components/banner.tsx
const subscribeUser = async (e: any) => {
e.preventDefault();

try {
setLoading(true);

const req = await fetch(`./api/waitlist`, {
method: "POST",
body: JSON.stringify({ email }),
});

const data = await req.json();

setSubscribe((item) => ({
isSubscribed: !item.isSubscribed,
status: data,
}));

} catch (error) {
console.log(error);
} finally {
setLoading(false);
}
};
This will make a POST request to the /api/waitlist route when the user clicks the Add Me To Waitlist button. After the POST request is complete, the subscribeUser() function will modify the component state to indicate the user has been subscribed and change the display text.
Navigate to the running application to test the subscribe functionality with another sample email. You can see an example of a successful test below: 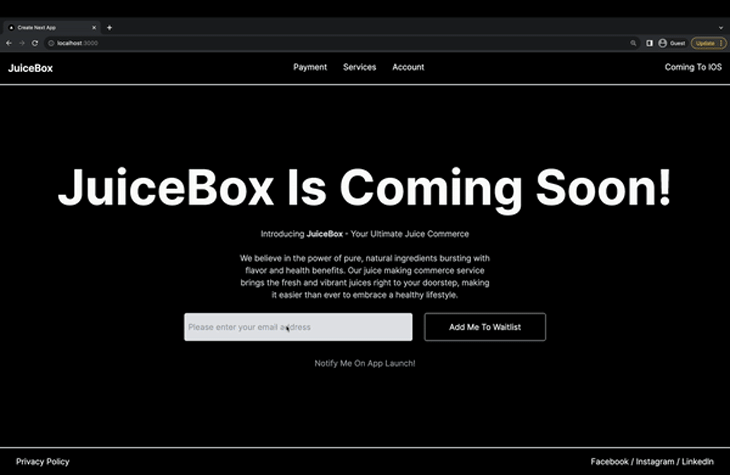 Now, you have a functional SST application that uses Next.js and a DynamoDB table.
Deploying SST apps to AWS with OpenNext
OpenNext plays a crucial role in the deployment of our SST application. This open source adapter is designed specifically for Next.js. It transforms your build output into a package that’s ready for SST to deploy to AWS Lambda or S3 services.
Run the following command to deploy the JuiceBox application to AWS through OpenNext:
npx sst deploy
The SST CLI will prompt you to create a new stage for production, as having multiple environments for various purposes is standard practice.
During deployment, OpenNext will execute the build command before deploying it to AWS:
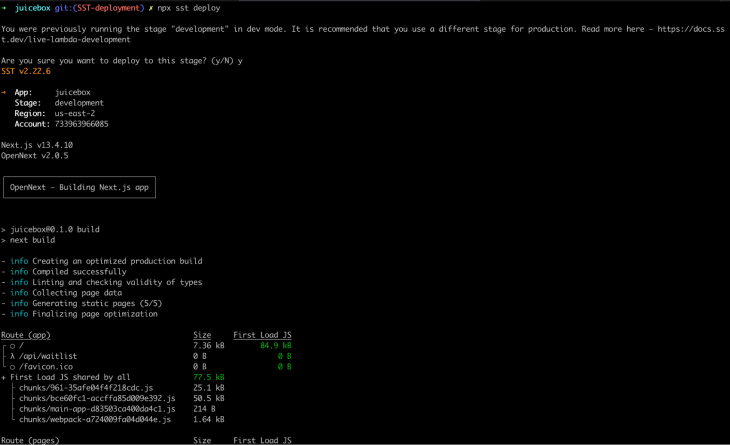
OpenNext outputs CloudFormation logs during deployment to inform you regarding its progress.
After deployment, OpenNext will also output the application’s URL, which uses a Cloudfront CDN to cache static content: 
Conclusion
Congratulations on completing this comprehensive tutorial! We covered how to use SST and OpenNext to initialize a Next.js application using DynamoDB and deploy it to AWS. You can find the complete code for our project on GitHub.
Deploying a Next.js application on AWS using SST, OpenNext, and DynamoDB offers a robust and scalable solution for modern web applications. If you have any questions as you explore further for your own purposes, feel free to comment them below.
LogRocket: Full visibility into production Next.js apps
Debugging Next applications can be difficult, especially when users experience issues that are difficult to reproduce. If you’re interested in monitoring and tracking state, automatically surfacing JavaScript errors, and tracking slow network requests and component load time, try LogRocket.

LogRocket is like a DVR for web and mobile apps, recording literally everything that happens on your Next.js app. Instead of guessing why problems happen, you can aggregate and report on what state your application was in when an issue occurred. LogRocket also monitors your app's performance, reporting with metrics like client CPU load, client memory usage, and more.
The LogRocket Redux middleware package adds an extra layer of visibility into your user sessions. LogRocket logs all actions and state from your Redux stores.
Modernize how you debug your Next.js apps — start monitoring for free.

Top comments (0)