
SPI flash stores most of the module executed by UEFI BIOS. If you want to extract actual UEFI module to take a look at, or modify some of the content, SPI flash programmer is a perfect solution. Moreover, some BIOS images are distributed as .bin file, and you can use SPI flash programmer to update BIOS with those image.
Environment
I will be using followings in this article.
- Windows PC that has USB 3.0 port (Host PC)
- UP Squared ATOM Quad Core 08/64 (UP2 board)
- SF100 SPI NOR Flash Programmer (SF100)
- ISP Testclip SO8 (TestClip)
Finding SPI Flash Chip and detecting Device ID
For UP2 board, you first have to take off heatsink like this.
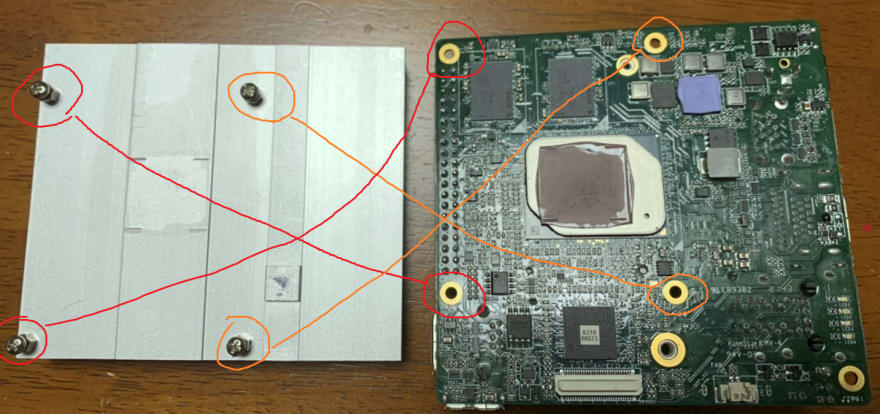
Most SPI flash chip is manufactured by winbond, so it is one way to find a chip that has a letter "winbond" written. In my UP2 board, it was located here. It first had a seal on so I had to take off the seal to find this.

It's too small to look from above picture, but it says winbond 25Q128JWSQ 2117 which we can tell that the device ID for this chip is W25Q128JW.
Setup for using SF100
Download the following three items from here.
- Latest version of software for using SF100
- I downloaded version
7.3.90.46
- I downloaded version
- USB driver
- USB Driver User Guide for Win 8/8.1/10
You will be asked to enter your email and serial number when downloading. The serial number is written on the back of the SF100.

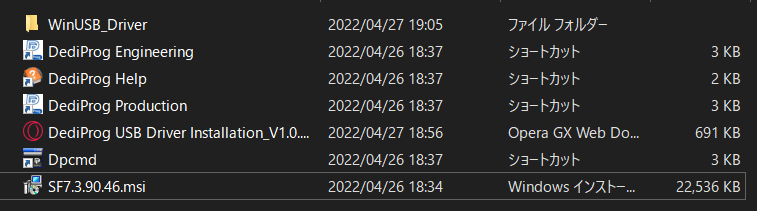
Once downloaded, run .msi installer to install the software. If the following 4 app shortcuts are generated on the desktop (note that I have moved contents to a folder), then the installation is complete.
After that, you have to setup the USB driver.
Let's connect SF100 and TestClip like this.

You can referer to the "USB Driver User Guide" from now on, but here's what I did. First, connect the above to the Host PC (which you will be using for manipulating SF100) and check the device manager. It should be like this.

Right click the above "SF100-ISP" and select "Update Driver Software...". Then follow the steps below.
- Browse my computer for driver software
- Let me pick from a list of device drivers on my computer
- Click Next without selecting any
- Click Have Disk
- Browse and locate the USB driver we downloaded before
dediprog.infand click OK - Select "DediProg SF Programmer driver" and click Next
- Installation will start and if nothing goes wrong, "Window has successfully updated your driver software" will be shown.
- Again if you open device manager and see this, then it's a success

Recognize SPI flash from Host PC
Now let's clip the SPI flash with the TestClip. Looking closely, you will see a dot on flash chip, and small white paintings on the TestClip. Make sure you clip it the right way, so that the white paint and the dot on the chip are in the same position.

After that, connect USB cable to the host PC and run the software "DediProg Engineering" which is one of the 4 shortcuts created after installation.

If it recognized correctly, the software asks you to select SPI flash Chip ID. You have found out that the device ID was W25Q128JW so select that. If there's no error, then the recognition is success.
Reading SPI flash
( The usage of SF100 software is written in "DediProg Help" which is one of the four desktop shortcuts created at installation )
To read the SPI flash content, click the Edit icon and then, press Read.... While reading, busy lamp glows orange on SF100, and the percentage of progress will be displayed on the place where Read... button was located.

After reading is complete, you can press Chip Buffer to File to save image as a .bin file.
After saving file, you might get an error message like an unnamed file contains ..., but you can ignore that. If you are not sure you've read the flash contents successfully, check if the contents start with the flash descriptor's magic byte 5A A5 F0 0F.
Writing SPI flash
Click Config icon and select/check the following two items.
Download a whole file to chip (Without Blank Check)…-
Reload file each time Then, press OK. There will be about two warning messages showing up, but you can ignore those. Next, click
 Fileicon and do the followings. - click
Findand select the BIOS image file you want to write in - select
Raw Binaryand make sure you don't checkTrucate file to...
After pressing OK, check if you have Operation completed. Finally, press the Batch icon and start flashing.
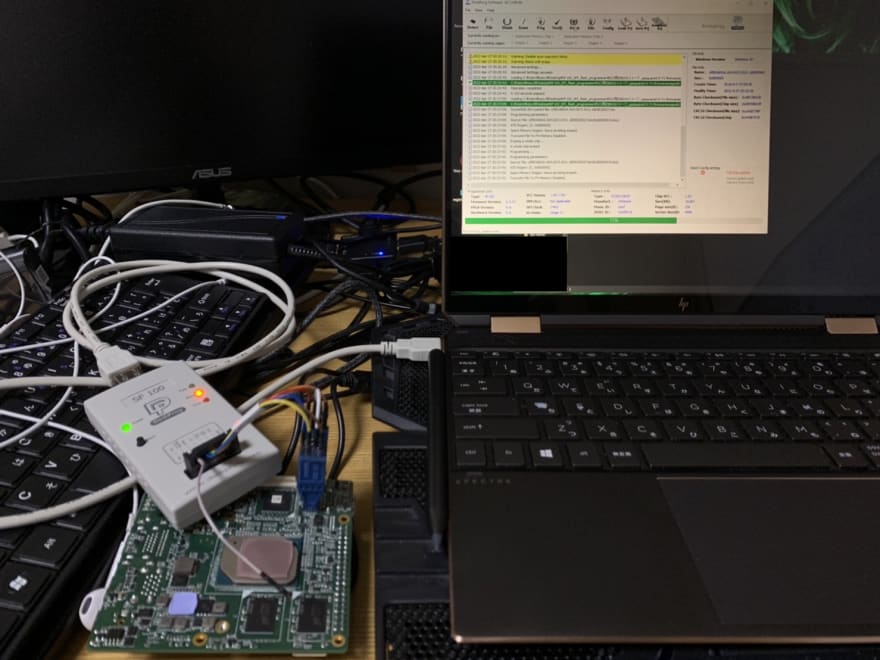
You can check if flashing is over by seeing if busy lamp becomes pass. You will see this kind of log output if it succeeded.

If you want to restore it, you can use the flash content file read in the previous section.
Acknowledgement
Great thanks to Satoshi Tanda for the support and for introducing this wonderful topic.

Top comments (0)