Hello. In today's article, I want to tell you about a custom placement of a grid item inside the grid. Most often, default grid item placement managed by auto-placement algorithm does not fulfill our layout expectations. Luckily, we can do something about it, and I’ll show you how.
This article is part of my CSS Grid introduction series. If you want to check out my previous posts, here you can find the whole table of contents.
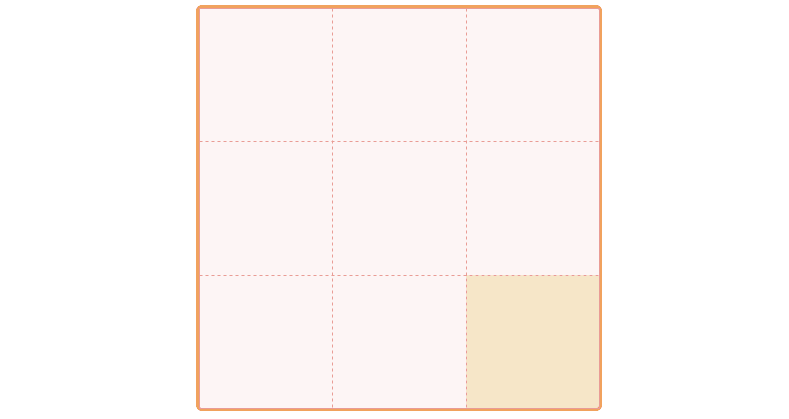
In my previous article, I mentioned that every grid item is by default assigned to a single, unique grid cell in a specific order. The truth is, we can overwrite this behavior and assign item to whatever grid cell or grid area inside the grid.
Notice how I changed the default placement of this item from top-left cell to bottom-right cell.
CSS Grid custom placement properties.
In order to achieve our desired custom placement, we can use four main CSS properties.
- grid-row-start
- grid-row-end
- grid-column-start
- grid-column-end
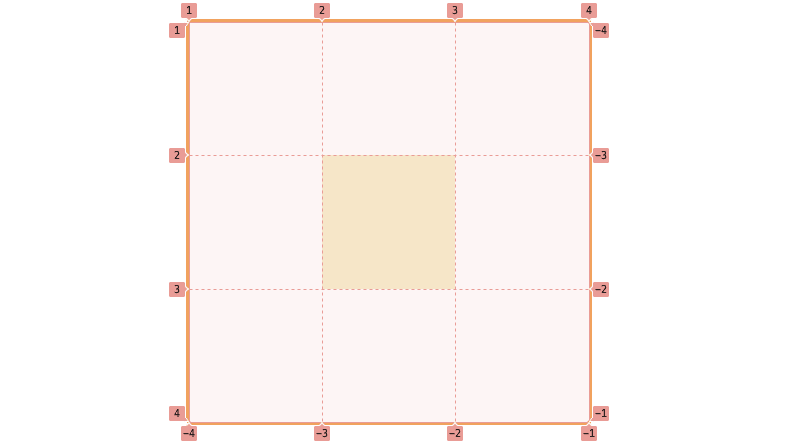
Those four properties represent grid lines within the grid. These are the boundaries of the selected area to which the selected item will be assigned.
.item {
  grid-row-start: 3;
  grid-row-end: 4;
  grid-column-start: 3;
  grid-column-end: 4;
}
Defining all properties is not required. We can only define one or all four. Missing lines will be determined automatically.
.item {
  grid-row-start: 2;
  grid-column-start: 2;
}
Each of the listed properties can take the same values. These are:
- global CSS keywords (inherit, initial, revert, revert-layer, unset)
- CSS Grid-specific values: keyword ‘auto’ or some combination of number, string, and keyword ‘span’
Global CSS keywords are shared between many different properties in CSS thus I won't cover them in this article. Here I want to focus on CSS Grid-specific values only.
Keyword ‘auto’ means that the grid line will be determined automatically by auto-placement algorithm.
The number simply indicates the line number in a given direction. The number can be negative, but cannot be equal to zero.
String argument refers to the grid line name if such exist.
The keyword ‘span’ means that we are dealing with a distance. In most cases, span is followed by a number or word. Span keyword without following part is not allowed.
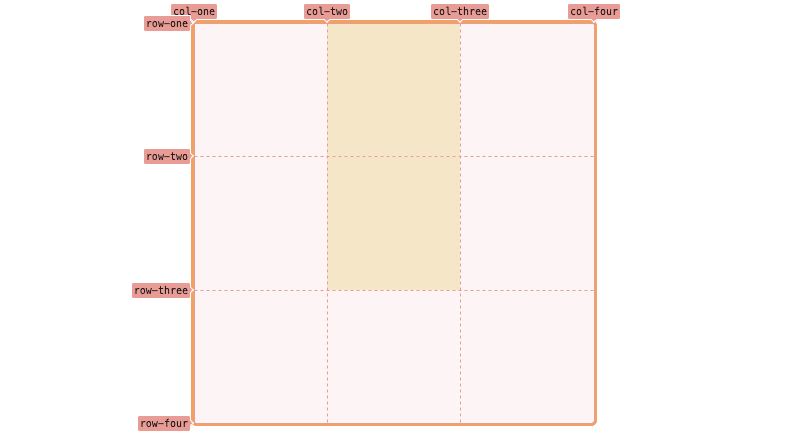
Let’s look at some examples.
.container {
  ...
  grid-template-rows: [row-one] 1fr [row-two] 1fr [row-three] 1fr [row-four];
  grid-template-columns: [col-one] 1fr [col-two] 1fr [col-three] 1fr [col-four];
}

.item {
  grid-row-start: 1;
  grid-row-end: row-three;
  grid-column-start: auto;
  grid-column-end: col-three;
}
.container {
  ...
  grid-template-rows: [row-one] 1fr [row-two] 1fr [row-three] 1fr [row-four];
  grid-template-columns: [col-one] 1fr [col-two] 1fr [col-three] 1fr [col-four];
}

.item {
  grid-row-start: 1;
  grid-row-end: span row-four;
  grid-column-start: 1;
  grid-column-end: span 2;
}
There are more acceptable combinations of the mentioned values. For example, you can find combinations like string + number or span + string + number. I want to tell more about them in my future ‘beyond basics’ article.
Shorthand properties.
If more than one grid line needs to be specified, we can use some special shorthand properties: grid-row, grid-column, or grid-area.
Shorthand properties accept the same values as discussed above separated using slash or slashes.
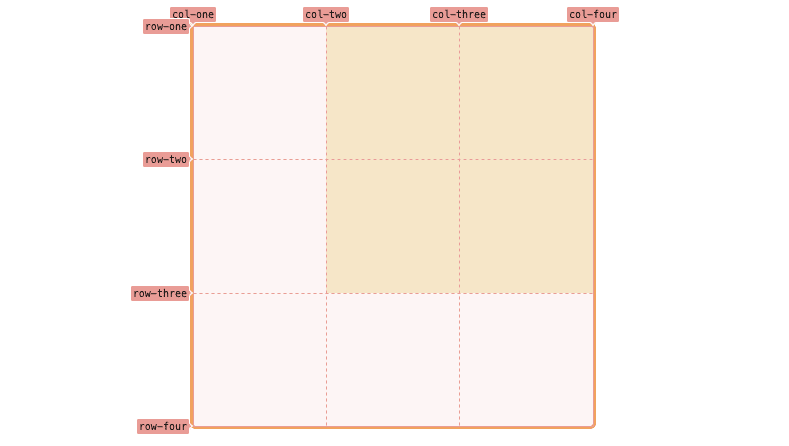
Grid-row and grid-column properties allow us to define both the start and end grid lines in a given direction. The missing definition will be replaced by auto.
.container {
  ...
  grid-template-rows: [row-one] 1fr [row-two] 1fr [row-three] 1fr [row-four];
  grid-template-columns: [col-one] 1fr [col-two] 1fr [col-three] 1fr [col-four];
}

.item {
  grid-row: 1 / row-three;
  grid-column: col-two / span 2;
}
Grid-area property enables us to define all four grid line boundaries at the same time. These definitions are separated by slashes, starting from the top line and going counterclockwise.
.container {
  ...
  grid-template-rows: [row-one] 1fr [row-two] 1fr [row-three] 1fr [row-four];
  grid-template-columns: [col-one] 1fr [col-two] 1fr [col-three] 1fr [col-four];
}

.item {
  grid-area: 2 / 1 / span 2 / col-three;
}
Remember that grid-area property does not force us to define all four grid lines at once. In my future article, I will show what will happens if the one (or more) definition is missing and what other placement-related feature this property has to offer.
Thank you for reading this short article. If you want to read more content like this you can follow my dev.to or twitter account. Also, feel free to give me any form of feedback. I'd love to read any comments from you. See you soon in my next article!
PS. If you would like to support my work, I will be grateful for a cup of coffee. Thank you. ❤️






Latest comments (0)